Showing posts with label jackets. Show all posts

Tuesday, October 16, 2012

Re-Fashion Contest: Planning and Original Items

Challenge Contest 2012 - Refashion / Repurpose
Look what I did.

Okay, I know I haven't been blogging much and sewing even less, but I'm determined to do this!  I really want to make this Burda jacket I blogged about a while ago:

And I just happened to find these two thrifted jackets:


LOOK, A DANIER LEATHER JACKET!!!  It's knee length and nearly fits me.  I'd leave it as is except that there's some wear and damage in some areas and the button holes are stretched out.  Found it at a garage sale raising money for a child's cancer treatments.  It was by donation, so of course I emptied my wallet for the jacket.  Think I paid about $25 bucks for it, and I probably would've paid more if there was anything left in my wallet.  Even so, I have no quams with cutting it up!

I found the Nygard wool jacket for about $6 at our (awful) Salvation Army thrift shop.  I didn't realize until I got home that it smelled like it'd been in a house fire, and after a couple washes it took a 12 hour soak in very soapy water to get the smokey smell out.  Definitely a stubborn making-do moment.

I even started tracing out the pattern from the September Burda issue.

Uh...I got the two sleeve sections traced.  It took 2 hours.  I can't find any other pieces...  Um, I'm really glad I have a couple more weeks to get this all traced out.  ...Maybe I should just make a wool and leather stuffed guitar...

Anyways, that's my plan for the refashion contest!  I need to figure out a lining fabric still, and pick up a metal zipper, and decide what colour I'm going to do the hand stitching in (because I'm totally including that part).  I'm leaning toward blue or burgundy, just for some colour.  Or just a cream. What do you think?

*~*~*

This picture is actual for Tanit-Isis.  It's the back of the leather jacket (see what I mean about the wear on the left hip there?).  I'm including it because the amazing full-length coat she sewed for her husband was damaged when it got stuck in the back wheel of his motorcycle.  Luckily he wasn't hurt, but the back got ripped off.  Also luckily, it's only the one side, and ends at about the hip.

When I was taking pictures of this jacket, I noticed the seamline across the hip (done because it's difficult to get large pieces of leather), and I thought it might be a possible fix for Mr. Isis's coat.  Not as pretty as a continuous piece, but a possible way to keep the coat length.  If, of course, she has anymore fabric...  I figured I'd share it anyways.  :)

Friday, January 20, 2012

All Tied Up in Grey

I love this cardigan. If I could get away with wearing it every single day, I would. Between the comfort and the style, I never ever want to take it off!

It's from McCall's 6408, a pattern I would've completely passed on by if not for Stacie from Stacie Thinks She Can. Seriously, it's getting ridiculous how much we keep copying enabling each other, and I don't see it ending anytime soon, especially considering that I've ordered a copy of Colette's Peony purely because of this. (And also maybe this, because I need a version in wool tweed, yes I do.)

But anyways, she made a gorgeous polka dot version here, and then offered the same fabric up in a giveaway (isn't she sweet?). I wanted her cardi as soon as I saw it (looks so much nicer than the envelope versions, that's for sure), and when I won the fabric (eeeee!!), I knew I'd have to copy emulate her. But then there were a few mailing issues, not the least of which was me giving the wrong address, and the fabric only just arrived this week.

Ahem, whoops. And like Stacie, I'm way too impatient to wait for the fabric to get here before I made this, so voila! Tied cardi in grey.

I've never had so many compliments on a something I've worn nor so many people asking where I bought the garment in my entire history of wearing clothes. My Mom, who hates most of the clothes I wear (and sometimes make), has ordered a version in black. I will add pockets to hers, and in my next one. Because there will be a next one. This cardigan is ridiculously easy to make and ridiculously easy to wear. No buttons, no zippers, no interfacing, just simple seams, and built in belt, and a bit of easing in sleeves.

Speaking of, these are probably the nicest sleeves I've ever eased. The medium-weight knit probably helped with that. This fabric was a dream to work with. Don't ask for details, I can't remember what it was, but it's the weight of yoga pants and holds its weight without stretching or losing shape. Was originally going to make sweat pants out of them, but this is so much better.

Of course, just because I found it easy to make doesn't mean I didn't have problems. I (stupidly) attached both ties to the inside of the cardigan. Instead of sandwiching the tie between the front and back piece on the side like I should've, I...well, you can see below. No, don't ask me why, I don't know.

Sorry for the dark photo. Yes, that's the tie sewn to the inside seam, hanging inside the garment and definitely not popping out on the right side of the garment through the side seam. Yes, I did it on both sides. I don't know.

Luckily it was easy to fix by spending some careful time with my seam ripper. Yank the stitches and zig-zag seam finish along the tie, stick the tie through the hole, and re-stitch the seam closed with the tie sandwiched properly through the seam.

Fixed!

A lot of the reviews on PR noted that the size fits big, and that the sleeves are wonky. Based on my measurements, I should've cut at least a large, probably an extra-large. Based on tissue measurements, especially across the back and shoulders, I cut size small. Yes, 3 sizes smaller. I wanted a fitted look through the top and drappy looseness at the bottom, not baggy all over. And I didn't want most of the back to be pulled around to the front like it shows on the envelope picture.

While I'm mostly pleased with the results, I should've given a bit more room in the back. There wasn't as much stretch in this knit as I was accounting for, and you can see how tight it looks from the back. HOWEVER in my defense, this picture was taken on my first day wearing it, and I've since learned to loosen up the ties a bit. This dispels the worse of the chub-hugging. I suspect that working with a stretchier knit would also help reduce this, but I'll add some more width along the centre of the back anyways, especially for a bit more bum room.

The only other thing I did was sew the sleeves at 1/4" instead of 5/8", since they were a little too snug. Could probably widen them a tiny bit more, even if I do like the snug sleeve.

Isn't the cream stitching on the grey fabric lovely? I made sure to topstitch where I could.

Oh, and just because they suggest using clear elastic to stabilize the shoulder seam, doesn't mean you can't improvise with regular 1/8" elastic! This makes the shoulder seam gather a tiny bit when unworn, but sits nicely when wearing it. Which is a bit of a shame, actually, because the light gathers on the shoulder are pretty (see photo of set in sleeve above). Will have to remember that.

Thanks Stacie for making me notice this pattern! I think I may need a polka dot version of it, and then we'll just have to be Spotted Cardi Twins.

But I guess I should make my Mom's first.

If I have to.

I guess.

:)

P.S. Look what else Stacie included in my wandering fabric package! I love lace, I do. Thanks!

Saturday, September 17, 2011

Finished Object: Corduroy Jacket

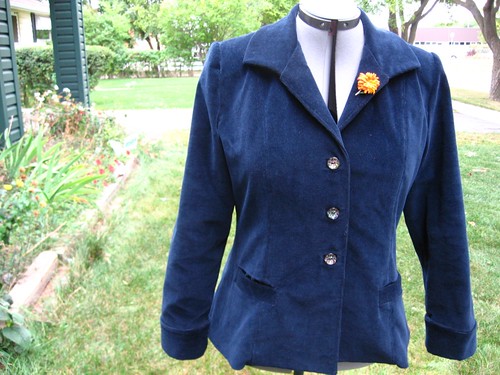
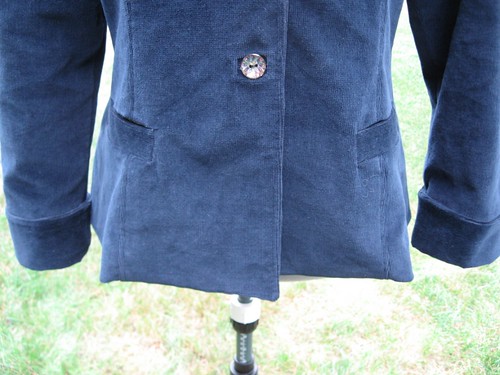
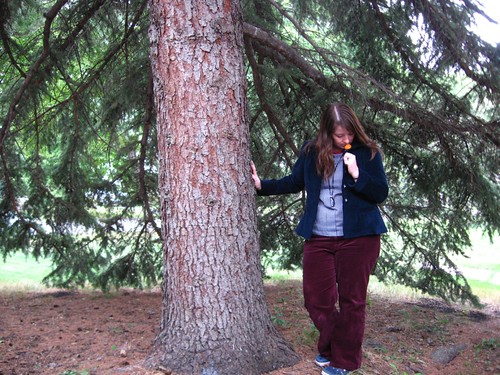
It's done!! And I love approximately 90% of it. More on that later. I managed to get the lining sewn in, the hem stitched together, and the back of the buttonholes finished last night, mostly because of my goal to finish up this jacket for Friday Night Sew-In. All I had to do this morning was sew on the buttons and take a bunch of pictures. I met a friend for coffee this afternoon, and she complimented my jacket without me saying a word about it! \o/ More importantly, I love wearing it, so I call this a success.

Mabe and I went out to the front lawn and took a load of pictures. One cyclist nearly ran into a parked car because he was staring at us and not paying attention. I'll bet he was jealous of my pretty new fall jacket!

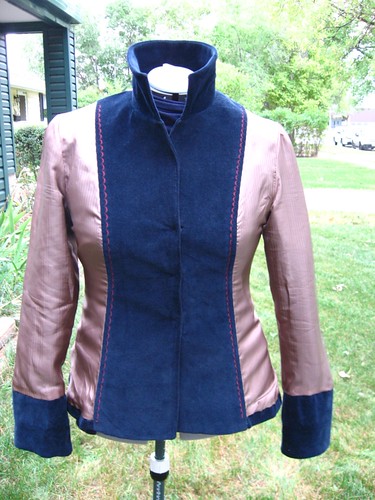
The lining mostly behaved, and the only real problem is that I forgot to tack it to the shell before stitching the opening where I flipped the jacket right-side-out. Ooops. It's holding together pretty good so far, so I may leave it. If it gives me trouble, I'll tack it along some seam lines from the outside.

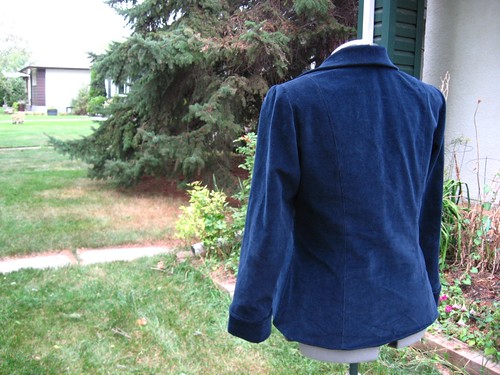
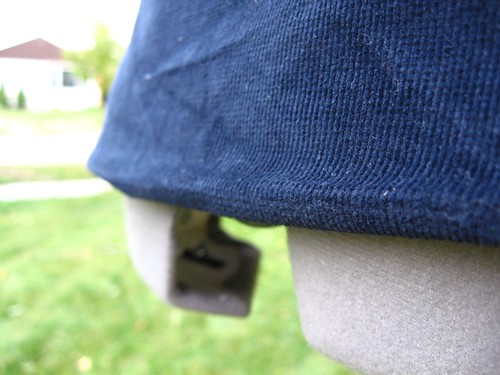
The thing I'm most disappointed about is the hem. It's the reason I don't 110% love the results. I completely forgot to stabilized the hem, and because the length-wise direction is the direction of stretch, it's a very flimsy hem that's apt to stretch. You can see how it kinks right where the body of the jacket joins the faced front. The stiffness and heft of the facing is just too much for the lighter hem. It bothers me, to the point where I'm considering re-doing the hem. It'll be a giant pain in the rear, but I'll be happier with it. I might live with it for a bit, but look at what's happening in the back anyways:

The hem is dropping. You can see the pressed edge, and where it's drooping a bit. :( I originally ran a line of topstitching along the hem, but really didn't like the look and tore them out. So I'll probably use some hem fuser to help hold this hem up. Maybe that would be enough to stiffen the hem, too. Any suggestions?

Speaking of the hem, here's a note for those baffled by the hem instructions:
I had some trouble figuring out what the instructions meant for attaching the lining to the jacket along the hem. They way they explained it and showed in the instructions, it looked like the lining would line up with the bottom of the jacket, but then the next figure showed the shell fabric folded inside. I finally figured out that you're supposed to shift the lining fabric down to meet the shell fabric and stitch. However, this only works if you remember to chop 1 inch off of the bottom of the lining pieces, and only stitch to the circle mark where the lining attaches to the facing. The instructions mention the former, but only in passing, and I nearly forgot to do it myself. Also, I had to do some fancy hand-stitching where the facing meets the hem after I flipped everything right-side-out, because I forgot to stop stitching at the circle, and had to cut the lining out. Also, make sure you listen to the instructions when it suggests hand-basting about 1 1/2 inches from the bottom of the shell. This will be your folding line for the hem, and it's so much easier to do the hem with the markings.

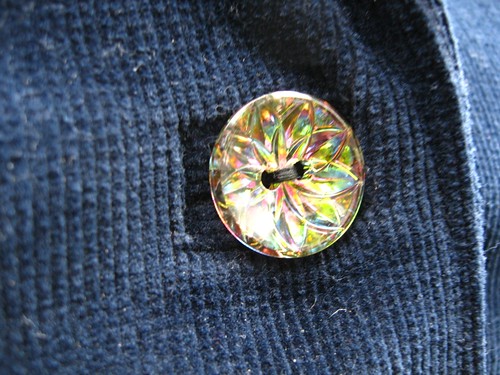
I really liked the bound buttonholes, and my pretty crystal-bowl buttons!

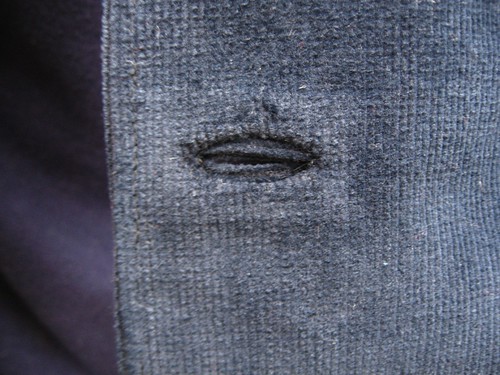
Here's the back of the buttonholes. I followed one of the methods in RD-CGtS, which included cutting a slit the same length of the buttonhole, then gently tucking in the raw edges and hand-stitching the edges down. It was really simple.

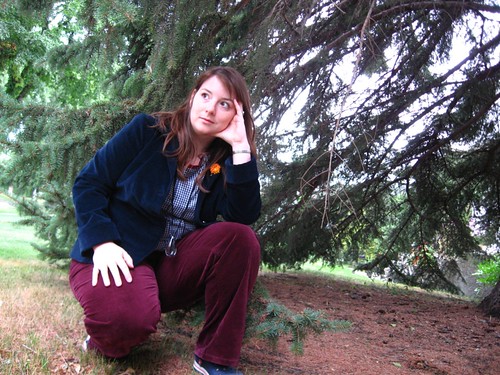
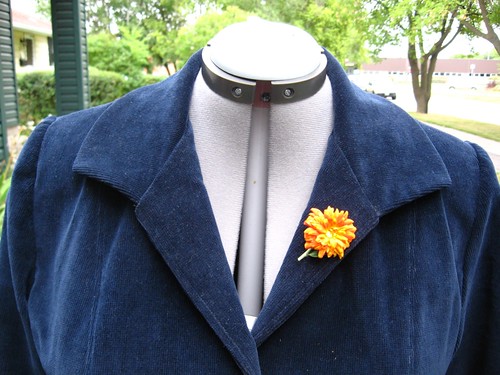
Still love the collar! Obviously I need to pin fresh flowers to the lapel all the time. It's going to be hard to steal pretty flowers from peoples gardens once winter comes, though. :(

It's a fun jacket, and I loved wearing it already. It's pretty warm too! I was worried about the liner fabric, but it seems to hold body heat in well and keeps the wind from blowing straight through it. I need to line more things.

Anywho, me an my self-timered camera had some fun outside after we abandoned poor Mabe on the front lawn. No, I didn't leave her naked, I gave her my cardigan so she wouldn't be sitting out there in only my spare red bra. Here's a bunch of fun shots.

YAY THE JACKET'S DONE!

Thursday, September 15, 2011

Corduroy Jacket - Construction and Details

I've been sewing up a storm lately, mostly focusing on my corduroy jacket. It's come a long way since you last saw it (and it's buttons), but I haven't had much chance to tell you about it.

It's starting to look like a real jacket!

Ages ago (or so it felt), I got the shell body constructed. I knew right away I was pleased with the fit. It tapers into the waistline, then flairs nicely at the hips. I'm still not pleased with the welt pocket lining showing through, but I'll probably stitch the edges of the pocket closed to help hold up the welt.

I adore the collar. They had you cut the under collar a bit smaller than the upper collar, so that when you sewed them together, the upper collar edges curled under a bit. This has lead to lovely shaping, and it makes me smile every time I look at it. The best part is it's held up to me scrunching it up while handstitching things, or being shoved into a bag for a trip to the fabric stores for buttons and liner and questions, so this bodes well for the future.

Had a heck of a time attaching the first sleeve. The first attempt was disastrous, with the sleeve rotated a bit to the back due to my shoddy notch lining skills. Tore that sucker out and tried again. This time it was a bit more successful, but then I realized that the shoulders were ways too wide for me. Tore that sucker out again and then hacked off about 1 inch from each armhole at the shoulder seam, grading down to the original armhole about half way down. Third time was mostly the charm, and despite some strangeness with the shoulder, I'm done futzing with it. As I mentioned here, I cut a size 18 for the sleeves, and graded to an 18 for the armhole. The sleeve is slightly too big, and it puffs a tiny bit at the back of the shoulder. Also, it looks slightly too big under the arm, so I suspect that I should've just left it at size 16. Oh well, next time.

The second sleeve set in decently in the first try, so I suppose it was worth the trouble with the first.

Looking at the top of the sleeve, the shoulder, and the upper chest, there were quite a lot of wrinkles, and the shoulders looked...limp. After much humming and hawing (and attempts to ignore the fashion atrocities I remember from my childhood), I decided to attempt shoulder pads. This is another technique I've never done, so along with welt pockets, I'm learning a lot with this jacket. I consulting my trusty Readers Digest Complete Guide to Sewing (RD-CGtS), and learned another tailoring technique to accompany the shoulder pads: sleeve headings.

These things are a rectangle of lambs wool or fleece (I used slightly too thick polar fleece - but I think the fabric type depends on what you're main fabric is), sewn just under the seam below the shoulder pad, and helps support the sleeve cap where it attaches to the shoulder (the Sewing Divas discuss it here, although I used a straight heading). I found that the sleeve hung pretty limply from the shoulder when the pad was put in, and the wrinkles sort of ruined the look, but the sleeve heading makes it look much better. Below you can see the difference between one sleeve with shoulder pads and sleeve heading, and one without.

It looks so much better! I suppose that shoulder pads don't deserve the bad rep that the 80's and early 90's gave them. Well, within reason. Also, yes, that's a feather extension in my hair. Got it a month ago, and it's holding up great!

Here's a view of the shoulder pad and my first version of the sleeve head in place. RD-CGtS suggests folding over the fabric like this, but I found that the fleece was too thick, and eventually wound up reducing it to one layer, and clipping it to shape it a bit. I think it looks like my shoulders have a mustache and goatee, eh?

And then last night, despite arguing with myself and telling myself I wasn't going to do it, I decided that my new jacket really did need bound buttonholes. Talk about a skill building jacket.

Note my liquid courage.

Obviously I consulted the RD-CGtS, which gave me about 6 or 7 different methods for making bound buttonholes. I chose the one-piece folded method, which basically just involved taking a measured piece of fabric, folding the edges into the middle, and attempting to accurately sew it to your marked edges on the right side of the fabric, then doing the usual cutting the middle and clipping triangles at the corners, flipping the whole thing inside, sewing down the edges and stitching the lips closed, etc. I was...not so accurate sticking to my markings, but they turned out pretty well. As with the welt pockets, it wasn't nearly as hard or painful as I expected, although that could be because this book is just that awesome. Seriously, keep an eye out for it at your local used bookstore or thrift store (where I found my for a couple dollars), because it is THE best reference book I've found to date, and my reference library is a little ridiculously large.
Sorry for the crummy picture. They look rather horrible here, especially with the markings still evident and the lips sewn shut still, but they look pretty good in person. I'm pleased to have learned another new skill. So far, the count is at:
  1. Welt pockets
  2. Shoulder pads
  3. Sleeve head
  4. Bound buttonholes
OH, and one more thing:

5. French tack (to anchor down the sleeve lining)


Monday, September 5, 2011

Corduroy Fall Jacket - Alterations and Cutting

So in my last post, I told you all about the fabulous thrifty fabric I picked up for tops and trousers, and also about my plans to start perfecting a muslin of trousers. Then mentioned that I'd probably wind up making a jacket instead.

I was right.

Honestly, I tried to make myself start my first trouser muslin, but the suddenly cooler weather inspired me to work on a jacket that's been teasing me of late, and the poor (terrifying) trousers lost the battle. But it's fine because I really need a new fall jacket!

I'm working on Simplicity 3628 from the Threads Magazine collection. I decided on version B with the cuffs. However, I'm not making the horrid fake pocket flaps, because fake pocket flaps, and also because I technically didn't have enough fabric; something had to give and it wasn't going to be the sleeves.

Although now I'm considering making welt pockets. Heidi Ho's review over at PR influenced me, as she had welt pockets on her gorgeous jacket. Now I just need to practice making them.

I'm making it out of a 1.85 m length of navy blue fine wale corduroy, found at Value Village a couple months ago for ~$4. Sadly, it was a bit too short, but a creative layout meant I got nearly everything cut out, and there was no loss in the silly fake pocket flaps. The lining is this taupe-brown striped...thing that I found at Fabricland in the clearance area for ~$3/m. Was originally priced over $20/m, so I'm guessing it's a pretty decent material. It's soft and silky, so I'm also guessing it'll be a pain in the you know what to sew.

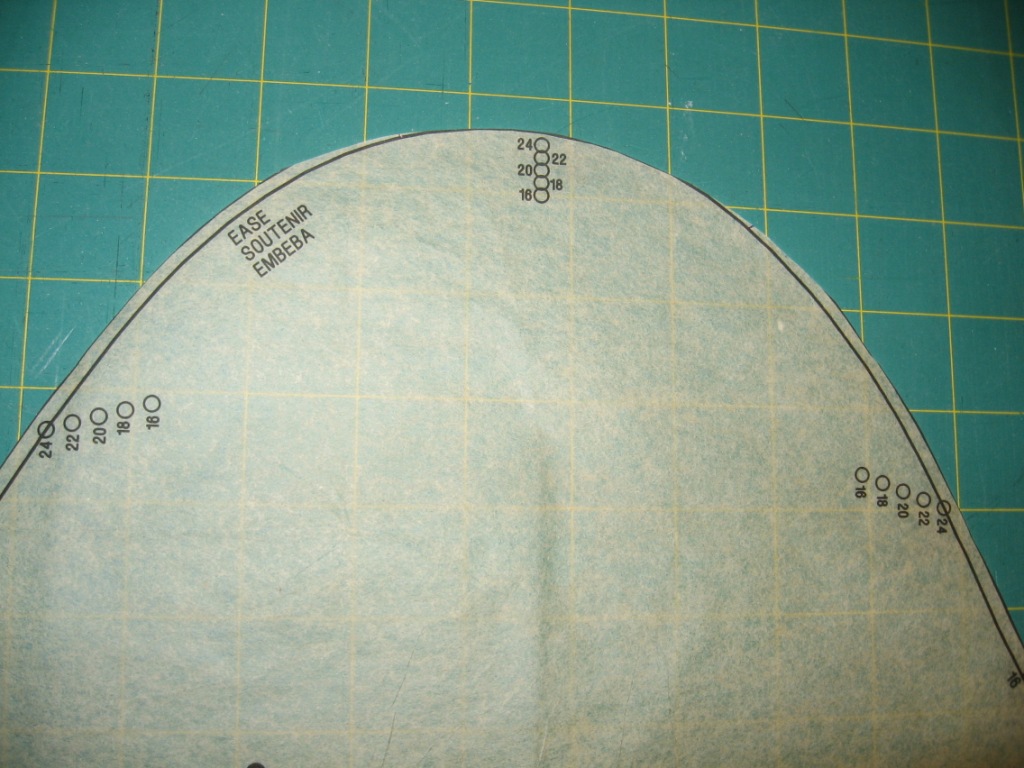
Theoretically I cut a size 16, but then graded to a size 18 below the waist, and cut size 18 sleeves. Then I had to add some width to the armhole to account for the added width on the sleeves, but since I cut the shoulder seams at size 16, I reduced the top of the sleeves to size 16. I probably could've just eased it into the armhole, but the corduroy is pretty stiff, so I figured I'd try reducing the bulk. Honestly, I should just say that I cut a size 18, because there's not much left of it at size 16.

Here's the body pieces, with my adjustments. I'm not sure if it was needed or not, but I chose to do the 1 inch Misses Petite adjustments that Simplicity included on the pattern pieces. Hope that doesn't bite me in the butt in the end.

Everything is now cut out and ready to be sewn up. But I've been uh...sipping on one too many amarettos, so I think I should leave the sewing for tomorrow. Things are getting pleasantly fuzzy, and I already forgot to reduce the length of the lining pieces by 1 inch already, so it's probably time for bed before I make a mistake I can't easily fix. ^__^

Good night, all you lovely sewists!
Related Posts Plugin for WordPress, Blogger...