Showing posts with label Simplicity 3628. Show all posts

Saturday, September 17, 2011

Finished Object: Corduroy Jacket

It's done!! And I love approximately 90% of it. More on that later. I managed to get the lining sewn in, the hem stitched together, and the back of the buttonholes finished last night, mostly because of my goal to finish up this jacket for Friday Night Sew-In. All I had to do this morning was sew on the buttons and take a bunch of pictures. I met a friend for coffee this afternoon, and she complimented my jacket without me saying a word about it! \o/ More importantly, I love wearing it, so I call this a success.
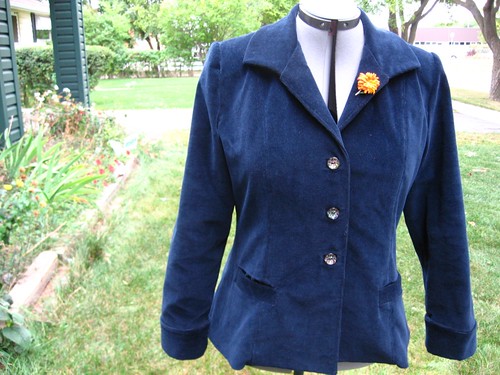
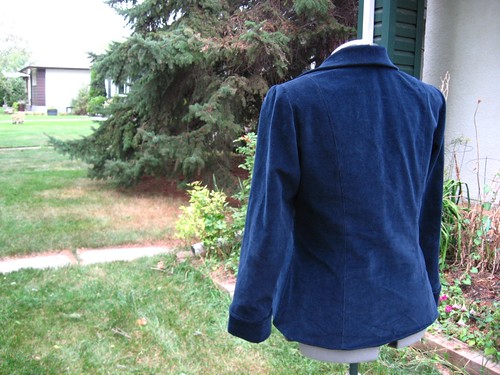
Mabe and I went out to the front lawn and took a load of pictures. One cyclist nearly ran into a parked car because he was staring at us and not paying attention. I'll bet he was jealous of my pretty new fall jacket!
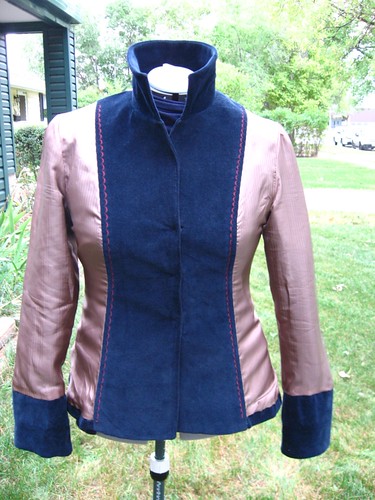
The lining mostly behaved, and the only real problem is that I forgot to tack it to the shell before stitching the opening where I flipped the jacket right-side-out. Ooops. It's holding together pretty good so far, so I may leave it. If it gives me trouble, I'll tack it along some seam lines from the outside.
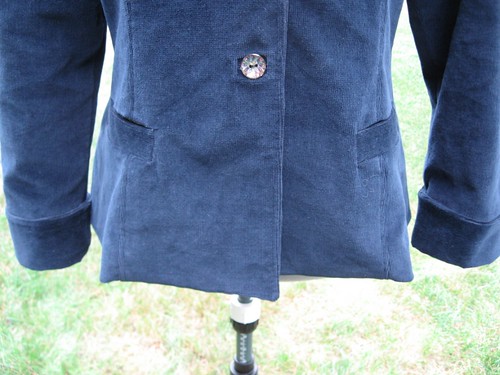
The thing I'm most disappointed about is the hem. It's the reason I don't 110% love the results. I completely forgot to stabilized the hem, and because the length-wise direction is the direction of stretch, it's a very flimsy hem that's apt to stretch. You can see how it kinks right where the body of the jacket joins the faced front. The stiffness and heft of the facing is just too much for the lighter hem. It bothers me, to the point where I'm considering re-doing the hem. It'll be a giant pain in the rear, but I'll be happier with it. I might live with it for a bit, but look at what's happening in the back anyways:
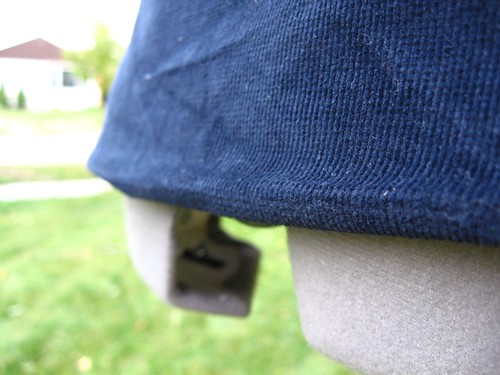
The hem is dropping. You can see the pressed edge, and where it's drooping a bit. :( I originally ran a line of topstitching along the hem, but really didn't like the look and tore them out. So I'll probably use some hem fuser to help hold this hem up. Maybe that would be enough to stiffen the hem, too. Any suggestions?

Speaking of the hem, here's a note for those baffled by the hem instructions:
I had some trouble figuring out what the instructions meant for attaching the lining to the jacket along the hem. They way they explained it and showed in the instructions, it looked like the lining would line up with the bottom of the jacket, but then the next figure showed the shell fabric folded inside. I finally figured out that you're supposed to shift the lining fabric down to meet the shell fabric and stitch. However, this only works if you remember to chop 1 inch off of the bottom of the lining pieces, and only stitch to the circle mark where the lining attaches to the facing. The instructions mention the former, but only in passing, and I nearly forgot to do it myself. Also, I had to do some fancy hand-stitching where the facing meets the hem after I flipped everything right-side-out, because I forgot to stop stitching at the circle, and had to cut the lining out. Also, make sure you listen to the instructions when it suggests hand-basting about 1 1/2 inches from the bottom of the shell. This will be your folding line for the hem, and it's so much easier to do the hem with the markings.
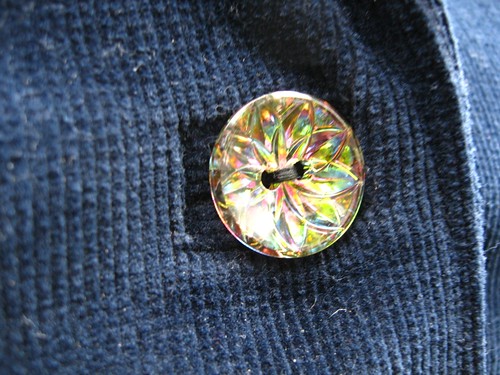
I really liked the bound buttonholes, and my pretty crystal-bowl buttons!
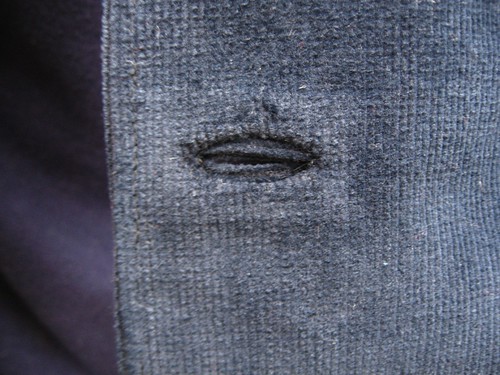
Here's the back of the buttonholes. I followed one of the methods in RD-CGtS, which included cutting a slit the same length of the buttonhole, then gently tucking in the raw edges and hand-stitching the edges down. It was really simple.
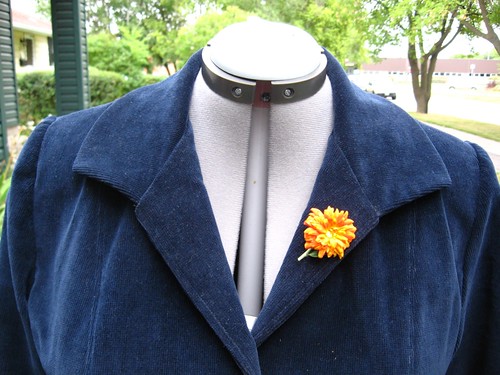
Still love the collar! Obviously I need to pin fresh flowers to the lapel all the time. It's going to be hard to steal pretty flowers from peoples gardens once winter comes, though. :(

It's a fun jacket, and I loved wearing it already. It's pretty warm too! I was worried about the liner fabric, but it seems to hold body heat in well and keeps the wind from blowing straight through it. I need to line more things.

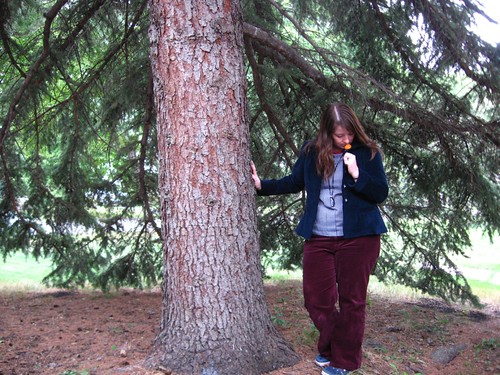
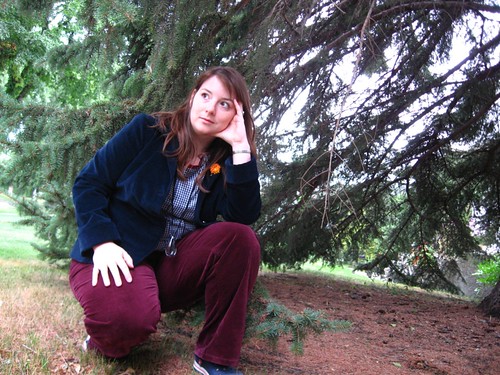
Anywho, me an my self-timered camera had some fun outside after we abandoned poor Mabe on the front lawn. No, I didn't leave her naked, I gave her my cardigan so she wouldn't be sitting out there in only my spare red bra. Here's a bunch of fun shots.

YAY THE JACKET'S DONE!

Thursday, September 15, 2011

Corduroy Jacket - Construction and Details

I've been sewing up a storm lately, mostly focusing on my corduroy jacket. It's come a long way since you last saw it (and it's buttons), but I haven't had much chance to tell you about it.

It's starting to look like a real jacket!

Ages ago (or so it felt), I got the shell body constructed. I knew right away I was pleased with the fit. It tapers into the waistline, then flairs nicely at the hips. I'm still not pleased with the welt pocket lining showing through, but I'll probably stitch the edges of the pocket closed to help hold up the welt.

I adore the collar. They had you cut the under collar a bit smaller than the upper collar, so that when you sewed them together, the upper collar edges curled under a bit. This has lead to lovely shaping, and it makes me smile every time I look at it. The best part is it's held up to me scrunching it up while handstitching things, or being shoved into a bag for a trip to the fabric stores for buttons and liner and questions, so this bodes well for the future.

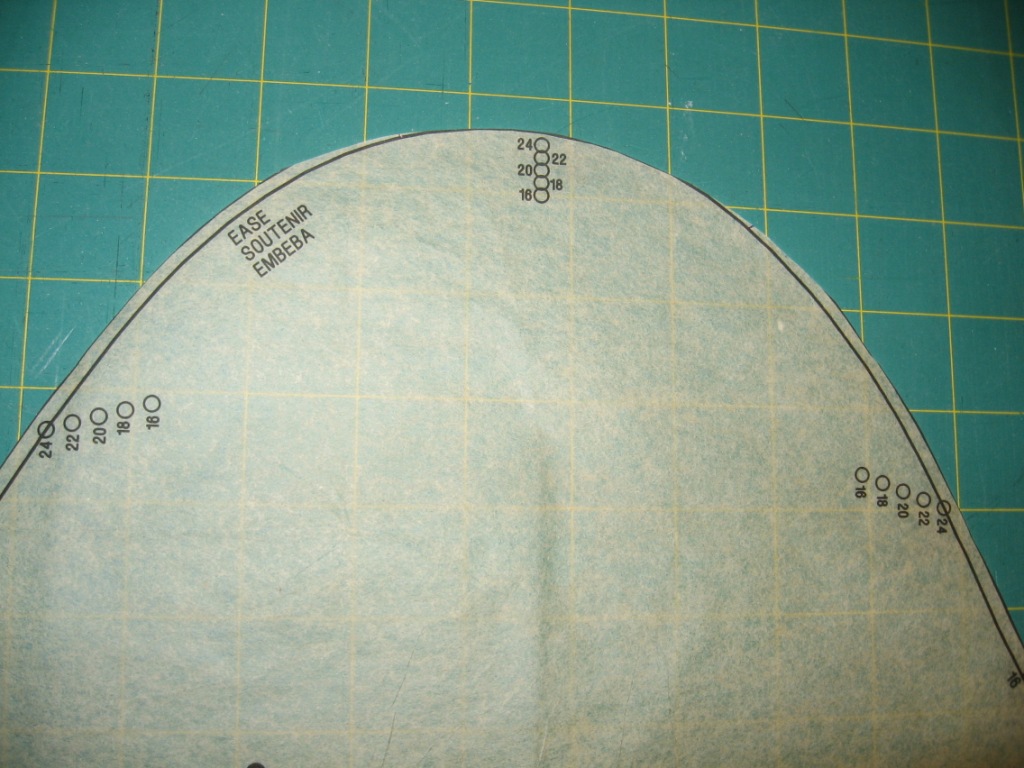
Had a heck of a time attaching the first sleeve. The first attempt was disastrous, with the sleeve rotated a bit to the back due to my shoddy notch lining skills. Tore that sucker out and tried again. This time it was a bit more successful, but then I realized that the shoulders were ways too wide for me. Tore that sucker out again and then hacked off about 1 inch from each armhole at the shoulder seam, grading down to the original armhole about half way down. Third time was mostly the charm, and despite some strangeness with the shoulder, I'm done futzing with it. As I mentioned here, I cut a size 18 for the sleeves, and graded to an 18 for the armhole. The sleeve is slightly too big, and it puffs a tiny bit at the back of the shoulder. Also, it looks slightly too big under the arm, so I suspect that I should've just left it at size 16. Oh well, next time.

The second sleeve set in decently in the first try, so I suppose it was worth the trouble with the first.

Looking at the top of the sleeve, the shoulder, and the upper chest, there were quite a lot of wrinkles, and the shoulders looked...limp. After much humming and hawing (and attempts to ignore the fashion atrocities I remember from my childhood), I decided to attempt shoulder pads. This is another technique I've never done, so along with welt pockets, I'm learning a lot with this jacket. I consulting my trusty Readers Digest Complete Guide to Sewing (RD-CGtS), and learned another tailoring technique to accompany the shoulder pads: sleeve headings.

These things are a rectangle of lambs wool or fleece (I used slightly too thick polar fleece - but I think the fabric type depends on what you're main fabric is), sewn just under the seam below the shoulder pad, and helps support the sleeve cap where it attaches to the shoulder (the Sewing Divas discuss it here, although I used a straight heading). I found that the sleeve hung pretty limply from the shoulder when the pad was put in, and the wrinkles sort of ruined the look, but the sleeve heading makes it look much better. Below you can see the difference between one sleeve with shoulder pads and sleeve heading, and one without.

It looks so much better! I suppose that shoulder pads don't deserve the bad rep that the 80's and early 90's gave them. Well, within reason. Also, yes, that's a feather extension in my hair. Got it a month ago, and it's holding up great!

Here's a view of the shoulder pad and my first version of the sleeve head in place. RD-CGtS suggests folding over the fabric like this, but I found that the fleece was too thick, and eventually wound up reducing it to one layer, and clipping it to shape it a bit. I think it looks like my shoulders have a mustache and goatee, eh?

And then last night, despite arguing with myself and telling myself I wasn't going to do it, I decided that my new jacket really did need bound buttonholes. Talk about a skill building jacket.

Note my liquid courage.

Obviously I consulted the RD-CGtS, which gave me about 6 or 7 different methods for making bound buttonholes. I chose the one-piece folded method, which basically just involved taking a measured piece of fabric, folding the edges into the middle, and attempting to accurately sew it to your marked edges on the right side of the fabric, then doing the usual cutting the middle and clipping triangles at the corners, flipping the whole thing inside, sewing down the edges and stitching the lips closed, etc. I was...not so accurate sticking to my markings, but they turned out pretty well. As with the welt pockets, it wasn't nearly as hard or painful as I expected, although that could be because this book is just that awesome. Seriously, keep an eye out for it at your local used bookstore or thrift store (where I found my for a couple dollars), because it is THE best reference book I've found to date, and my reference library is a little ridiculously large.
Sorry for the crummy picture. They look rather horrible here, especially with the markings still evident and the lips sewn shut still, but they look pretty good in person. I'm pleased to have learned another new skill. So far, the count is at:
  1. Welt pockets
  2. Shoulder pads
  3. Sleeve head
  4. Bound buttonholes
OH, and one more thing:

5. French tack (to anchor down the sleeve lining)


Friday, September 9, 2011

Corduroy Jacket - Buttons!

I wish I could show you guys my progress on this jacket, but I'm using a different computer that won't let me do the simplest things, and I'm tired of wasting time trying to figure this out.

But I can upload and post (I hope) one picture, so I'm showing you the buttons I picked for this jacket. Don't they look like little crystal bowls? They're actually plastic, but you wouldn't know it. Seriously, these buttons make me happy, especially against this jacket, and that's the best part.

I can't wait to wear this jacket!

Tuesday, September 6, 2011

Corduroy Fall Jacket - Welt Pockets

After a bit of humming and hawing (and procrastinating), I decided to go ahead with making welt pockets on my corduroy fall jacket. This was mostly because I'd like functional pockets on my jackets, but also because I've been shying away from trying out new techniques, and I need to get over that.

I'm glad I did, because welt pockets aren't nearly as intimidating as I thought!

First off, I did a practice run with some scrap denim. I spent all afternoon yesterday trying to figure out what my sewing books were trying to tell me. I finally went with instructions in the Reader's Digest Complete Guide to Sewing, a book I picked up at Value Village one day and has proven to be invaluable so far. Look how my trial run turned out!

It's not perfect, and I didn't bother stitching down the sides of the welt, but overall I think it turned out pretty good.

I did learn two very valuable lessons that made doing the practice run well worth it.

#1: My lining fabric is a pain to work with! I sort of knew this going in though. Sewing the first box around the welt opening proved this; look at how the fabric warped.

And it sort of got worse from there. This fabric is so lightweight and difficult to stitch, especially by machine. I'm not sure how I'm going to handle putting together the lining of the jacket, but I suppose it'll be another learning experience. For the pocket, though, I decided to replace it with another fabric I had kicking around. More on that later.

#2: The other valuable lesson I learned with this practice run was about pocket dimensions. The RD-CGtS said to choose your pocket depth, then add 1.5 inches to one pocket and 0.5 inches to the other one.

Uh, yeah no that didn't work. I think this problem arose because my welt wound up 2x the size of the one in the book, but they didn't actually give you any starting dimensions. If I'd thought about it some more, I probably wouldn't figured this out on my own, but oh well. That's what muslins are for!

My starting dimensions included a 1 inch welt flap (plus seam allowance), and a 1 inch high (by 5 inch wide) welt opening.

The advantage of doing this trial run was I could play with placement on my jacket front. Since the original pattern only had you attaching a fake pocket flap, the marked placement wasn't right. Keeping the pocket depth in mind, I decided to lower the welt pocket 1 inch from the original flap markings.

I got a little focused while working on the first real pocket on my jacket, and forgot to take pictures. Here's the finished pocket!

Once again, not quite perfect; you can see that the left side pulls down a bit. I suspect that if I'd used a cotton instead of a ...shiny slippery poly-something-or-other fabric, it might not slide down so easily. Overall though, I'm super pleased. My first real welt pocket!

I was skeptical about making the pockets at first, and I wondered if I was wasting my time yesterday. Those doubts are gone, because these pockets will totally be worth the time!

Monday, September 5, 2011

Corduroy Fall Jacket - Alterations and Cutting

So in my last post, I told you all about the fabulous thrifty fabric I picked up for tops and trousers, and also about my plans to start perfecting a muslin of trousers. Then mentioned that I'd probably wind up making a jacket instead.

I was right.

Honestly, I tried to make myself start my first trouser muslin, but the suddenly cooler weather inspired me to work on a jacket that's been teasing me of late, and the poor (terrifying) trousers lost the battle. But it's fine because I really need a new fall jacket!

I'm working on Simplicity 3628 from the Threads Magazine collection. I decided on version B with the cuffs. However, I'm not making the horrid fake pocket flaps, because fake pocket flaps, and also because I technically didn't have enough fabric; something had to give and it wasn't going to be the sleeves.

Although now I'm considering making welt pockets. Heidi Ho's review over at PR influenced me, as she had welt pockets on her gorgeous jacket. Now I just need to practice making them.

I'm making it out of a 1.85 m length of navy blue fine wale corduroy, found at Value Village a couple months ago for ~$4. Sadly, it was a bit too short, but a creative layout meant I got nearly everything cut out, and there was no loss in the silly fake pocket flaps. The lining is this taupe-brown striped...thing that I found at Fabricland in the clearance area for ~$3/m. Was originally priced over $20/m, so I'm guessing it's a pretty decent material. It's soft and silky, so I'm also guessing it'll be a pain in the you know what to sew.

Theoretically I cut a size 16, but then graded to a size 18 below the waist, and cut size 18 sleeves. Then I had to add some width to the armhole to account for the added width on the sleeves, but since I cut the shoulder seams at size 16, I reduced the top of the sleeves to size 16. I probably could've just eased it into the armhole, but the corduroy is pretty stiff, so I figured I'd try reducing the bulk. Honestly, I should just say that I cut a size 18, because there's not much left of it at size 16.

Here's the body pieces, with my adjustments. I'm not sure if it was needed or not, but I chose to do the 1 inch Misses Petite adjustments that Simplicity included on the pattern pieces. Hope that doesn't bite me in the butt in the end.

Everything is now cut out and ready to be sewn up. But I've been uh...sipping on one too many amarettos, so I think I should leave the sewing for tomorrow. Things are getting pleasantly fuzzy, and I already forgot to reduce the length of the lining pieces by 1 inch already, so it's probably time for bed before I make a mistake I can't easily fix. ^__^

Good night, all you lovely sewists!
Related Posts Plugin for WordPress, Blogger...