Tuesday, April 2, 2013
Pants: V2.0 - BLEGH
Sigh.
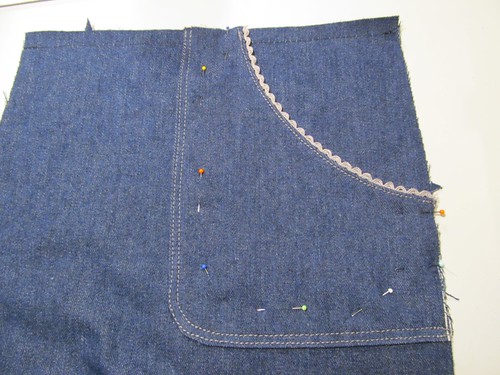
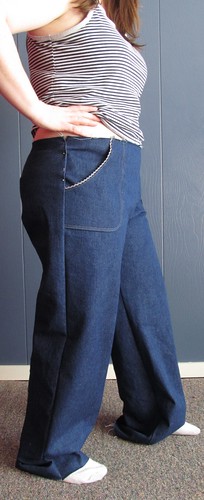
Okay, let's focus on the good points. I spent some time playing with those patch pockets. On my next pair, I'll definitely make them wider since the pattern includes a one-size-fits-all piece that just moves further and further from the centre seam, but I don't think it's too bad here.
I lined the pockets in some quilting cotton you may recognize from here and here, and trimmed them in some lace I found at a new-to-me Awesome Dollar Store in town. Which, incidentally, has a better stocked sewing section than our only local (crappy) fabric shop. OH RIGHT POSITIVITY. I CAN DO THAT.
I'm pretty proud of the topstitching here!
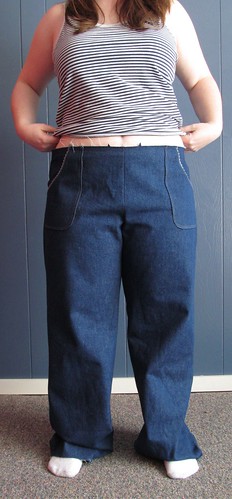
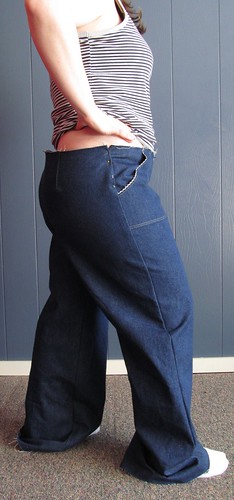
In regards to the pants themselves, it's not too bad, just obscenely big. As I mentioned before, I graded up a size 16 pattern to size 20, which should've fit according to my measurements. In fact, this size "fits" slightly smaller than me, but I figured it was close enough and I only wanted 2 inches ease in the hips instead of the built in 3 inches. I've made these before, and they certainly didn't turn out this huge.
Although to be fair, I'm pretty sure I should've cut a size 18 instead of 16 back then.
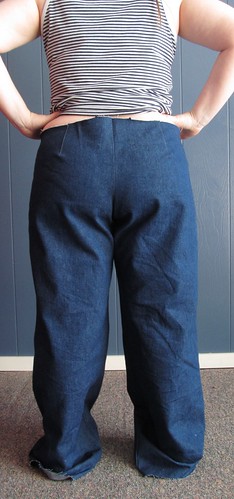
Anyways, I'm just going to toss up all of the fitting photos I just took. Then I'm going to go dig through all of my pants fitting books and see what they suggest. The only thing I know for sure is that I definitely need to add two more darts to the back. Any suggestions by you folk would be mucho appreciated.
ETA: I guess I should add some context here. This is Simplicity 2367, and I definitely don't want a wide legged trouser. I'd like it more fitted, closer to what it looks like when I literally pinch out 3-4 inches of fabric from the side seams. Believe it or not, but these leg pieces are 2-3 inches narrower than my previously considered Simplicity 2562 pattern. As in, each leg piece is 2-3 inches narrower. So glad I didn't go with that one. I'm not sure if the leg width will be best resolved by just taking in the sides or if I should take in the inside seam too. Or just for the back pieces? I'm really not sure.
Like I said, any advice would be appreciated. HELP ME PLEASE!!!
Sunday, March 31, 2013
Pants Project: Pattern Tracing Adventure
You guys have heard me whine on and on about my fear of pants. WELL NO MORE! I am doing this.
I was planning on making Simplicity 2562 Amazing Fit because I’ve heard
good things about it, and it’s been on my radar since Patti made a pair
ages ago. But once I started to trace it
out, I realized that really wide-legged trousers are just not something I’d get
any use out of in my wardrobe. So I dug
around a bit in my pattern stash, and came across Simplicity 2367. I originally made these in a size 16 back in 2010 for the PR WardrobeContest. They were my very first
completed pair of pants. And they were a
disaster. Still, I think most of it had
to do with the thin stretchy cotton poplin I’d used, along with a desperate
need for crotch length lengthening.
Despite how bad the first pair turned out, I
really did like the details and style of the pants, and even knew back then
that my failure wasn’t the fault of the pattern. So I pulled it out and started to play with
it.
The first problem I encountered was that pattern tracing is something I’ve
only recently embraced, and back then I cut a size 16. Based on my measurements, I’d need a size 20.
*facepalm* Luckily (or so I thought at
first), the pattern also includes separate pieces for the shorts included in
the set. I thought ‘hey that’s
great! I’ll just trace the shorts
pattern, then use the original pants to extend the legs’; simple! Too simple.
![]() |
| Pants pattern over shorts, inside seam lined up. Just a little bit different. |
Turns out that the shorts pattern is designed to be much looser in
order to attach bands at the bottom and create a bloomer effect. Adorable in shorts, but too much fabric for
the look I want in pants. Back to the
drawing board. Or in this case, back to
the original size 16 pattern.
All of you out there who have ever graded up a pattern are probably
laughing at me, since it’s actually pretty easy to do. I knew I needed to go up 2 sizes, and luckily
the pattern itself goes up to size 22.
This made it really simple, since I just slid the pattern around on my
tracing plastic the amounts needed based on the drawing lines on the shorts
pattern (they were useful after all!) and traced. Easy peasy.
Also easy was retracing the contoured waistband. I was concerned at first since these curve
differently depending on the size. Again
though, I was lucky because the pattern includes another waistband piece for
the skirt also included in the set that has different markings, but the same
contour. :D Seriously, I couldn’t have found a more
convenient pattern to grade up. Thanks for that, Simplicity!
![]() |
| Simplicity 2367 (my chosen pattern) over the Amazing Fit pattern, back centre seams aligned. Hmm. |
![]() |
| And here's my favourite pair of non-stretch jeans (also my only pair, because most women clothing stores suck) lined up over the Amazing Fit crotch line - perfect! |
Now, back in 2010, I identified one of the problems with my pants was
the crotch curve. Actually, all of the
lovely people at Pattern Review identified the problem was with the crotch
curve (thanks ladies!). I wasn’t sure
how to handle this, until I spied the Amazing Fit pattern pieces, still draped
on my ironing board. I put them under my
tracing plastic, wiggled it around a bit until it lined up relatively well, and
then retraced the crotch curve. There
wasn’t much difference in the back, although the curve was a bit higher (we’ll
see how that goes – at least it can be removed if needed), but boy was the back
curve different! It makes sense. If you (dare to) look at the back of my first
pair, the fabric pulls tight under the butt and causes major wrinkles; the area
obviously needs more length along the crotch curve. After tracing the new crotch curves, I just
graded them over to meet up with the original pants leg line approximately 6
inches or so below the crotch.
I haven’t tried cutting these out yet, never mind sewing them, but I
thought I’d share my progress here so far.
Last week, I promised you more posts, so here’s one of them! :D
Anywho, wish me luck on these. I’m
tentatively hopeful (so much so that I’m going directly to my planned fabric),
but more luck is always good!
Happy Sewing!
Tuesday, March 26, 2013
Finished Project: Pavlova Top
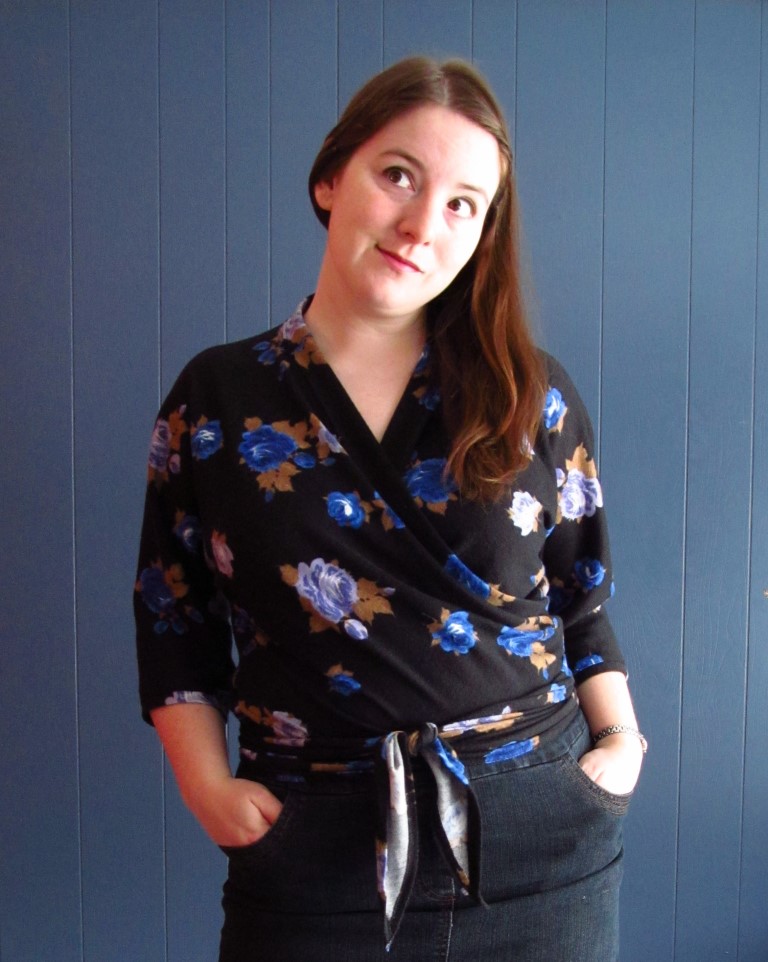
Well, that was easier than I thought it would be! I got everything cut out Sunday evening (after procrastitaping the digital copy all friggen afternoon), spent the day procrastinating while trying to do all the mark-ups, and then sewed the entire thing in the evening.
With the help of this:
Steph at Cake Patterns was hosting a Pavlova sewalong over on flickr and her website, and it was great motivation to keep going at it. Here's the details:
Pattern: Pavlova wrap top #0169 (can also buy the top and the skirt individually on Craftsy)
Size: I cut size 40, although my measurements were at the bottom of the range. I could've cut a size 35 for a snugger fit, and probably will next time.
Fabric: Some mystery knit that I bought ages ago to make a cardigan. Might be a cotton poly blend? I have no idea. It's sinfully soft though!
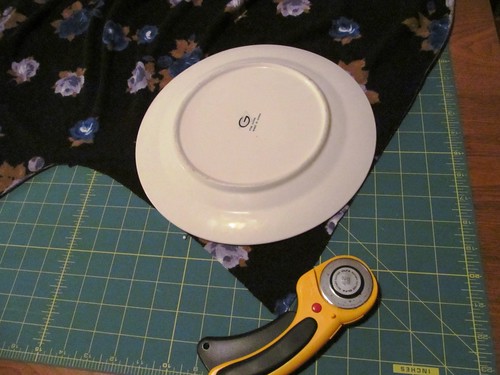
Alterations: None to the size. I did round off the muffin cover so that it'd be more subtle if I wear over a long t-shirt or dress.
Didn't take much, just a plate and a rotary cutter to trim off the excess fabric!
I'm surprisingly pleased with this top. I didn't think that it'd work so much for me since I'm not partial to such short tops. Part of that has to do with the fact that I am most self-conscious of my tummy right below where this top ties. I'm a little bit concerned that I won't reach for this top just for that reason, but I'll give it a shot for a while. I have an idea that if I don't wear it as a top, I can convert it to a cardigan, which I'd probably get more use of.
I pretty much just finished all seams by either zigzagging the seam allowance or using a twin needle (and in some cases, both).
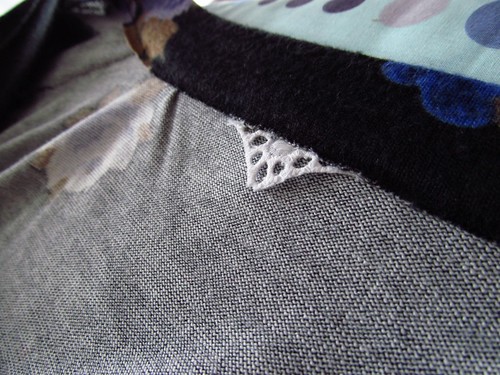
And I added a bit of lace as the tag. I didn't see any point of this beyond decorative, but then I went to put the top on and realized that the neckline is ten billion miles long and having a centre marker is a good thing!
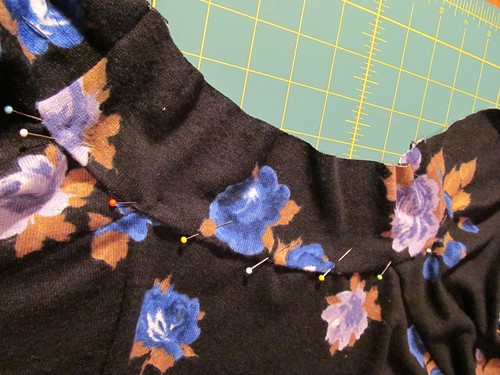
The lapped seam at the neckline makes no sense whatsoever when reading the instructions, and then totally does when you just start doing it. Trust Steph and just go with it, and remember: it's a lapped seam.
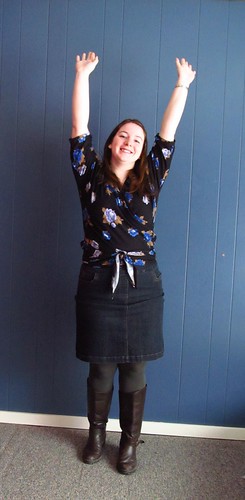
I'm really amazed by the range of motion in this top! With the muffin cover tucked into the back of my skirt, I can wiggle around and raise my arms and bend over, and everything stays where it is. Including the girls!
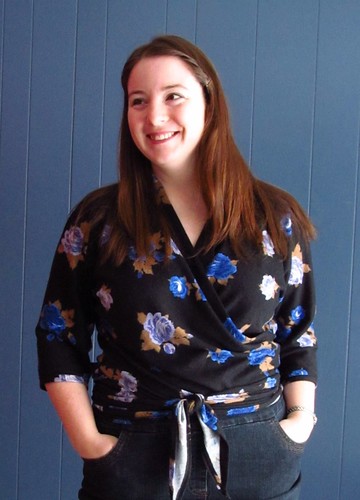
Overall, I'm pleased with this top! It was quick to put together (there's only 6 pieces total when cut out, 4 pattern pieces), has some unique construction methods, and suits every body type (check out the flickr group photos if you don't believe me)! I think the only thing that may hold me back from wearing this as often as it deserves is the length, and as Steph has mentioned, there are ways to lengthen it too.
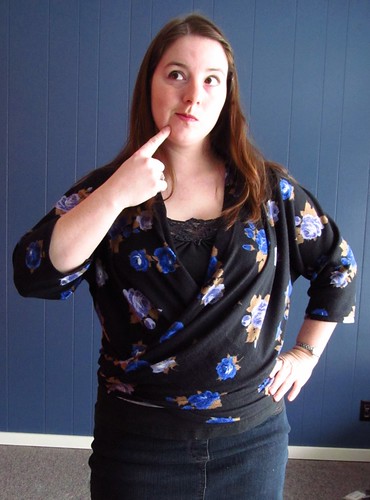
Are any of you considering making this top? Which of the above styles do you like best: tied in the front (top and bottom picture), tied loosly in the back (third picture), or loose as a cardigan (sixth picture)?
With the help of this:
| Fortitude. |
Steph at Cake Patterns was hosting a Pavlova sewalong over on flickr and her website, and it was great motivation to keep going at it. Here's the details:
| Tied loosly in the back. |
Pattern: Pavlova wrap top #0169 (can also buy the top and the skirt individually on Craftsy)
Size: I cut size 40, although my measurements were at the bottom of the range. I could've cut a size 35 for a snugger fit, and probably will next time.
Fabric: Some mystery knit that I bought ages ago to make a cardigan. Might be a cotton poly blend? I have no idea. It's sinfully soft though!
Alterations: None to the size. I did round off the muffin cover so that it'd be more subtle if I wear over a long t-shirt or dress.
Didn't take much, just a plate and a rotary cutter to trim off the excess fabric!
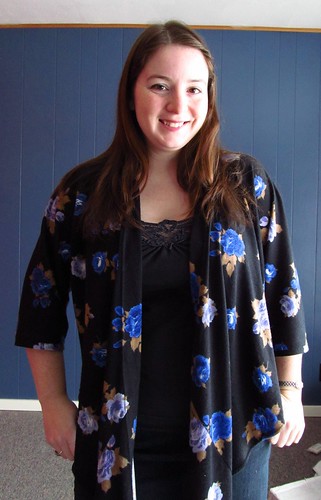
| Worn with ties loose as a cardigan. |
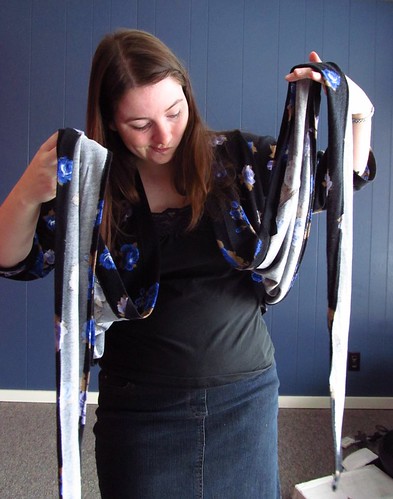
| Sweet mother of pearl, look at these ties! Definitely have to hack these off if I choose to convert it as a cardi. |
I'm surprisingly pleased with this top. I didn't think that it'd work so much for me since I'm not partial to such short tops. Part of that has to do with the fact that I am most self-conscious of my tummy right below where this top ties. I'm a little bit concerned that I won't reach for this top just for that reason, but I'll give it a shot for a while. I have an idea that if I don't wear it as a top, I can convert it to a cardigan, which I'd probably get more use of.
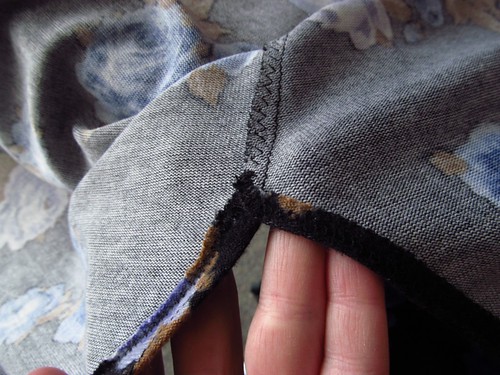
I pretty much just finished all seams by either zigzagging the seam allowance or using a twin needle (and in some cases, both).
And I added a bit of lace as the tag. I didn't see any point of this beyond decorative, but then I went to put the top on and realized that the neckline is ten billion miles long and having a centre marker is a good thing!
The lapped seam at the neckline makes no sense whatsoever when reading the instructions, and then totally does when you just start doing it. Trust Steph and just go with it, and remember: it's a lapped seam.
I'm really amazed by the range of motion in this top! With the muffin cover tucked into the back of my skirt, I can wiggle around and raise my arms and bend over, and everything stays where it is. Including the girls!
| I'm sorry about the BAM FACE. But look, no gaping! |
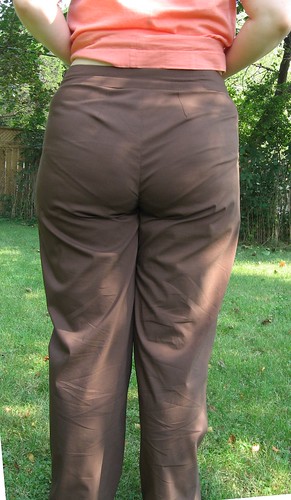
Are any of you considering making this top? Which of the above styles do you like best: tied in the front (top and bottom picture), tied loosly in the back (third picture), or loose as a cardigan (sixth picture)?
Sunday, March 24, 2013
Planning a Sewcation
| Me, right after coming up from underground in the mine. This was actually a clean day. Look! You can still see skin-toned flesh on my hands, and not much dirt on my face! :D I love my filthy job. |
Anyways, enough babble. I have a tentative plan, although I'm not planning too much because I want to let the patterns and fabric talk to me and tell me what they want to become - with a bit of guidance on my end based on what I need, of course.
Tiramisu
You guys have seen some of this. I started it, got the bodice sewn together, got it recut and sewn when it was too small, and then completely stalled out on it. I'm excited for this dress for our coming (in a couple months) spring! NEEDS to be done.
Pavlova
Yeah okay, I might have a Cake Patterns fixation. I ordered this pattern yonks ago, right before I left for camp, but Canada Post sucks and it still hasn't arrived. I've missed the sewalong (again). But that's okay because I still want to make this skirt. I'm not certain if the top is for me. While I love wrap designs, I'm not that partial to such short tops. But I've learned to not knock something until you've tried it, so I'm going to make it regardless. Plus Steph is genius and always proves my disbelief wrong. :)
Tops
I am in desperate need of clothing. And living in Whitehorse, I have the option of Walmart, Marks Work Warehouse, Reitmans, and Warehouse One. Better than some places, but I'm sick to death of cheap knit tops that go past my bum (not the best look on my short and squat figure) and ill-fitting blouses. I'm not sure yet what I want, but I'll research this more as I go. I do know that I need basic layering pieces (with fun details) and I really want some cute and easy-to-wear blouses.
Pants
Okay, this is a long shot, but it's a desperate need in my closet. See above mentioned stores? Yeah, my choices for jeans and trousers are thin stretchy fabric that lasts about 3 months of regular wear and so badly ill-fitting it's ridiculous. I nearly cried while trying to find decent pants at Reitman's on Friday afternoon. I NEED PANTS. Preferably jeans, because even my last pair of long-living real denim jeans are about one squat away from ripping in awkward places. :(
BUT OH GOD PANTS. *cowers in fear*
Stay tuned, faithful friends! And keep an eye out on twitter for some live sewing tweets and teaser pics.
Saturday, March 2, 2013
How to Rip Back a Knitting Project Without Crying (Much)
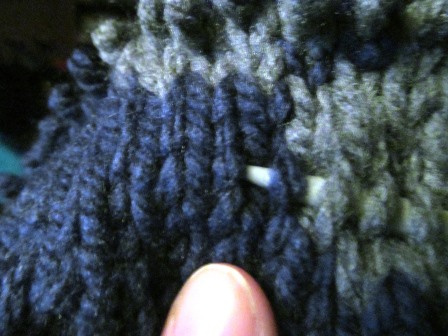
I'm working on a hilarious sweater pattern, and I got so eager to watch the colourwork develop that I completely forgot to do the side shaping. Unfortunately this meant I had to pull back 5 rows. Not too bad, but it's a long way around and it made me sad. To make things easier, I figured out how to insert my circular needle into the row I had to rip back to, and I thought I'd share!
Oh but, sorry for the shoddy pictures...
| Identify the row you need to rip back to. |
| Insert the needle under the right side loop of each stitch. |
| Be careful to stay along the same row. It's easy to shift to next row if you're not watching properly. |
| Work all the way around. If you're working in the round, remember that you're spiralling upward! |
| Pull back the yarn... (please excuse my messy messy livingroom) |
| ...until all the stitches are active on your needles! |
| And then good luck detangling all the yarn you just ripped back. |
Subscribe to:
Posts (Atom)