Showing posts with label pattern prep. Show all posts

Tuesday, March 4, 2014

One More Top for Sewcation?

No idea if I'll get this done before I leave for camp on Thursday, but it's worth a shot.  Make up for my horrible showing during my supposively 3 day Sewcation, during which I only got the one top finished.  *sigh*  At least it was a successful garment?

Anyways, I'm piecing together the SBCC Tonic Tee PDF pattern (this one), and I'm already liking it.  All the pages butt up together, instead of having to overlap, and it's making for a much quicker taping job!  Lets see how the rest of it goes.

Sunday, March 31, 2013

Pants Project: Pattern Tracing Adventure


You guys have heard me whine on and on about my fear of pants.  WELL NO MORE!  I am doing this.

I was planning on making Simplicity 2562 Amazing Fit because I’ve heard good things about it, and it’s been on my radar since Patti made a pair ages ago.  But once I started to trace it out, I realized that really wide-legged trousers are just not something I’d get any use out of in my wardrobe.  So I dug around a bit in my pattern stash, and came across Simplicity 2367.   I originally made these in a size 16 back in 2010 for the PR WardrobeContest.  They were my very first completed pair of pants.  And they were a disaster.  Still, I think most of it had to do with the thin stretchy cotton poplin I’d used, along with a desperate need for crotch length lengthening.
 
Despite how bad the first pair turned out, I really did like the details and style of the pants, and even knew back then that my failure wasn’t the fault of the pattern.  So I pulled it out and started to play with it.

The first problem I encountered was that pattern tracing is something I’ve only recently embraced, and back then I cut a size 16.  Based on my measurements, I’d need a size 20. *facepalm*  Luckily (or so I thought at first), the pattern also includes separate pieces for the shorts included in the set.  I thought ‘hey that’s great!  I’ll just trace the shorts pattern, then use the original pants to extend the legs’; simple!  Too simple.

Pants pattern over shorts, inside seam lined up. Just a little bit different.
Turns out that the shorts pattern is designed to be much looser in order to attach bands at the bottom and create a bloomer effect.  Adorable in shorts, but too much fabric for the look I want in pants.  Back to the drawing board.  Or in this case, back to the original size 16 pattern.
All of you out there who have ever graded up a pattern are probably laughing at me, since it’s actually pretty easy to do.  I knew I needed to go up 2 sizes, and luckily the pattern itself goes up to size 22.  This made it really simple, since I just slid the pattern around on my tracing plastic the amounts needed based on the drawing lines on the shorts pattern (they were useful after all!) and traced.  Easy peasy. 

Also easy was retracing the contoured waistband.  I was concerned at first since these curve differently depending on the size.  Again though, I was lucky because the pattern includes another waistband piece for the skirt also included in the set that has different markings, but the same contour.  :D  Seriously, I couldn’t have found a more convenient pattern to grade up. Thanks for that, Simplicity!

Simplicity 2367 (my chosen pattern) over the Amazing Fit pattern, back centre seams aligned. Hmm.
And here's my favourite pair of non-stretch jeans (also my only pair, because most women clothing stores suck) lined up over the Amazing Fit crotch line - perfect!
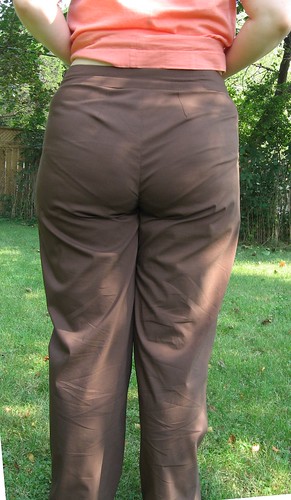
Now, back in 2010, I identified one of the problems with my pants was the crotch curve.  Actually, all of the lovely people at Pattern Review identified the problem was with the crotch curve (thanks ladies!).  I wasn’t sure how to handle this, until I spied the Amazing Fit pattern pieces, still draped on my ironing board.  I put them under my tracing plastic, wiggled it around a bit until it lined up relatively well, and then retraced the crotch curve.  There wasn’t much difference in the back, although the curve was a bit higher (we’ll see how that goes – at least it can be removed if needed), but boy was the back curve different!  It makes sense.  If you (dare to) look at the back of my first pair, the fabric pulls tight under the butt and causes major wrinkles; the area obviously needs more length along the crotch curve.  After tracing the new crotch curves, I just graded them over to meet up with the original pants leg line approximately 6 inches or so below the crotch. 

I haven’t tried cutting these out yet, never mind sewing them, but I thought I’d share my progress here so far.  Last week, I promised you more posts, so here’s one of them!  :D
Anywho, wish me luck on these.  I’m tentatively hopeful (so much so that I’m going directly to my planned fabric), but more luck is always good!

Happy Sewing!

Wednesday, January 9, 2013

Tiramisu 30 Minutes a Day Sew-Along: Days 1-3

My office - seriously.
For those who didn't make it that far in my 2012 recap post or just plum forgot, I now work as a geo at a fly-in mine here in Yukon. I work a 2 week rotation, so please forgive me if I disappear for half a month at a time.  I've already pulled one rotation, and will be leaving on my second one tomorrow morning!

Despite this, I sort of signed up for Cake Pattern's Tiramisu 30 Minutes a Day Sew-Along!  StephC is doing a fantastic job of organizing it and guiding us along.  Wish I could follow along each day for the entire thing, but oh well, the posts will still be there when I get back.

Day 1 had us gathering up our supplies into a box or bag or basket, and then tracing the pattern.  I forgot to snap a picture, but I'm using one of the many wicker baskets I have laying around.  I liked this step especially because I'm in the middle of moving and my sewing supplies are scatted to the wind.  This lets me keep it all in one spot and ready to go for when I come back to the project.  Steph is a smart woman.

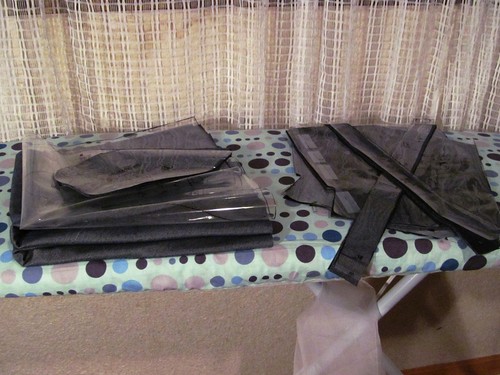
Day 2 had us cutting out the pattern from our fabric.  You can see my pile above.  I'm using a lovely denim-like knit that I surprising found in our severly lacking local fabric shop.  My cutting was fairly simple as I don't have stripes to match.  Since this fabric has a diagonal texture to it, it's really hard to match up on the seams, so I've opted to rotate the skirt piece and cut on the fold to eliminate the centre front and centre back seams.  I know this will effect the drap of the fabric, but Steph did the same thing on her polkadot Tiramisu, and it looks just fine.

Sorry about the dark crummy picture. The lighting in my sewing room sucks right now.
Day 3 (today) has us pressing our neck and sleeve bands in half and ironing on strips of fusable interfacing to the shoulder seams and pocket openings.  I should be packing up today so that I can cuddle with my boyfriend tonight without worry; instead, I did the day 3 chores PLUS then played with stitch options. 

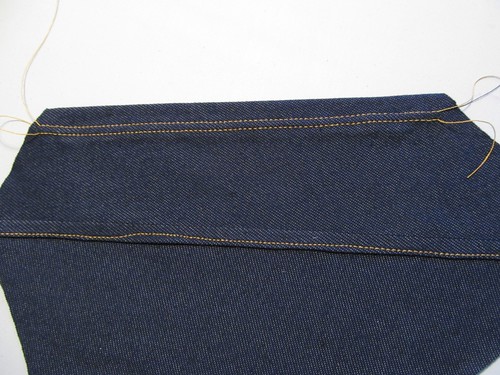
See, since I'm using a demin-like fabric, I want to use some denim-like seam finishes, and that includes possibly a flat-felled seam along the side seams.  It worked out decently on my test scraps (although I got distracted part way through and my needle wandered off), but I'm not sure if it'll work well as a side-seam on a knit dress.

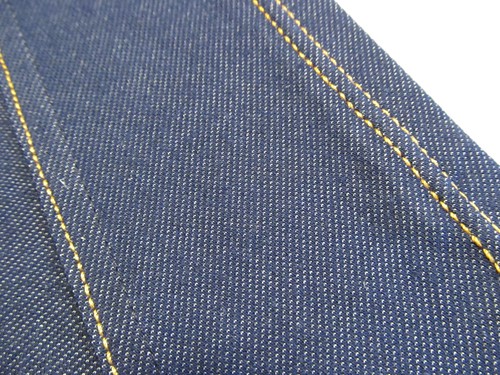
I also tested out using a double needle with the thicker gold topstitching thread.  I'm going to have to really crank up the tension to make it work, since the stitches pull through to the underside of the fabric.

I don't know, what do you guys think?  Ever use a flat-felled seam on a knit before?  This knit has some weight to it, but I had to steam the crud out of it to get it to fall flat again after stitching the seam.  (But then, I had to do the same with the double needle seam too.)

ETA: The reason I want to do this is two-fold.  I want to carry on the look of denim jeans in the dress, and since jeans have the flat-felled seams on the sides, I thought it'd be perfect.  But more importantly, the diagonal texture on the front and back skirts will be meeting at nearly perpendicular angles (much like the picture above).  Having the flat-felled seam there would obscure this more than I suspect a regular seam would.  But a lot of you have mentioned the weight of the seam, so I think a bit more investigation is needed before I attempt it.  Thanks everyone.

Friday, October 26, 2012

Pattern Tracing Woes

I hate Burda Magazine patterns.  You'd have to really love a pattern to put up with tracing the entire bloody thing from the messy sheet they give you.  I decided to finish tracing my jacket pattern (this project, for those just tuning in) this afternoon, and after a few hours of figure skating and Mythbusters on in the background (and maybe a lot of procrastinating on facebook and twitter), got two more pieces traced.

That's right: Two.

*sigh*
4 pieces down, 7 to go.

Monday, May 7, 2012

Grading a Pattern Down a Size

I'm working on a Top-Secret Project, and while I can't share the details of it with you right now, I did want to share something that I've learned while working on it!

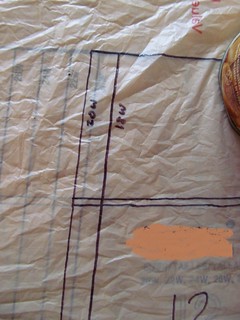
The pattern I'm working with is plus size (20W to 28W). Unfortunately, this is just a too big for exactly half of me, and my upper body would be swimming in the bodice if I sewed the smallest size. I guess only my butt is plus sized? Anyways, I'm grading the entire pattern down from a size 20W (the smallest in the set) to a size 18W. I thought I'd share with you how I accomplished this. While only piece of the pattern is demonstrated here, the technique shown can be used on all pattern pieces.

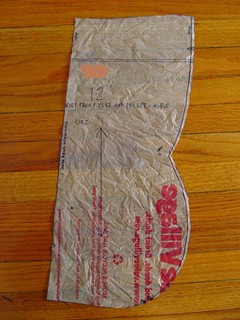
I've used a plastic grocery bag and a permanent marker to trace my patterns. Works like a charm and uses up plastic bags to boot! (Speaking of making do, tomato soup, tinned mushrooms, and tuna cans all make great pattern weights too.)

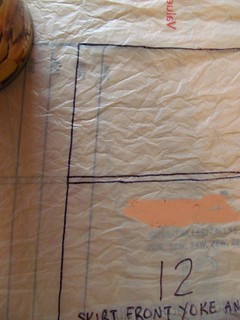
The first thing that I do is lay out the plastic and weigh it down so it doesn't move. Then I traced out size 20W completely, including all notches and shortening lines.

Since the size increments in this pattern are uniform from size to size, it's fairly easy to grade down a size or two. Once size 20W was traced, I shifted the pattern so that one side lined up with size 22W. Including grain line arrows and shortening/lengthening lines makes it easier to keep the pattern lined up properly.

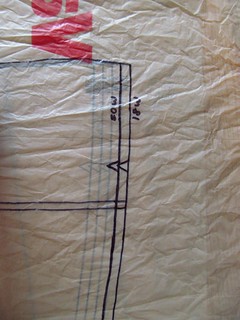
I then retraced the size 20W line. This shifts the left side of the pattern piece down one size increment, to what I'm going to infer would be size 18W. (Please ignore that neither line is aligned with the pattern sheet below. My tracing had shifted by the time I took photos.)

Since we're going down one size, we can't just re-trace the size 20W line all the way around, or else we'll just wind up with another size 20W, shifted over a tiny bit from the original. Instead, lets look on the right side of the pattern piece. See how I've shifted the original size 20W edge to line up with size 22W?

NOTE: Normally if you're grading down to a smaller size, the new, smaller-sized outline will be inside the original larger sized outline (or vise versa if you're grading up). However, in the case of this pattern piece, the smaller size outline is actually on the outside on the left side of the piece. I probably should have used a more conventional piece to demonstrate with, but this just shows how much you have to pay attention while tracing and grading your pattern. Watch out for this!

Once again, I simply just traced along the size 20W line, creating a size 18W outline. Make sure you're marking your lines as you go so that you don't get confused when it's time to cut out the pattern piece.

I went around the entire pattern piece, shifting the traced size 20W edge over to size 22W line and retracing the size 20W line to create a pattern piece at size 18W. (I'm hoping repetition makes this clearer.) In this case, I only had to trace the pattern on the left and right side for this piece, but some pieces required retracing on all sizes.

Make sure you transfer over all markings. I find that the markings line up relatively well, but watch out for tricky areas. Sleeves can be complicated because you're often shifting one area of a pattern in different directions, which can wreck havock on the notches and marks.

Once finished, carefully cut out your pattern pieces, paying attention to which line you're cutting. On the piece above, I nearly cut along the size 20W line on the right side, which would've left me with a too small of a piece!

This may seem time consuming, but so is running out to purchase a new pattern in a different size. Cheaper too, especially if you're recycling plastic bags for your tracing material!

What I'd really like to do is get a hold of this same pattern in the smaller size set, and see if my down-graded size 18 based on the plus-size pattern matches up with the size 18 based on the Misses' pattern. Not only would I really like to know how close I am to getting the size accurate through this method, but I suspect that there may be some drafting differences between regular sized and plus sized patterns.


The picture above is from the Simplicity website, showing the differences between different body types. They classify plus size patterns as "women" or "women/plus size", and they indicate in the text that the main difference between Misses' and Women's shapes is the proportions. Wouldn't this mean that the pattern proportions would be different too?

So this is why I keep referring to my new pattern size as 18W to distinguish it as coming from the Women's shaped pattern, as opposed to an 18 based on a Misses' shaped pattern. I'll try to get my hands on the smaller size set soon so we can see if there's a difference!

What do you think? Is there a difference in the pattern proportions between these two shapes?

Saturday, January 21, 2012

Cold Weather and Winter Coats (FNSI Report)

We've finally got hit with typical Canadian prairie winter weather the last week or so, with temps hovering around -30 C and colder (with the wind chill, and you always count the wind chill here). Unfortunately, between last winter and this winter I've somehow lost my winter coat, and have been getting by with a fall jacket and zippered hoodie (and lots of layers underneath). No, don't yell at me, I'm pretty acclimatized to the cold. It's only been the last few days of around -35C in the mornings that the cold has really bothered me.

I should go out to buy a winter coat, but I'm being stubborn. During the PR 10th Anniversary Celebration last November, I bought fabric to make a winter coat using Simplicity 2508 (similar to the version below), and paid a pretty penny for the lot. I refuse to go spend more on a winter coat when I've already dished out nearly $100 for this one (some assembly required).

But of course I've been working on everything BUT a winter coat.

I'm determined to make this up this week. During the Friday Night Sew-In last night, I forced myself to cut out and alter the actual pattern paper. Maybe not the most exciting sewing that was done during FNSI, but it forced me over a hurdle I've been avoiding for a while.

I'll keep you all updated on my progress on this coat. Knowing my luck and procrastination skills, it'll be spring before my coat is done.
Related Posts Plugin for WordPress, Blogger...