Showing posts with label gifts. Show all posts

Sunday, December 29, 2013

Cheeky Dishcloths from Grandma

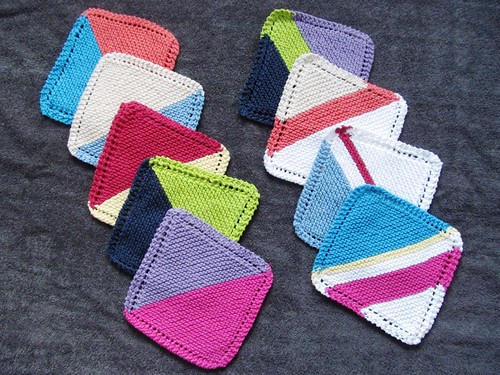
These colourful dishcloths arrived from my Grandma as my Christmas gift this year.  It's a great gift all on it's own, as I've been wanting to make dishcloths since we have, literally, only 2 of them, but haven't quite gotten around to it.  But it's an even better gift when you hear the background behind them.

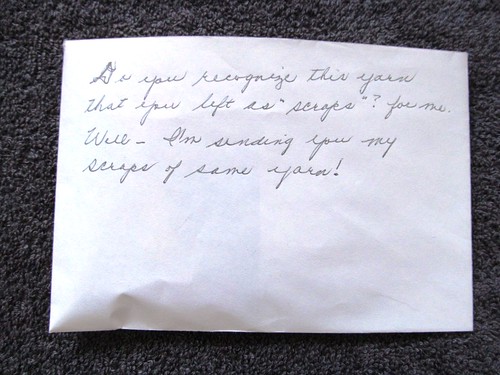
"Do you recognize this yarn that you left as 'scraps'? for me. Well - I'm sending you my scraps of same yarn!"

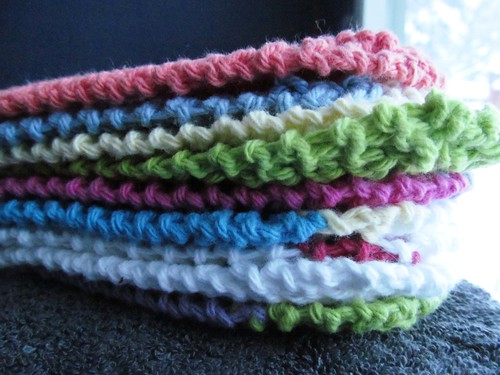
Sitting on top of these cloths was this envelope.  See, back when I was packing up my apartment to move up to the Yukon, I came across a bag of partial balls of cotton yarn, left overs from when I made this pillow:

Since I was downsizing, I offered the bag to my Grandma, who makes more dishcloths in a month than most people do in their lifetimes.  I guess she just came across the bag again recently and got an idea of what to do with it.

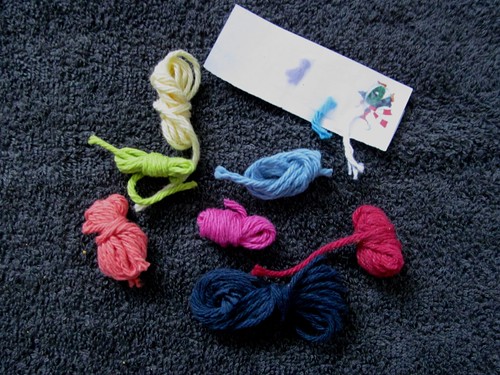
Of course, my Grandma is a little cheeky, so inside the envelope was this:

So hmm, what can I make with these itty bitty bits to send back to her?  Suggestions?

Saturday, December 28, 2013

Possibly Some Over-Medicated Babbling

I have a hidious cold that Dr. Google has me convinced is either my imminent doom or possible bronchitis.  Regardless, I've been cooped up in the house, sunk miserably in the couch coughing my lungs out.  Or so it feels.  I'm going to apologize right off the bat, because this post is going to meander like the Red River.  Actually, I'm not really sorry.  It will involve a lot of knit talk, because that's all I've been doing lately.  Although I do have one sewing project down at the bottom!

My boyfriend has abandoned me for a hockey tourniment out of town.  Well, to be fair, I was supposed to go, but THIS COUGH.  I've spent the majority of today doing a Project Runway Season 5 marathon on youtube and knitting away at my Reverb cardigan I started back in November.

I know a lot of you aren't big knitting fans, but you have to admit, you can make some gorgeous garments doing it!

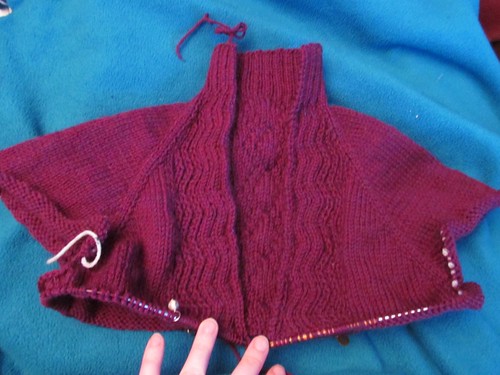
I'm actually about an inch further down from this pic.  It's a slow knit because of all the cables, but it's hard to put down once you get going.  Especially when you can't really do much else without epic coughing fits.  Again though, colour is off in this picture.  Stupid camera.
Fit check!  It's not too bad - I'm worried about the sleeves and the width, but I need to trust my math. Despite the fact that Geologist don't do math.  Eeep.  The colour in this pic is more true, but a little dark still.  ARGH CAMERA I HATE YOU.

No, I didn't get very far in NaKniSweMo.  Well, I got as far as the armhole divide, and then everything stalled out for Christmas knitting.  Which I should still be working on because I'm not actually done, but screw it.  I'm sick and I can knit what I want to!

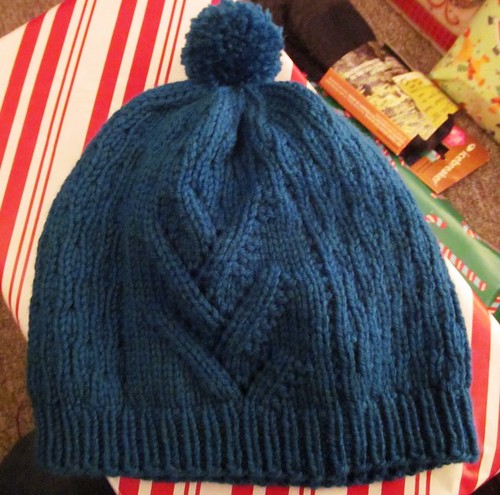
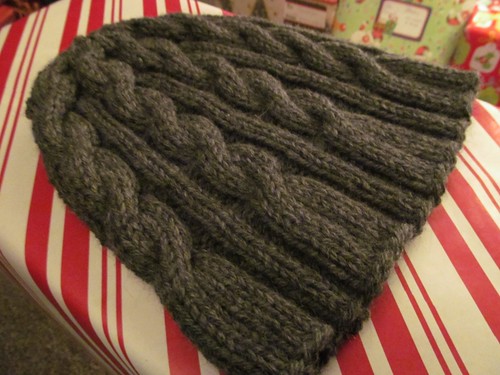
I'm pleased with what I got done for Christmas though.  Aside from the out-of-no-where owl hat for a coworker's daughter, I also finished off two toques for the couple who hosted us for Christmas eve/morning. (They also got most of the salted caramels too.)  I thought it was very kind of them to open their home for two people with no local family, and wanted to do something extra for them.  I made The Natural Hat (which I made last year as well for a friend) and the Lace Vine Hat.  The latter is a new pattern and the first one the creator has released.  It's a pretty well-written and a beautiful pattern - my right-before-wrapping-them-up pictures don't do the hat justice.

Love the textures in this pattern, and it was a quick knit. So fun to watch the lace pattern develop!  Colour's off here though.
The toque was more of a teal shade, like in this photo, but...deeper, if that makes sense.
This toque turned out a little bit too short. The recipient immediately put it on and wouldn't take it off all morning, so I assume he liked it, but it didn't quite go down far enough. Think my tension was a little tighter than normal.
Let's not talk about what I didn't get done.  Like the fornicating beaver's hat I promised to design for my boyfriend, nor the other NSFW knit he asked for.  And the fornicating deer hat a good friend requested that's been nearly done for months now but I'm too lazy to pull back 4 rows to start the top decreases sooner.  (I have interesting friends.)  And then there's the hat my brother asked me for about 2 weeks before Christmas when I had all the above (including the two pictured) to complete.  Brat.


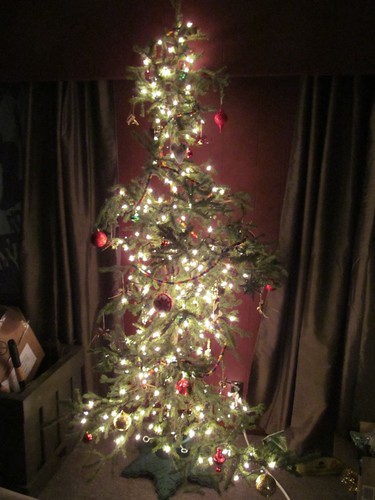
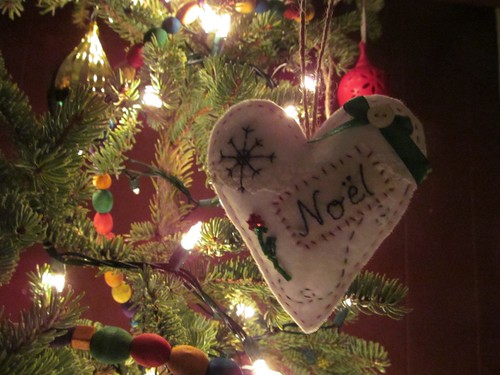
The Boyfriend and I went out and cut down our own Christmas Tree from the middle of the bush.  It was my first time doing that and was so much fun!!  Poor thing looks a little scraggly, but honestly it was one of the fullest ones out there.  I might've added too many lights to the poor thing - looks sort of like the centre of a galaxy, but at least he's a bright little tree!  I made some of the ornaments for it too.  Mostly brass bells with ribbons tied on, but I also made this little guy:

I love it!  Entirely hand sewn using felt, some lace I had on-hand and a bit of woven fabric for the noel part, some embroidery thread, some ribbon and beads, and a button.  I can't take credit for it though, I totally copied was inspired by this brilliantly talented person. 

I also made a bunch of crocheted snowflakes, but I didn't get them starched in time, and frankly, I forgot about them until just now.  Whoops.  Oh well, next year.

AND I should probably stop babbling.  I will say, though, that I'm stoked to get back into my sewing room (as soon as I dig it out of the Christmas Cleaning Explosion that happened in there AKA where everything that I didn't know what to do with got tossed).  I'm forcing myself to cull my wardrobe drastically, and that's made me think about the gaping holes in my closet.

Not the least of all is pants.  Might be time to dig these suckers out again.

Hope you all are healthier than me and knitting/crocheting/sewing up a storm this holiday season!  Or at least are enjoying your alcohol and merriment with friends and family.  Lucky buggers.  I'll just be here on my couch, coughing and pouting.

Wednesday, December 18, 2013

Cute Little Hooters


I may have been utterly absent lately, but that doesn't mean I haven't been creating!  Boy, have I been creating.  There may be more posts in the near future.  Especially since the mining industry has gone down the toilet and I'm going to find myself with a lot more free time in the near future!  YAY MORE CRAFTING TIME!!!

This year, we're spending Christmas at the Boyfriend's Best Friend's Parents place, which will be fun and is so kind of them to invite non-family to their family event.  And I thought it would be nice to make them all toques, because they're all outdoorsy people and winter outdoorsy people, and you can never have enough toques.

So while I should've been working on all of these toques, I instead made my coworker's daughter (who I've never met) a toque instead.  Because I am the Queen of Procrastination.  lol  I tried to say no, but the project burrowed it's way into my brain and shoved all other projects out. 

Sneaky little owls.  You might recognize this toque.  I made the same pattern last summer and then gave it away to Suzy Bee Sews.  I love the pattern and I was glad for a chance to make the child-size version.

I was originally going to make it out of the bright pink yarn you can see hints of in the toque, but it's a bit of a scratchy wool, and it's for a kid...plus wool needs special handling...nope, wasn't going to work.  So instead I used some admittedly soft acrylic I happened to have in camp with me, and I'm so glad that I did.  Easy care, super soft, and will take a beating.  And then added some pink touches, since the girl really loves pink!

As you can see, it's a bit small for an adult's head, but it'll be perfect for the little 8-year-old recipient.  The coworker is knit-worthy, considering all of the stuff he's done for me, last minute mind, without complaining.  My job would've been a lot harder without his help!

Someday, I'm going to make myself one of these...

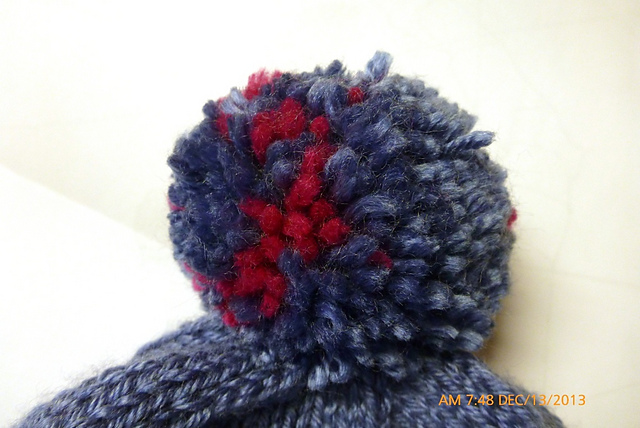
The very best part of this toque is this:
Obviously ALL THE TOQUES will need pompoms now, because I've forgotten just how much fun they are to make!


Tuesday, May 7, 2013

Care Package of Enabling Joy


I sent off a care package/birthday/Christmas present to one of my best friends last week!  This was a monumous occasion because I'm pants at mailing things, and have been putting this together forever.

The recipient (let's call her K) has recently started knitting, and since I'm a filthy enabler, I of course sent her yarn (amoungst other goodies).  But not any yarn!  The poor woman is allergic to wool and has been just using acrylic.  I admit, I'm not a fan of acrylic in general, but it does have it's uses and there's some nice acrylic out there now.  However, I think that everyone should be able to play with lovely luxury yarns now and then, so I found her several different types of cotton (this aint your dishcloth cotton), along with some really nice raw silk (in purple, K's favourite colour of course!). 

I'm also running an experiment with her.  I want to see how bad her allergy to wool is.  K has very sensitive skin, but I suspect it's more the texture of the wool that irritates her skin than anything else (but of course, she knows her allergy better than anyone).  I've sent her several swatches of different types of yarn, in individual baggies, including:
  • 100% wool (mostly for comparison or to test sensitivity to hands rather than more delicate areas - but I expect her to leave this one in the baggy I've sent it in),
  • 50% merino wool and 50% silk (to test if a much finer wool will still bother her)
  • 100% baby alpaca (because a lot of people who are allergic to wool, aren't allergic to alpaca.  And also because alpaca is the softest thing EVER, like knitting a kitten).
  • 75% kid mohair and 25% silk (just because)
She's game for experimenting (yay for fellow scientist friends!), so we'll see what comes of this!

 
Of course, I couldn't just send her the yarn in a plain ol' box or envelope, I had to make something special!  And being a sewist with a lot of quilting fabric and a can-do attitude, I tossed together a cute little project bag in about an hour.

It's pretty simple, but has a few nice details: Fully lined with a fun print, buttonhole slots for the draw string, and I used the only "fancy" stitch on my machine to sew up the open side of some double fold bias tape for a draw string.  All very easy, but was fun to work out and the only sewing I did in my last time off.

Now let's just hope that Canada Post doesn't lose the package along the way!  They managed to lose my Pavlova pattern, and I suspect some yarn I ordered a while ago.  :(

Happy sewing (and knitting)!

Friday, November 23, 2012

Owl Keep Your Place

Now that my refashioned Hitchhiker's Jacket is finished (finally), I can get back to knitting up Christmas gifts.  Considering that the mail is hideously slow, I need to get these sent out by the first week of December, and I'm so far behind, it's terrifying.

But that's okay, because I just stumbled across a cute gift idea that I think a lot of people will be getting this year: the Owly Bookmark!

Well, sort of.  I basically just drew inspiration from the original pattern, because I changed the main part of the bookmark to stockinette from...whatever the heck the designer had going on (I must've been doing something wrong because it looked like a garbly mess when I tried it).  And then I changed the owl design to something shorter and stouter, making it up as I went (I've knit a lot of owly things, so I have the gist of them by now).  And then I used french knots instead of eyes.

I got it finished off in one evening.  The only reason it took as long as it did (maybe 3 hours) is because I messed around with stitch types before I stuck with stockinette, and because I knit this thing so tight, my 3.0 mm bamboo needles are now oddly bent and I suspect the yarn indent on my finger is permanent.  It was fun to do though, and I think I'm going to play with different stitches on the main part of the bookmark.

DETAILS:
Pattern: Owly Bookmark Pattern (sort of)
Yarn: Mystery acrylic from my stash - I suspect Red Heart brand (7 g - 11.6 m)
Needles: 3.0 mm
Alterations: Changed main part of bookmark to stockinette.  Reduced body length to 6 rows before cabling and reduced the head to 4 rows before cabling.  Used french knots for eyes instead of buttons.
New Techniques Learned: Knit through the front and back loop.

Monday, October 29, 2012

Nalu Fingerless Mitts

Took me nearly a month, but look at the fingerless mitts I just finished blocking!  I'm super proud of the result, and itching to keep them for myself.  Alas, they'll probably be a gift for my Step-Sister, who just started a new office job and, I predict, will freeze to death sitting in front of the computer.  These should help keep Ms. I'm-Always-Cold a bit warmer while letting her type on the computer.

I LOVE the stitch definition. So lovely.
The pattern is the Nalu Mitts created by Leila Raabe (link goes to Ravelry), and I absolutely adore this pattern.  So pretty and detailed, but still simple and elegant.  And she offered the pattern up for free, which is always a bonus in my books!

I used Cascade 220 wool yarn for this, which is worsted weight.  For those who don't know much about yarn, they come in different 'weights' or thicknesses; much like fabric.  The weight of the yarn will help determine the gauge (stitches per inch) of the finished fabric.  Think of it like the fabric you buy: the finer the fibre, the smoother the fabric; the thicker the fibre, the more 'coarse' the fabric (and by coarse I mean the more you can see the details in the weave of knit - think cotton twill vs. fine silk).  Tension and needle size also plays an important roll in stitch size. 

But that is for a different post.
Anyways, the point I was getting to with the yarn weight is that the yarn I chose is actually heavier than the pattern called for (DK or double knit - for those who like these sort of details), so I made up some mods along the way to make sure the mitts didn't turn out too large.  I actually detailed the mods over on my ravelry project page if you're intersted in checking it out (should be accessible for anyone following this link), but it mostly consisted of decreasing the amount of stitches and tightening up my tension.


They fit quite snugly when I finished them, and since I consider myself having medium-sized hands (man, are hand sizes ever abritrary - pain in the butt to work out), I figured they'd work out just fine for my smaller-handed Step-Sister.  Then I blocked them to help define the pattern, and they came out a bit larger.  They still fit me really well, but I suspect they'll be too big for their recipient.

If I hadn't had to pull each of these mitts back umpteen-bajillion times before I finally got them finished, I'd be tempted to keep these and make a new pair for the Sis.  But I guess we'll see.  They may be fine, and I'm probably just making excuses to keep them, because hello pretty mitts, you're even in my favourite colour!

This project is the first time I've used a chart (different coloured blocks or symbols to indicate different stitches).  The pattern only charted the detailed section on the back of the hand, but I kept getting lost when it was time to do the increases around the thumb gore.  After pulling the project back 3 or 4 times for that reason alone, I chose to just sit down and chart the whole thing out in Excel.  It worked out really good, and I could highlite what rows I'd finished to keep track.  Definitely something to keep in mind for complicated patterns in the future.  Time consuming to do, but infinitely helpful to refer to, especially when you put the project aside for a while and need a reminder where you are.

So there we have it, another Christmas present (hopefully) done.  Many, many more to go.

*~~*~~*

To those not interested in the knitting projects, rest asure I am working on a sewing project.  Or rather, tracing a sewing pattern.  Got a couple more pieces traced this afternoon, and will hopefully finish it up tonight.  I really do need to muslin this pattern though because I don't know anything about the fit of Burda patterns, and my own shape has changed since the last time I sewed something for myself.  Stay tuned for those posts. 

And also for other knitting projects, because boy have I been knitting!

Friday, September 21, 2012

WIP Post (Oh the WIP!)


Oh goodness, I have the WIP bug.  NOT the UFO bug, these projects are still ongoing.  But I seem to have a tough time finishing something before moving onto another project.  Instead of waiting until they're finished and never posting anything, I figured I'd share the projects (and maybe get a handle on where I'm at with them).  Oh, and it's not all knitting!  There's a sewing project in there too!

This here is my longest WIP (so far).  It's a pretty shawl called Summer Flies, and I suspect that I knit it far too tight.  I only have one last section to go, and I'm only just now starting the second ball of yarn (and I was supposed to use them both up).  Plus it looks like it'll barely cover my shoulders.  But I'm praying to the Blocking Goddess that it'll block larger, so keep your fingers crossed for me!

This is nearly done, and barely took any time to do.  It's a doll (minus the head and arms) knit flat to be stitched up the back and stuffed.  I keep forgetting to pick up stuffing, hense why this has stalled.  A couple weeks ago, a woman in the States put out a call for donations of knitted/crocheted/sewn/whatever child-sized picc line covers and medical play dolls for a Children’s Rehab Centre in Washington, DC, where a friend of hers works as a Recreation Therapist.  I'll let you go read about it over on her dreamwidth account, since she explains it better than I can, but I'm making up a couple dolls to send along, and will probably do more after Christmas. 

I just have to finish the blasted things.

I think I mentioned it before, but I'm making up all of my Christmas gifts this year.  Or at least, I hope to!  I'm ambitious like that.  This fuzzy halo will (hopefully) be a lacy cowl for one of my friends.  She works in a (cold) office, and tends to wear a lot of scarves and what not.  I think this will be right up her alley.  I hope.  But man, have I messed up a bunch on this already.  Hopefully it won't be noticed.  I have, however, learned couple of new skills with it:
  • SSK (slip slip knit - this youTube video was really helpful)
  • Using markers before each repeat. Whoa man so much easier!
  • Counting 154 stitches of a fine and fuzzy yarn on circular needles is hard
Here's another started gift, a toque for my brother.  Except that I cast onto a larger needle to keep the cast on stitches loose, and was going to transfer it to a smaller circular needle.  Except that I'm using the needle for the cowl above...oops.

Oh hey look, it's a sewing project!  You might recognize the fabric, it's the top I mention here (aha, let's not talk about the wardrobe contest) out of the fabric that Kristin sent me.  I just need to sew on the sleeves and hem the blasted thing, but my sewjo is completely gone at the moment.  It'd better come back soon though, because I have a pair of pants I need to hem for an interview on Monday.  Yeash.


But Wait! What is This?  Are These FINISHED OBJECTS?!

AHA I lied, I do have a couple of finished projects! 

The first is a set of dishcloths that, once combined with some locally made soap (using our Territorial flower too - woo all Yukon made!), made up a house-warming gift for Heather over at FussWorks.  :)  The dishcloths were pretty easy to do, although the sead-stitched stripes were a bit more difficult and I had to frog one section about 3 times before I got it right.


The other FO is a lacy scarf from a knitting book I took out from the library, Last Minute Knitted Gifts.  It's a fantastic book with lots of cute projects in it, but if you can find all of the projects on Ravelry, including any corrections to the patterns.  And there's a lot of corrections.  Which is kind of annoying.

No corrections on this scarf though.  It's a super simple pattern, and taught me just what the YO, k2tog combination does (hint: the eyelet row).  It was also the first pattern that I ever blocked.  It grew a lot, which was good because boy was it small.  The hardest part of this project was dealing with the super fine and fuzzy (which likes to tangle together and is hard to rip back) mohair and silk yarn.  But boy is it luxurious when around your neck!

So that's where I'm at.  Sorry for the lack of posts lately.  I've been working away on stuff (as you can see), but I haven't really felt like sharing.  And then you know how it is, it builds up on you and suddenly it just all seems overwhelming.  Hense the post of WIP (and FO) DOOM.

Hope you're WIPs are becoming FOs!

Tuesday, July 24, 2012

The Divine Toque, or 'Heather Gives up and Starts Crocheting'

Uh so, there still hasn't been much...or any sewing going on in my life.  I'm completely living vicariously through you all, and also very much enjoying life in the Yukon.  Was at the Dawson City Music Festival this weekend, and let's just say there's a very good reason why I look so tired in the photo below.

Geez, do I ever look tired. Please excuse my face.

Even though I'm not sewing right now, I have started to pick up yarn projects.  I crocheted this hat recently, and plan to make a bunch more for [SPOILER] Christmas presents this year.  I really loved this pattern, the Divine Hat by Sarah Arnold.  It's the most popular crochet hat pattern over on Ravelry, and for good reason; it's super easy, quick to make, and looks great!  And being a free pattern doesn't hurt, either.

I love how it swirls!

I actually whipped off the first version of this hat the day I started it, but my tension was too tight and it was just too small.  I pulled the ENTIRE thing back and re-crocheted it.  Annoying, but worth the effort.  Keep your stitches loose if you plan to try this one out!  I've included more details on my Ravelry post, if you're a member (go friend me!).  I used the ever popular Cascade 220 wool, and boy am I in love!  Best of all, I found a great shop here in Whitehorse that sells it and a bunch of other lovely natural fibre yarn!  WOOT!!

I should probably apologize up front, since there's probably going to be a lot more yarn works in the coming months.  Between hats for Christmas, a class on knitting socks this fall, helping out make an airplane cozy this month, and a general lack of sewing space, sewing posts may be few and far between.  Sorry guys.  But stay tuned, because I do have a rather ambitious winter sewing plan in the works!

Happy sewing (and knitting, and crocheting, and whatever else charges up your creative juices)!

Friday, May 25, 2012

Baby's First Straight Jacket, aka "Bunting"

A friend of mine just had a baby boy yesterday (YAY!) and I made the little tyke a snuggy! Or more accurately, a straight jacket (that's what it looks like, okay). Despite having several cousins and friends popping out kids the last few years, this is the first time I felt inspired to actually make something for a little sprog. I don't know why I held off so long. This was nearly instant gratification, since baby things take approximately an hour to put together.

I used Simplicity 2165 view D, what they call a "bunting", my Mom calls a swaddling (or something), and I call a baby straight jacket. I was originally going to make the changing mat, but cripes I couldn't figure out what they heck they were talking about in the instructions. Straight jacket it is.

I decided to use soft flannel, and picked out a cute mint-green and duckies print for the outside and solid brown for the inside. Man, there is a major deficit of boy-themed prints out there. Most of it was really girly, even the blue stuff. And I'm really not pleased with the quality of this fabric. It's already piling after one wash, and has a loose weave. Really shoddy Fabricland, I'm unimpressed.

Anyways, it was super easy to put together, right up until the hook and loop tape (which I learned is actually the generic form of Velcro - like what Kleenex is to tissues). The diagrams seem to be wrong of where to place them. It took a bit of thought, superimposing the tissue paper, and folding the wings in, but I figured it out. You can see the final placement below.

Doesn't the mint print and the brown look nice together? I was craving mint chocolate the entire time I made this.

Anyways, I zigzagged the hook and loop tape on using mint thread, which looked sharp against the brown. I even trimmed the tape with wee scissors, since the edges are sharp and plasticy and I was afraid of the baby getting hurt.

And then I embroidered crossed hockey sticks at the bottom corner of the straight jacket, since his parents are rabid hockey fans. Just a little nod to them. I love the idea of being able to add that little personal touch!


*~~*~~*

As I mentioned in my last post, I'm moving to the Yukon. And as I didn't mention in my last post, I'm leaving on (or around) June 12th. MEEP! Unfortunately that means that this project will be my last sewing project before I leave, since I really need to start packing. But the good news is that I bought a car this week, and will be driving up. I have drawn up the following equation to show you the value in this:

Road trip x able to bring all(my happy stuff + sewing stuff) = YAY!

Red hot tamales!

Let's not talk about the fact that it's a 3700 km trip. And that I'm a prairie girl through and through, and have never driven through the mountains before. DOUBLE MEEP!

Sunday, February 19, 2012

Crochet Hook Holder...Thing: A Belated Christmas Gift

This post is a long time in the making. Actually, not really, I've just procrastinated for way too long. Sorry Fuss!

Back before Christmas, a good friend of mine, Heather (Fuss), started up crocheting. Since I've been crocheting for most of my life, I of course felt the need to enable this new hobby and right away wanted to make something special as a Christmas gift. And what better than a crochet hook holder filled with all sorts of goodies?!


Of course, my procrastination genes popped up, and I didn't get it done in time for Christmas. One day in January, while chatting away in gmail, she mentioned that she'd bought herself a set of hooks and was planning to make herself a holder for them.

Cue panic.

Luckily it didn't take too long to finish up the gift, and off it went across Canada to her doorstep (or rather, postbox down the street). Her reaction was delightful and chronicled in her brand spanking new creative blog, FussWorks (go check it out! The pictures of her bunnies and dogs modeling things are adorable and their put-upon expressions hilarious).

The crochet hook holder was pretty easy to make. My quick and dirty schematics are shown above, and the hardest parts were 1) figuring out how long to make it, and 2) sewing all those straight parallel lines dividing the hook pockets. I sort of wung the first part, deciding that longer was better, because everyone winds up with way too many needles. For the second part, Sheila of the Marble Stash group suggested using a strip of painters tape and sewing next to it before shifting it over to sew the next line.

There's a lot of pockets. I cut a piece of fabric the length and height that I wanted for the hooks, and bound the top edge with a piece of straight-grain tape (is that what it's called? Non-bias bias tape made from the shell fabric) before basting the pocket piece to the inside fabric. I found the bound edge really helpful for keeping the hooks nestled tightly in the pockets. For the pockets themselves, I sort of just wung the spacing, going from widest to narrowest across the length. I figured this would give lots of space for different sized needles.

The pockets were probably the most fun part. I wanted to bring the pretty batik fabric I was using for the shell fabric inside the holder, and this was a great way to do it. I also wanted to line the pockets so that there would be no frayed edges.

The patch pockets with the flaps were easy to figure out, but the zippered pocket was a little big more work. If anyone is interested in a tutorial for making a zippered patch pocket, just let me know. I'd be glad to put one together. The lined inside is a nice touch.

Once all the pockets were attached to the inside fabric piece, I simply put it and the shell fabric right sides together, sandwiching the ribbon ties inside, and stitched around, leaving an opening to flip the whole thing right side out. A bit of top stitching around the edge, and c'est fini!

I'm super proud of how it turned out considering I was making it up as I went. It's a good thing I really like my buddy, because otherwise I would've kept it! Enjoy your crochet holder, Fuss. Happy crocheting!
Related Posts Plugin for WordPress, Blogger...