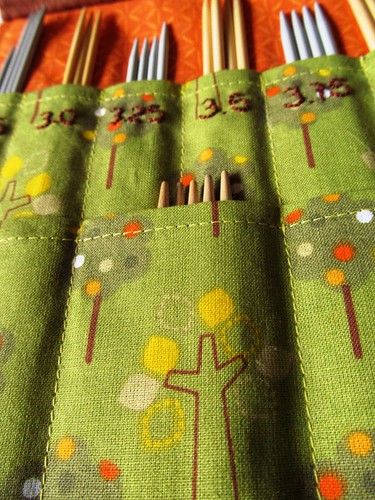
It took a couple extra days, but I finally finished my double point knitting needle case! (For those who don't know what those are, they're needles that have sharpened points on both sides of the needle, hense 'double point'.)
The pattern is from a tutorial by
Crafty Avocado. She walks you through the instructions clearly with lots of pictures. I did make a few changes though (which I'll detail below), and if I were to make it again, I'd make a few more based on personal preference. Great tutorial though!
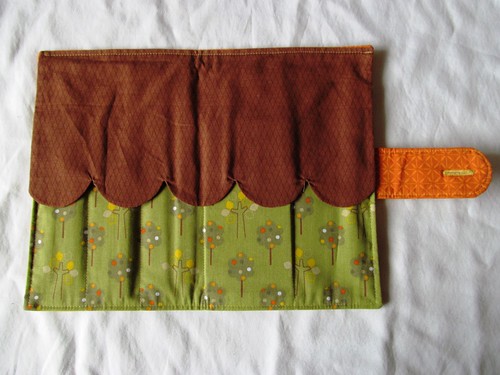
Case opened! The tutorial just had you do the protective flap with a straight edge along the bottom, but I wanted scallops to emulate the little trees in the green fabric below! I also rounded off the buttonhole tab for the same reason.
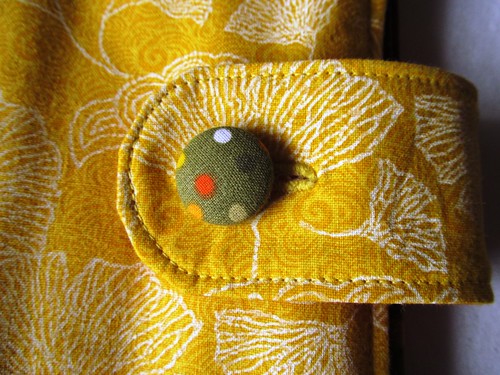
How do you like my self-covered button? I managed to centre one of the trees exactly on the button *cough*on my second try*cough.
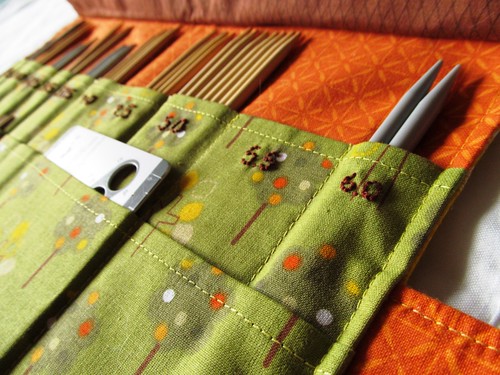
And here's the flap opened, revealing the needles underneath! The flap keeps the needles slipping out of the case when it's closed up, something I neglected to do when I made
Fuss that
crochet hook case. Oops.
Another change I made was the stitching order. The tutorial had you stitch down all of the upper pocket seams first, then the lower pocket seams, matching up with the upper seams where needed. Instead, I stitched all of the upper pocket seams that didn't line up with the lower pockets, then stitched both at once in one long seam so that they'd line up perfectly. (I hope that makes sense - I'm a little confused trying to explain it.) I did, however, backstitch at the top of the lower pocket for more strength before continuing on.
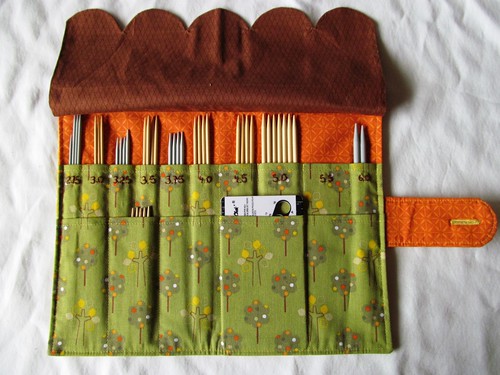
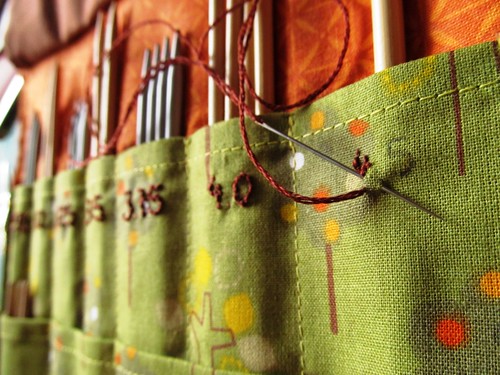
The hand embroidery was...
tedius. All I can say is that it seemed like a good idea at the time. If you decided to do something similar, I recommend that you
not do it stick a larger knitting needle in the pocket to prevent yourself from catching the lining with the sewing needle. It also makes it easier to stitch with a bit of support behind the fabric.
Now I just need to order a set of 5.5 mm needles to fill that gap! The needles I have here are all the ones I can get in town. :(
Overall, I'm pretty pleased with this case. It was handy to have at the knit night I organized for last night, especially when one of the women asked if I had any DPNs on hand and I could say YES! I think that I'd make more smaller pockets next time though, and maybe a flapped or zippered pocket for adding a few stitch markers (I'm always desperate for them and it's getting annoying finding them in pants pockets, the bottom of my purse, in amongst spare change, under couch cushions...).
I'd originally planned to use the fabric I found in
Alaska
a few weeks ago, but when I went to find coordinating fabric, I fell in
love with the green tree fabric. And then I found the yellow fabric
for the outside of the case. The orange and brown just cemented it and I
changed directions. Oh well. Maybe I'll use it when I
make a case for my circular needles. I might have to design that one myself...


Lovely - you have done a great job.
ReplyDeleteI love it -- thanks for the link as requested. You choice of fabric really works here -- and I cannot believe you hand embroidered the numbers! Way to go!
ReplyDeleteI love the fabric! Your scallop seam is beautiful too. Great project :) Once I get my sewing machine fixed up (it needs maintenance) I might just make one!
ReplyDeleteI love it, your mods look beautiful! The scalloped edges are so pretty. A lot of work, I know, I make my own interchangeable needle cases which take a lot of work too :) I adore your fabrics
ReplyDeletedo you have a pattern to go by? How much material is needed? How much space to you give to place needles in? Your finished product is beautiful, but I need a pattern and directions so I can make my own. Thank you in advance.
ReplyDeleteARGHH! I had a whole comment written out answering this, and stupid blogger ate it! :(
Delete*sigh* Let's see if I can recreate it.
Thanks for your questions! I didn't so much use a pattern as followed a tutorial by the Crafty Avocado, which I linked to above. It's really easy to follow and a fun project, although I changed a few things along the way, which I talked about in the post.
I'm not sure exactly how much fabric I used. Maybe a little bit more than half of each of the 4 fat quarters I picked for the project? I know there wasn't enough to make a second version, although there's enough to make the pin cushion I've been planning to make forever!
For the spacing, I followed the tutorial, which gives you dimensions. I'm pretty happy with the spacing, but if I were to make it again, I'd probably change up the bottom row, making a few smaller spaces for crochet hooks and a pair of scissors, and possibly a zippered pouch for stitch markers and things (I talked a bit about that at the end of the post).
I hope that helps! Not a lot of info, but I think most of what you need is explained in the original tutorial post. Good luck making your own! I had so much fun making it, and I hope you do too!
Hi Heather, This is a great project that my daughter hinted to make for Christmas. Thge Christmas countdown begins. Where can I find your yardage of fabric needed and and the steps to create this. I really appreciate your effort in answerin this and hope you have a great day.
DeleteThis comment has been removed by the author.
ReplyDeleteI apologize for the typo's I must preview first or find my glasses. LOL
ReplyDelete