I should be knitting the three projects I really need to finish in the next month. But I'm frustrated by all three projects (especially the toddler sweater I need to restart for the third time.
So instead, let's play with some gorgeous Liberty of London fabric I ordered from Hyggeligt Fabrics and a TNT shirt pattern!
Showing posts with label tops. Show all posts
Friday, March 28, 2014
Tuesday, March 4, 2014
Oh Look - A Top Completed in One Day. Who'd a Thunk.
Will do a proper post tomorrow once I get some better pics, but I couldn't resist sharing tonight. SO HAPPY! Why yes, I did manage to get my Tonic Tee done today!
I absolutely adore it. It's the perfect t-shirt! And now I'm going to go try to snuggle with the Neglected Boyfriend. He's come to bug me 3 times in the last hour, so I think he wants attention.
No make-up, a bit crazy-eyed, but the t-shirt is done. Can I haz a TNT? Why yes I can! |
I absolutely adore it. It's the perfect t-shirt! And now I'm going to go try to snuggle with the Neglected Boyfriend. He's come to bug me 3 times in the last hour, so I think he wants attention.
One More Top for Sewcation?
No idea if I'll get this done before I leave for camp on Thursday, but it's worth a shot. Make up for my horrible showing during my supposively 3 day Sewcation, during which I only got the one top finished. *sigh* At least it was a successful garment?
Anyways, I'm piecing together the SBCC Tonic Tee PDF pattern (this one), and I'm already liking it. All the pages butt up together, instead of having to overlap, and it's making for a much quicker taping job! Lets see how the rest of it goes.
Sunday, March 2, 2014
Finished Project (!!!!): Simplicity 2594 Top
![]() |
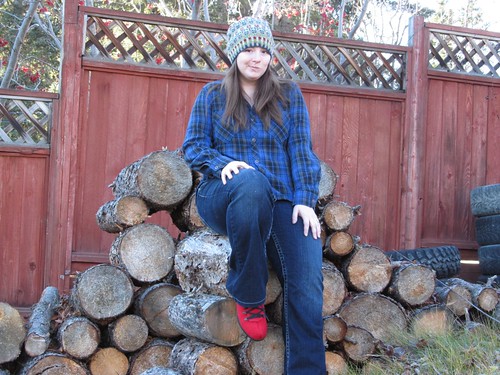
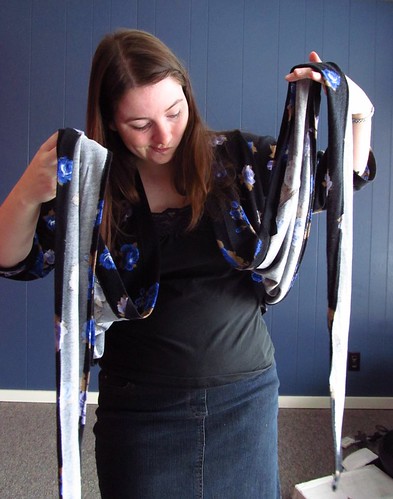
I am so sorry about how washed out some of these pics are. My camera is a dick and hates any and all lighting conditions. And me. |
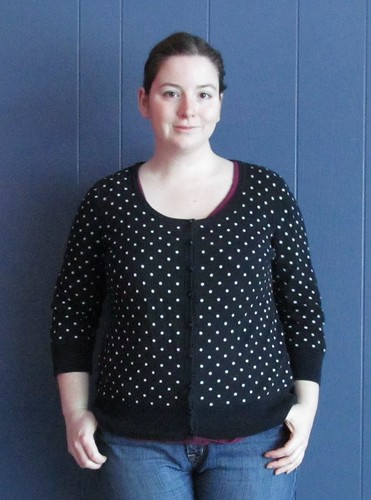
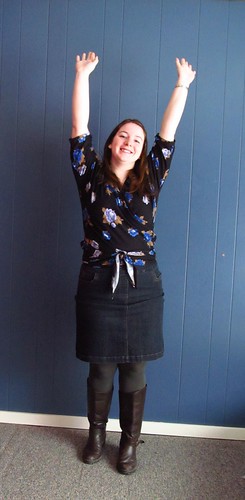
Which took me the whole weekend to finish. *facepalm*
Here's the basics:
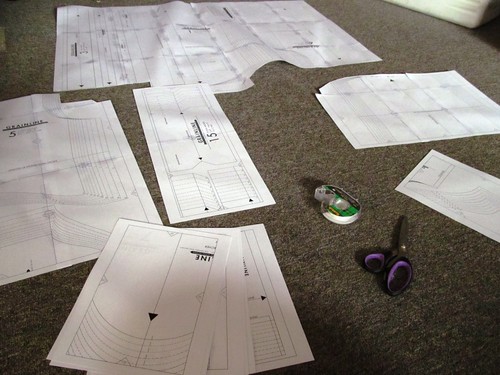
Pattern: Simplicity 2594, view E.
Size: I cut size 16, two sizes smaller than my body measurements. This garment has 7 inches of ease.
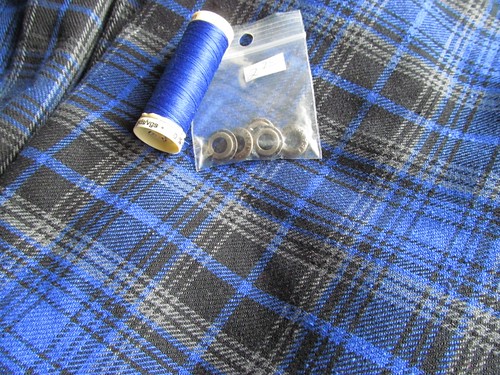
Fabric: Lightweight 100% polyester I bought who the heck knows when.
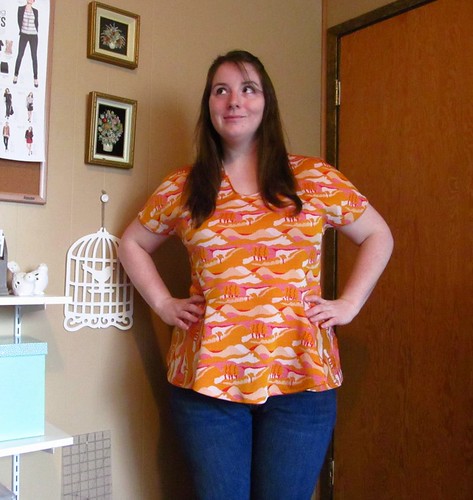
Alterations: NO FBA! 
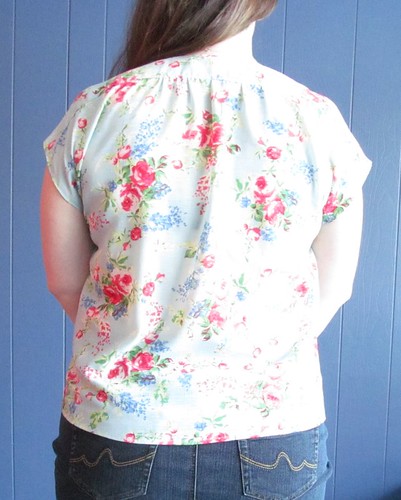
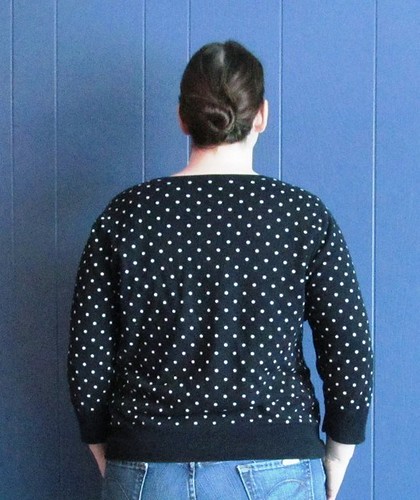
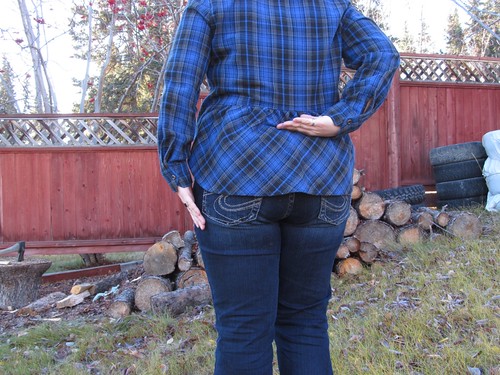
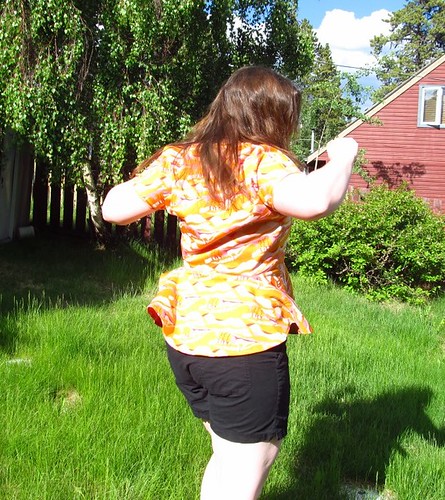
So much ease. It appears that I did draft out some of the drape in the back. Thanks Past Heather, I appreciate that!
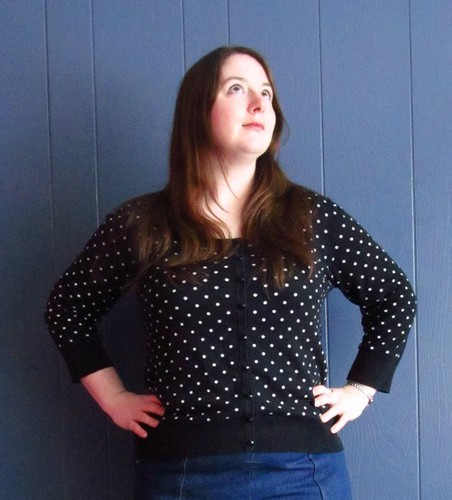
I made up this pattern a couple of years ago, in view B. I still have that top, and while I do wear it now and then, it's not a go to top because the cowl annoys the living crap outta me. But I like the loose fit of it, so I guess I thought view E would be a good choice.
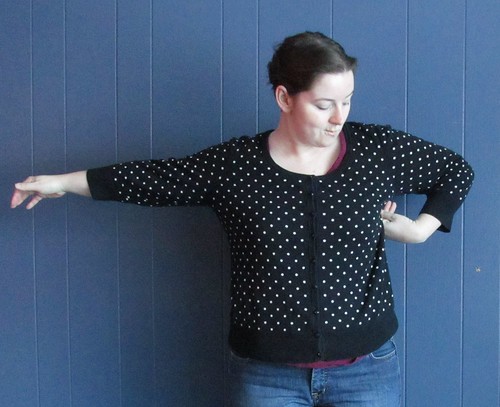
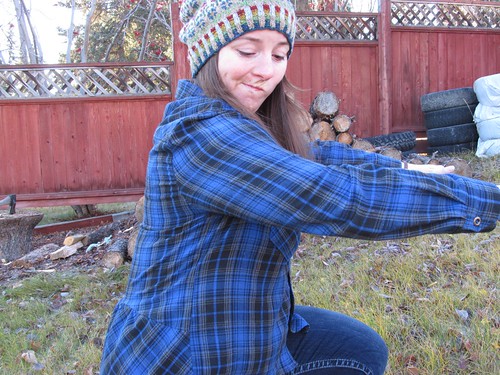
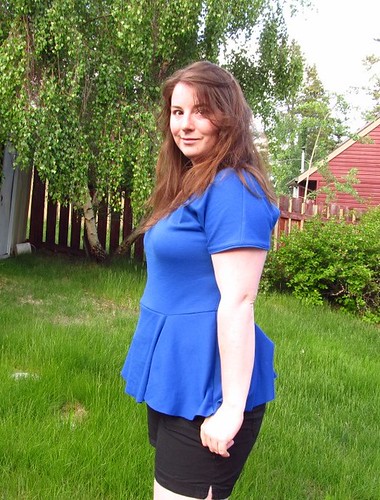
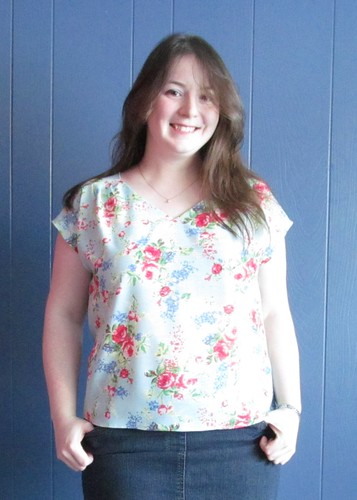
I like the loose back, although I'm glad I took out some of the upper back fullness. Not sure how bad the fabric-eating-armpits really are (stupid camera and it's hatred of all lighting conditions - even the low diffused light like above), but I don't really care. It's comfortable with a high mobility range.
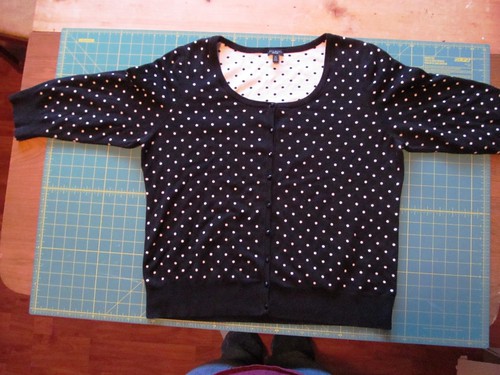
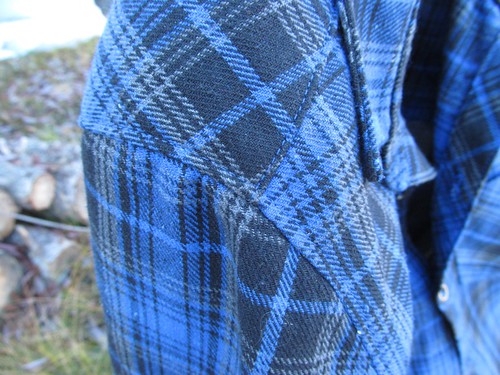
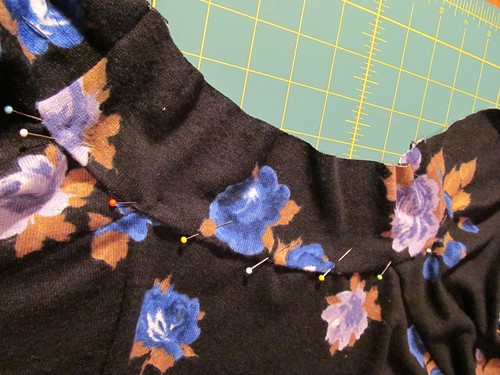
This pattern has some gorgeous details that I didn't notice as much in my black polkadot version. Like these gorgeous pleats at the front shoulder yoke.
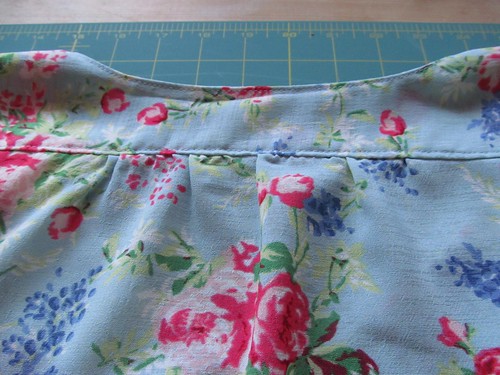
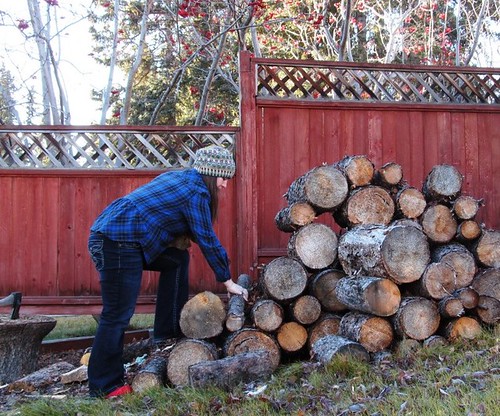
And the back gathers below the yoke. Which I totally should've put more effort into, but oh well.
I topstitched all of the seams, whether the instructions said to or not, because polyester will not hold a press at all. Or not in my experience anyways. The only exception was the neckline. It's faced with a piece of interfaced self-fabric. When I went to topstitch, I realized that I love the look of it without the stitches. Not sure how it's going to hold up long term, but the understitching is holding for now. We'll see how it handles repeated washings.
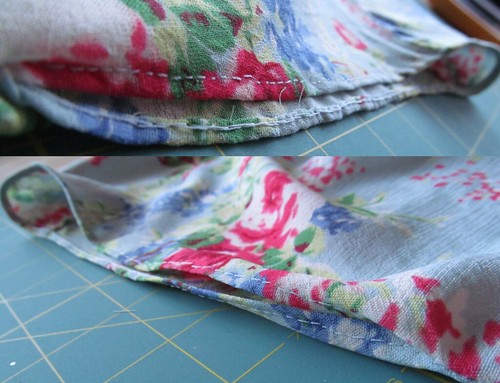
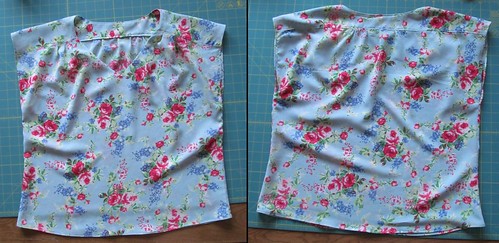
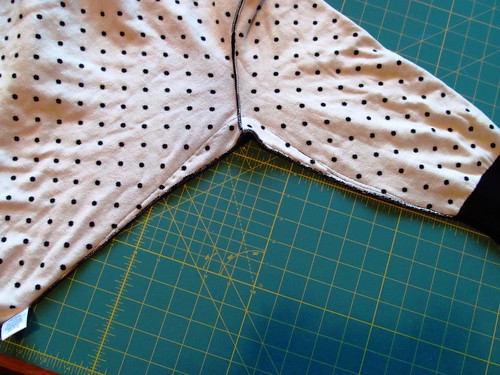
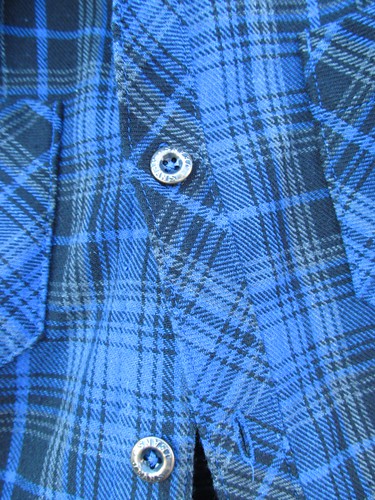
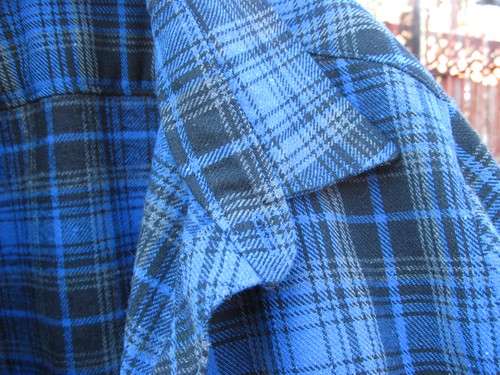
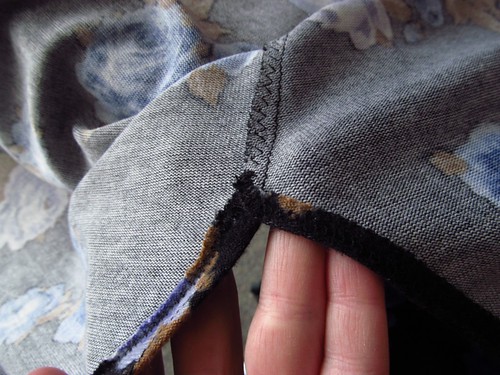
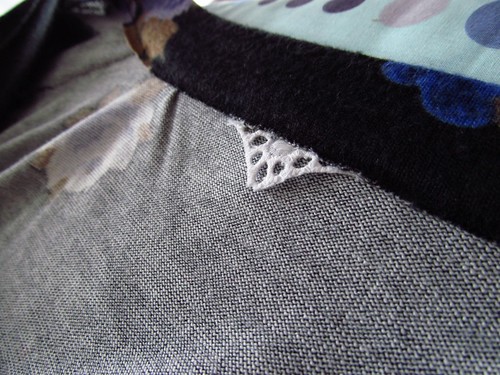
I french-seamed the side seams and did a pseudo-rolled hem at the bottom. For the sleeve openings, I decided to attempt a hand-rolled seam (with visible stitches. The first one, at the top, looks like crap. I decided to run a line of machine stitches along one of the turning lines 1/8" from the edge. Since the fabric is so thin, the stitches pulled too much, creating the horrible crinkling you can see above. The bottom picture was done without the line of machine stitches, and it looks so much better. Plus my handstitching improved with the practice.
I spent a very peaceful couple of hours this morning, lounging on the couch handsewing while the Boyfriend kept refilling my coffee. :)
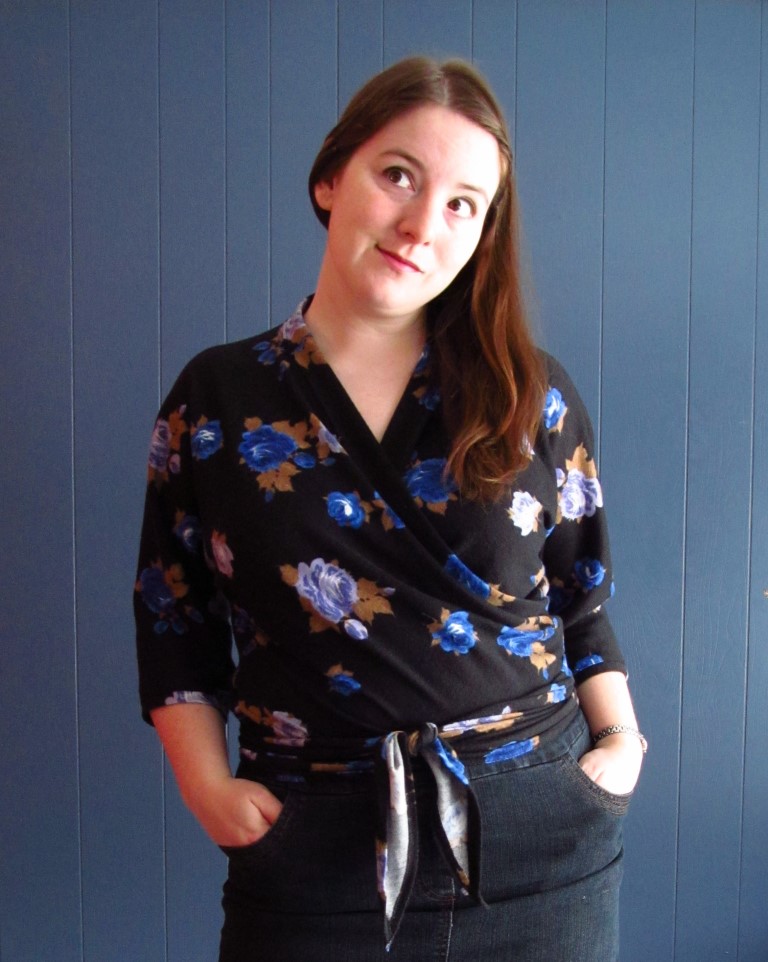
There's not a lot of shaping to this garment, and I probably should've taken out a bit of width around the waist (yes, even going down two sizes, this was a little too baggy). But I like the looseness, especially since it's offset by the clingy nature of this very light polyester.
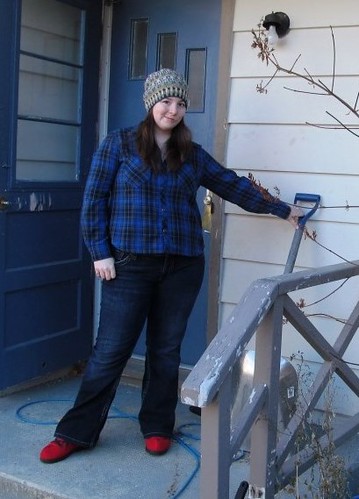
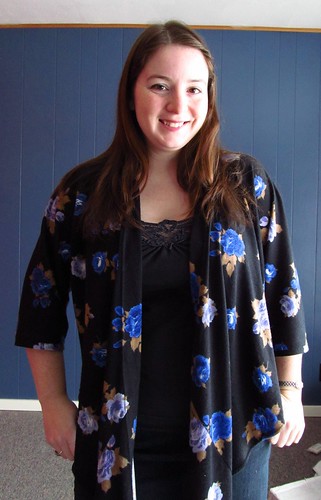
And of course, since this was meant to be a layering top, I'll be hiding all of those pretty details under my cardigans. Hehe oops.
Well, I may just wear this top on it's own this summer, because it is awfully pretty! Did I mention that I adore it? So so comfortable (despite the staticy cling), and so so adorable. Seriously, I need to find some really lightweight cotton to make some more. Although I really do want figure out how the lengthen the sleeves without sewing a rectangle to them. Don't like drop sleeves.
Tuesday, January 28, 2014
Baggy Too Loose Cardigan to Cute Semi-Fitted Sweater
![]() |
POLKADOTS!!! |
And boy did it not fit. I guess it wasn't too bad, but bad enough that I proceeded to not wear it at all (despite the polkadots). See how thrilled I look? It was too wide across the shoulders, too wide across the body, and the armpits were about 2-3 inches away from mine when I stretched my arms out. And it looked awful unbuttoned. What's a sewist to do?!
Obviously shove it under the sewing machine and hope for the best. So I did just that, right before leaving for camp again in January*, marking out how much and where I wanted to take it in, and then sewing it up. Well, one side of it, anyways. And then abandoned it in last-minute work preparations.
First thing I did on getting home last week was trim my seam allowance from the one side...
...then taking a page from Lauren method of transfering aterations from one pant leg to the other, I folded the cardigan in half and traced out the seam allowance, then sewed 1/4 inch away from that line. Easy peasy. A bit of trimming and I was done!
Well, other than a bit of quick handsewing to close up the front so that it went from cardigan to sweater. This is the one time I prefer a sweater to a cardigan.
And Voila! A nearly instant (if you ignore the months I dithered over this) sweater that I've barely taken off since fixing! Look! The armpits are actually close to mine! Much better.
Also, remind me to never wear my hair up ever again! YEASH that's not a good look on me. (And no, I'm not fishing for compliments - at least, not on my hair! lol)
* Oh yeah, did I forget to mention that? The silly mine called be back, again. This time as a production geologist in a more essential (and less expendable) position, so here's to hoping that I don't get laid off from them a third time. But if I do, at least I'm an old hat at it? lol
Saturday, November 2, 2013
Finished Project: Plaidtastic Blue Archer
Hey would you look at that, I finally took pictures of my Archer! I've only been wearing it near-constantly for the last 3 weeks.
Yeah, I'm pretty happy with it. There's a couple things I'd change on the next one (and there will be at least one more, possibly a half-dozen because these are fantastic work shirts! And every day shirts.
I forgot how easy button-ups are to wear.
Details
Pattern: Grainline Studio's Archer Button-Up Shirt
Fabric: 100% cotton plaid flannel
Size: Size 12 from armhole upward, graded to size 14 at waist and size 16 at hips
Alterations: Other than size grading above, I did the following:
I didn't do an FBA, just because this is a loose top and the toile I did (and didn't take a pic of, sorry) showed that I didn't need it. I might do a small FBA next time though, just for a bit of extra room.
This fabric, while lovely, was skewed to an annoying degree. I couldn't straighten it no matter what I did. So I mostly gave up on matching the plaid, except for across the front. I think I did a pretty good job, considering, but the bias button band helps a lot!
There are two major alterations that I'll make next time.
I shortened the bodice by 2.5 inches. This was about 1 inch too much. The butt bustle should've been a bit lower.
This one is probably the biggest one. View A has a pleat below the yoke to give some extra fabric across the shoulders. View B doesn't. Definitely should've added that one in, because holy man is it ever annoying not having it. REACHING FORWARD IS HARD.
Although I'm probably going to make more view A's in the future, because there's only so many butt bustles a person needs in the 21st century. In this part of it, anyways.
So overall, I'm in love with this shirt. Don't be fooled by the 'meh' face in some of these photos, it was entirely due to my horrible camera and not the top. The top is easy to wear, both at home and at work, and with a few tweaks, will be even better next time.
But I will warn you, there's not a lot of shaping to this shirt. The only shaping is at the sides, and it's a bit poofy at the tummy. I'm happy with this right now, because I've been enjoying the camp desserts a bit too much and the camp gym facilities a bit too little. Plus I do like to de-emphasize my body when at camp.
Wouldn't be too hard to add a couple darts in the front though...
ETA: I forgot to mention something that's come up in the comments. I found the instructions for the Archer a little sparce, especially for a button-up top with a full collar. I eventually gave up on them and followed the Archer Sew Along instead. Maybe if you have experiences with this type of garment, the instructions would be fine, but for anyone new or newish to them, use the sew along.
Yeah, I'm pretty happy with it. There's a couple things I'd change on the next one (and there will be at least one more, possibly a half-dozen because these are fantastic work shirts! And every day shirts.
I forgot how easy button-ups are to wear.
Details
Pattern: Grainline Studio's Archer Button-Up Shirt
Fabric: 100% cotton plaid flannel
Size: Size 12 from armhole upward, graded to size 14 at waist and size 16 at hips
Alterations: Other than size grading above, I did the following:
- Narrowed the shoulders by 3/4 inch
- Shortened bodice by 2.5 inches
- Take in side seams by 1/2 inch
- Reduced length of butt bustle by cutting along size 0 hem
I didn't do an FBA, just because this is a loose top and the toile I did (and didn't take a pic of, sorry) showed that I didn't need it. I might do a small FBA next time though, just for a bit of extra room.
This fabric, while lovely, was skewed to an annoying degree. I couldn't straighten it no matter what I did. So I mostly gave up on matching the plaid, except for across the front. I think I did a pretty good job, considering, but the bias button band helps a lot!
There are two major alterations that I'll make next time.
I shortened the bodice by 2.5 inches. This was about 1 inch too much. The butt bustle should've been a bit lower.
This one is probably the biggest one. View A has a pleat below the yoke to give some extra fabric across the shoulders. View B doesn't. Definitely should've added that one in, because holy man is it ever annoying not having it. REACHING FORWARD IS HARD.
Although I'm probably going to make more view A's in the future, because there's only so many butt bustles a person needs in the 21st century. In this part of it, anyways.
So overall, I'm in love with this shirt. Don't be fooled by the 'meh' face in some of these photos, it was entirely due to my horrible camera and not the top. The top is easy to wear, both at home and at work, and with a few tweaks, will be even better next time.
But I will warn you, there's not a lot of shaping to this shirt. The only shaping is at the sides, and it's a bit poofy at the tummy. I'm happy with this right now, because I've been enjoying the camp desserts a bit too much and the camp gym facilities a bit too little. Plus I do like to de-emphasize my body when at camp.
Wouldn't be too hard to add a couple darts in the front though...
ETA: I forgot to mention something that's come up in the comments. I found the instructions for the Archer a little sparce, especially for a button-up top with a full collar. I eventually gave up on them and followed the Archer Sew Along instead. Maybe if you have experiences with this type of garment, the instructions would be fine, but for anyone new or newish to them, use the sew along.
Wednesday, October 30, 2013
Itchin' for a Skirt
It's weird weather here in southern Yukon - hovering around zero and the snow disappears almost as soon as it lands. Odd for this part of the world at this time of the year.
It's making me want to wear warm skirts - or skirts with leggings (I blame Steph and her new leggings pattern).
I've also been wanting to try out her Hummingbird Orange skirt pattern, which needs less than a metre of fabric. Incidentially, I've had this gorgeous burgundy corduroy kicking around for years, because there's only slightly less than a metre of it.
Coincidence? I call Fate.
Now if only I knew what I did with the pattern pieces...
I promised a post on my Archer button-up last week. It is finished! I just loath my camera with all the passion in the universe, and not inspired to take pictures with it at all. I'll suck it up this week and do it. Just be prepared for a slightly frustrated photoshoot. Here's a teaser, just to proove that it's done and that I actually wear it!
Because I would almost live in this thing (with one very important adjustment), if I could get away with it.
It's making me want to wear warm skirts - or skirts with leggings (I blame Steph and her new leggings pattern).
I've also been wanting to try out her Hummingbird Orange skirt pattern, which needs less than a metre of fabric. Incidentially, I've had this gorgeous burgundy corduroy kicking around for years, because there's only slightly less than a metre of it.
Coincidence? I call Fate.
Now if only I knew what I did with the pattern pieces...
*~*~*~*~*
I promised a post on my Archer button-up last week. It is finished! I just loath my camera with all the passion in the universe, and not inspired to take pictures with it at all. I'll suck it up this week and do it. Just be prepared for a slightly frustrated photoshoot. Here's a teaser, just to proove that it's done and that I actually wear it!
Because I would almost live in this thing (with one very important adjustment), if I could get away with it.
Thursday, October 3, 2013
GOOD NEWS! (both of the working and sewing variety)
Aha so yeah, I disappeared for a few weeks there. I have a good reason though: I GOT RECALLED BACK TO THE MINE!! \o/ \o/ \o/
And then a friend came to visit me as soon as I got home, so I've been a little busy visiting with an old friend and appreciating the Yukon. Which was time well spent in my books! It's funny how you only manage to visit some places when other's come to visit, eh?
Anywho, I'm actually planning a sewing project! I have a couple knitting projects to show off soon, but those need some finishing and I can't be bothered right now. ONWARD TO NEW PROJECTS!
Right before leaving for camp, I got seduced by Grainline Studio's Archer pattern, thanks to Lladybird's version. Yes, I know she wasn't happy with her version, but that wasn't because of the pattern itself so much as her execution.
See, it's getting cold here in Yukon, and I need some easy warm tops that I can wear easily at work. As I'm severly lacking in long sleeve button-ups, this seemed the ticket, especially the pretty bustle version!
Since I'm still wanting to support local, I scurried off to our crappy fabric shop to find something decent. I found this...admittedly lovely blue plaid flannel, which should be perfect. I even found some nice metal buttons that add a touch of a professional look (I hope). Anymore decent finds, and I'll have to finally remove that 'crappy' prefix.
Of course, now I just need to finish taping all of these go-damn sheets together. ARRRGGGHH.
Have any of you sewn up this top? Would you make that back bustle part straight or on the bias?
![]() |
S.S. Klondike Sternwheeler |
Anywho, I'm actually planning a sewing project! I have a couple knitting projects to show off soon, but those need some finishing and I can't be bothered right now. ONWARD TO NEW PROJECTS!
Right before leaving for camp, I got seduced by Grainline Studio's Archer pattern, thanks to Lladybird's version. Yes, I know she wasn't happy with her version, but that wasn't because of the pattern itself so much as her execution.
See, it's getting cold here in Yukon, and I need some easy warm tops that I can wear easily at work. As I'm severly lacking in long sleeve button-ups, this seemed the ticket, especially the pretty bustle version!
Since I'm still wanting to support local, I scurried off to our crappy fabric shop to find something decent. I found this...admittedly lovely blue plaid flannel, which should be perfect. I even found some nice metal buttons that add a touch of a professional look (I hope). Anymore decent finds, and I'll have to finally remove that 'crappy' prefix.
Of course, now I just need to finish taping all of these go-damn sheets together. ARRRGGGHH.
Have any of you sewn up this top? Would you make that back bustle part straight or on the bias?
Monday, July 29, 2013
Finished Project: Hummingbirds!
Hey look, I made a couple of Hummingbirds! Uh...way back in late June. Better late than never, eh? Heh.
I believe I already told you guys I was making this pattern up in this fuglovey fabric here. And oh how I love it! Especially the look on my boyfriend's face every time I wear it.
Details:
Cake's Hummingbird (green version)
Straight size 40
Skirt size 40s
No modifications other than the peplum
Sadly, it's a little bit too large, because I should've cut a smaller size for the back. You can see some of the extra fabric in the pic above (in my failed attempt to spin the skirt). See that large fold of fabric? Oh well, I don't care.
Since my fabric was directional I cut the peplum in two pieces, with a seam along the sides to keep the "up" direction on the front and back (otherwise it'd be upside-down at the back). The side seam doesn't even show up.
I did have to topstitch every single seam here, because my fabric is vintage 70's polyester and doesn't take to ironing at all. The plus side is that you could mash this thing into the bottom of your suitcase under a bunch of other crap, and it'll come out crisp and unwrinkled. The negative side is that it's so. damn. hot. ugh.
And then I sewed another one! This one is out of a mystery knit sent to me by a friend from her old fabric collection. It's a lighter-weight, finely-ribbed cotton something-or-other. I suspect there's a small amount of poly in it because it resists wrinkling, but it's still more breathable.
I modified this version by cutting the back in size 35 and modifying the shoulders of the size 40 front to align with the back. I also lowered the neckline a bit by judging how much lower I wanted it in my Fuglovely Hummingbird and just cutting it out. I didn't take into consideration that this fabric is stretchier, and I should've made it a bit higher, but it makes my boyfriend happy! I might add a mock dicky (is there such thing? Isn't a dicky already a mock of something?) if it really bothers me.
![]() |
Love at first twirl! |
Heh, despite using a non-directional fabric, I cut the peplum in two pieces again anyways because I managed to eek this top out of less than 1 m of tubed knit fabric. YAY!
![]() |
Ignore the weird bump on my butt - it's a rogue belt loop. :) |
The only thing that I'm not happy with in this version is the waistline seam. It poofs out a bit in this fabric, an makes me more self-conscious of my tummy. Well, my recent weight gain makes me self-concious of my tummy, this just makes me notice it more! lol Once I dig this top out of the laundry (it's been a constant in my wardrobe) and feel up to sewing again, I'll probably take in the side seams a bit, since it's still a little loose at the waist, and then try to fuse the seam down so that it lies flat.
You'd think that two great tops would be enough of a reward for the sewalong, but then my house, the Sabrewing House managed to sew the most amount of garments, and we won!!! Way to go Sabrewing House, and all the other talented sewists in other houses! It was so much fun to sew with everyone!
If you're still uncertain about this pattern, you should go and check out the sewalong board on flickr. So many fantastic garments, and even some hybrids of Hummingbird and Tiramisu!
Friday, May 17, 2013
Owl Sweater Progress: A Conversation
Heather, isn't that the Owls sweater you were working on a little while ago?
Why yes, it is in fact the Owls sweater I was working on a while ago.
Didn't you rip it all back already once? I thought you were much further along!
Yeah well, I'd ripped it back a while ago and started over, but er...realized it was way too big...again.
How far along were you?!
*mumbles incoherently*
Pardon me?
*coughuptothearmpitscough*
Ah. So this would be your...third time starting this sweater?
...yes.
*headdesk*
Monday, April 22, 2013
No Sewing, but Pretty Pictures and a Weepy Tale.
No sewing was done this weekend because my boyfriend suggested escaping the snow and driving down to Skagway, Alaska for hiking, and how can a girl refuse that?
I did take knitting along for the 3 (*coughtwocough*) hour drive. Got a lot of my Owls sweater done too. Except, I tried it on this morning...
IT'S TOO DAMN BIG!!! WWWWWWWAAAAAAHHHHHHHHH!!!!!! D: D: D: D: D: I even did a few gauge swatches to check that everything was okay, AND IT'S NOOOOOOOOTT. *woe*
Here's my mourning picture before I rip it all back and go down a needle size. :(
*weeps in the corner*
Old train along the White Pass. We're near the Chilkoot Trail, which we're planning to hike this summer. |
The Boyfriend in front of the Frozen Reid Falls - gorgeous! (And so are the falls) |
IT'S TOO DAMN BIG!!! WWWWWWWAAAAAAHHHHHHHHH!!!!!! D: D: D: D: D: I even did a few gauge swatches to check that everything was okay, AND IT'S NOOOOOOOOTT. *woe*
Here's my mourning picture before I rip it all back and go down a needle size. :(
*weeps in the corner*
Friday, April 19, 2013
Local Fabric Shop Challenge: Laurel Top
Okay, so it's not a secret that I'm not a fan of our only local fabric shop. It's got a crappy, overpriced fabric selection, especially considering that most of the bolts don't even have fibre content on it. But now that our local yarn shop has closed (WAAAAAAAAHHHH D:), I'm determined to at least appreciated the fabric shop more, dammit.
I challenged myself to not only buy the fabric I need to make a wearable muslin for Colette's Laurel, but to also use some sort of trim from their admittedly large and pretty selection. I tend to just oogle them and move on.
My main fabric is a boring broadcloth in a lovely shade of green (it's more yellowish in person - my camera hates green). I chose broadcloth and I really didn't want to dish out too much cash on this version. The trim is what makes it fun though, and I love it! I'm going to use it along the hem of the Laural top. I think. Maybe.
Anywho, that's my tentative plan for the weekend. And don't think I've forgotten about my pants! I've been thinking of nothing less for the last two weeks. But this pattern has sort of shanghied my imagination and won't let go, and I want to try out the top first before diving into the dress I plan to make down the road. :)
Tuesday, March 26, 2013
Finished Project: Pavlova Top
Well, that was easier than I thought it would be! I got everything cut out Sunday evening (after procrastitaping the digital copy all friggen afternoon), spent the day procrastinating while trying to do all the mark-ups, and then sewed the entire thing in the evening.
With the help of this:
Steph at Cake Patterns was hosting a Pavlova sewalong over on flickr and her website, and it was great motivation to keep going at it. Here's the details:
Pattern: Pavlova wrap top #0169 (can also buy the top and the skirt individually on Craftsy)
Size: I cut size 40, although my measurements were at the bottom of the range. I could've cut a size 35 for a snugger fit, and probably will next time.
Fabric: Some mystery knit that I bought ages ago to make a cardigan. Might be a cotton poly blend? I have no idea. It's sinfully soft though!
Alterations: None to the size. I did round off the muffin cover so that it'd be more subtle if I wear over a long t-shirt or dress.
Didn't take much, just a plate and a rotary cutter to trim off the excess fabric!
I'm surprisingly pleased with this top. I didn't think that it'd work so much for me since I'm not partial to such short tops. Part of that has to do with the fact that I am most self-conscious of my tummy right below where this top ties. I'm a little bit concerned that I won't reach for this top just for that reason, but I'll give it a shot for a while. I have an idea that if I don't wear it as a top, I can convert it to a cardigan, which I'd probably get more use of.
I pretty much just finished all seams by either zigzagging the seam allowance or using a twin needle (and in some cases, both).
And I added a bit of lace as the tag. I didn't see any point of this beyond decorative, but then I went to put the top on and realized that the neckline is ten billion miles long and having a centre marker is a good thing!
The lapped seam at the neckline makes no sense whatsoever when reading the instructions, and then totally does when you just start doing it. Trust Steph and just go with it, and remember: it's a lapped seam.
I'm really amazed by the range of motion in this top! With the muffin cover tucked into the back of my skirt, I can wiggle around and raise my arms and bend over, and everything stays where it is. Including the girls!
Overall, I'm pleased with this top! It was quick to put together (there's only 6 pieces total when cut out, 4 pattern pieces), has some unique construction methods, and suits every body type (check out the flickr group photos if you don't believe me)! I think the only thing that may hold me back from wearing this as often as it deserves is the length, and as Steph has mentioned, there are ways to lengthen it too.
Are any of you considering making this top? Which of the above styles do you like best: tied in the front (top and bottom picture), tied loosly in the back (third picture), or loose as a cardigan (sixth picture)?
With the help of this:
![]() |
Fortitude. |
Steph at Cake Patterns was hosting a Pavlova sewalong over on flickr and her website, and it was great motivation to keep going at it. Here's the details:
![]() |
Tied loosly in the back. |
Pattern: Pavlova wrap top #0169 (can also buy the top and the skirt individually on Craftsy)
Size: I cut size 40, although my measurements were at the bottom of the range. I could've cut a size 35 for a snugger fit, and probably will next time.
Fabric: Some mystery knit that I bought ages ago to make a cardigan. Might be a cotton poly blend? I have no idea. It's sinfully soft though!
Alterations: None to the size. I did round off the muffin cover so that it'd be more subtle if I wear over a long t-shirt or dress.
Didn't take much, just a plate and a rotary cutter to trim off the excess fabric!
![]() |
Worn with ties loose as a cardigan. |
![]() |
Sweet mother of pearl, look at these ties! Definitely have to hack these off if I choose to convert it as a cardi. |
I'm surprisingly pleased with this top. I didn't think that it'd work so much for me since I'm not partial to such short tops. Part of that has to do with the fact that I am most self-conscious of my tummy right below where this top ties. I'm a little bit concerned that I won't reach for this top just for that reason, but I'll give it a shot for a while. I have an idea that if I don't wear it as a top, I can convert it to a cardigan, which I'd probably get more use of.
I pretty much just finished all seams by either zigzagging the seam allowance or using a twin needle (and in some cases, both).
And I added a bit of lace as the tag. I didn't see any point of this beyond decorative, but then I went to put the top on and realized that the neckline is ten billion miles long and having a centre marker is a good thing!
The lapped seam at the neckline makes no sense whatsoever when reading the instructions, and then totally does when you just start doing it. Trust Steph and just go with it, and remember: it's a lapped seam.
I'm really amazed by the range of motion in this top! With the muffin cover tucked into the back of my skirt, I can wiggle around and raise my arms and bend over, and everything stays where it is. Including the girls!
I'm sorry about the BAM FACE. But look, no gaping! |
Are any of you considering making this top? Which of the above styles do you like best: tied in the front (top and bottom picture), tied loosly in the back (third picture), or loose as a cardigan (sixth picture)?
Subscribe to:
Posts (Atom)