Showing posts with label cake patterns. Show all posts

Wednesday, October 30, 2013

Itchin' for a Skirt

It's weird weather here in southern Yukon - hovering around zero and the snow disappears almost as soon as it lands.  Odd for this part of the world at this time of the year.

It's making me want to wear warm skirts - or skirts with leggings (I blame Steph and her new leggings pattern).

I've also been wanting to try out her Hummingbird Orange skirt pattern, which needs less than a metre of fabric.  Incidentially, I've had this gorgeous burgundy corduroy kicking around for years, because there's only slightly less than a metre of it.

Coincidence?  I call Fate.


Now if only I knew what I did with the pattern pieces...

*~*~*~*~*

I promised a post on my Archer button-up last week.  It is finished!  I just loath my camera with all the passion in the universe, and not inspired to take pictures with it at all.  I'll suck it up this week and do it.  Just be prepared for a slightly frustrated photoshoot.  Here's a teaser, just to proove that it's done and that I actually wear it!

Because I would almost live in this thing (with one very important adjustment), if I could get away with it.

Saturday, September 7, 2013

Finished Project: Tiramisu (Finally!)

Posing next to one of our backyard saskatoon berry bushes.
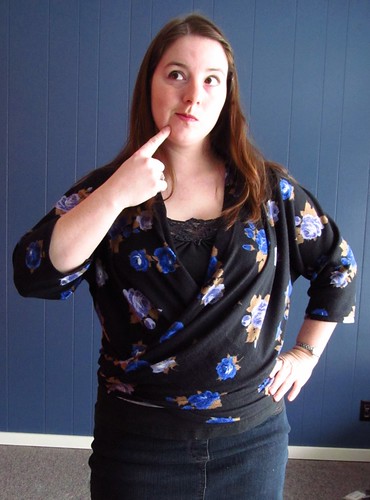
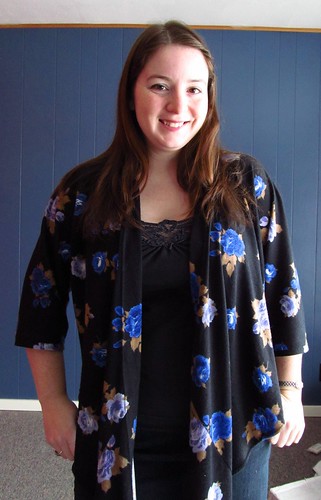
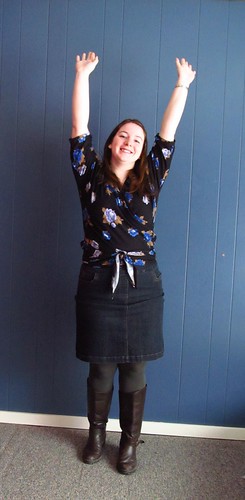
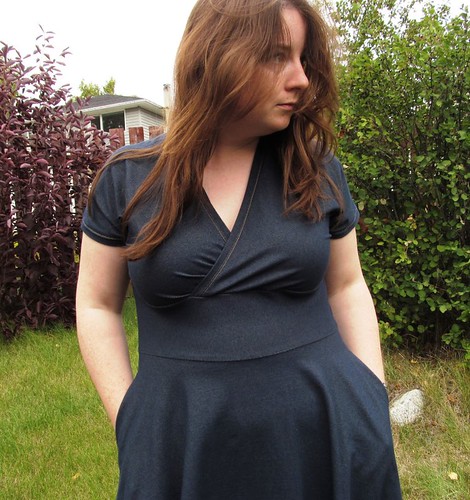
Please allow me to (finally) introduce the denim Tiramisu! 

Okay, not really denim, but a denim-like knit Tira.  Poor thing has been cut and partially sewn together since JanuaryWhy did I wait so long?!

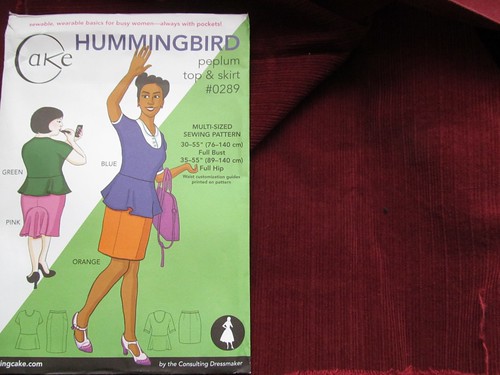
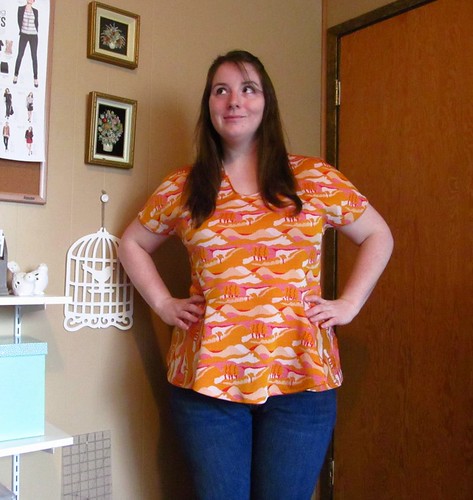
For the people who don't know about this dress (I'm only assuming there's a few of you - although you must be living under a rock!), it's the Tiramisu dress, the first pattern launched by Cake Patterns.  Steph at Cake has put out a scad of them, and I've already made up her Pavlova and Hummingbird tops.

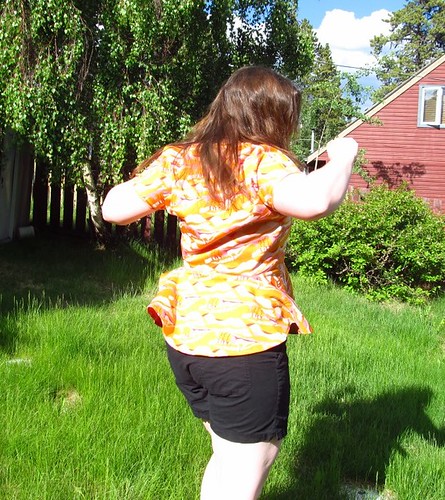
Saskatoons to the left of me, chokecherries to the right, here I am stuck in the middle with Tira.
Details
Pattern: Tiramisu Knit Dress #0144
Size: 35 back bodice, 40C front bodice, waist and hip cut to my size (can't remember what I cut, but my waist and hips measure at 36" and 45" repectively).
Fabric: A denim-like sturdy medium-weight knit bought at our Crappy Local Fabric Shop, a diamond in the rough and the reason I still wander through there now and again.  Sadly, I have no idea of the composition because our Crappy Local Fabric Shop doesn't bother to put fibre content on any of their bolts.
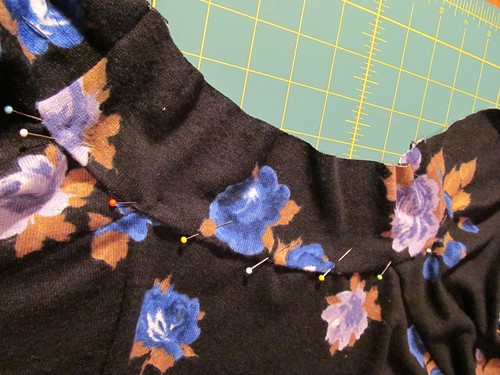
Alterations: Sigh. Because I cut this out so long ago, I don't entirely remember.  I do know that my 
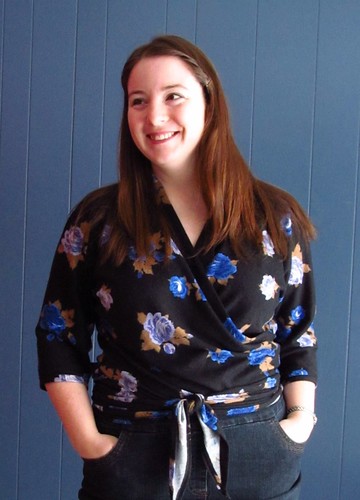
first bodice attempt was way too small, so I recut with a larger size.  I also had this almost all sewn together when I picked this up again last month, so other than needing to resew the underbust seam to bring the bodice wraps a bit closer together, I don't remember any other alterations.  I do know that next time I make up this pattern, I'll probably try cutting out the front bodice in size 35D, since the shoulder seams pull toward the back and there's some extra fabric above my bust.  Well, I'll try a toile of it, anyways.  I'm pretty happy with the fit as it is anyways, so we'll see if it improves it at all.

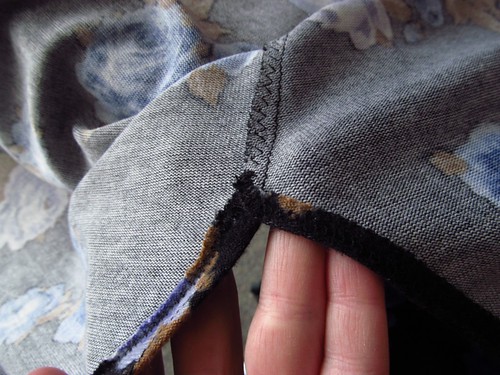
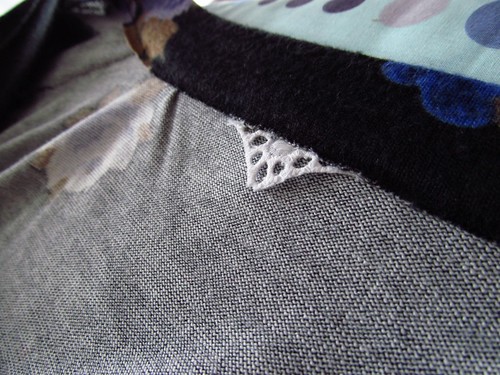
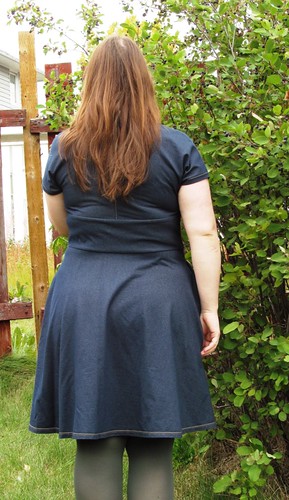
I did make a mistake in the construction though.  I understitched the pockets in the back skirt piece, but I completely forgot to on the front skirt piece.  Who knew that there were 4 pocket pieces?!  This causes the pockets to gape and stick out a little bit on the front skirt, but it really doesn't bother me.

I'm pretty chuffed about all the gold topstitching I did.  Because it was denim-looking, I embraced the jean look by sticking topstitching wherever I could!  I did a lot on the bodice piece, at the centre back and shoulder seams, around the sleeve hems, at the faux-wrap edges, and a double stitch hem around the skirt.  I really wanted to add more, especially around the under-bust and waist seams, but I thought this might be too much, and also make me more self-conscious.  That second one strikes me as being stupid, but sometimes you need to let your insecurities win sometimes when it means feeling so comfortable in a dress that makes you look and feel good!

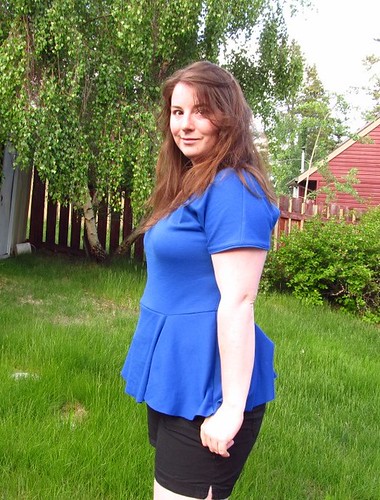
Need to harvest these berries this weekend! Winter is on it's way, here in Yukon.
There is some wrinkles, bumps and lumps in the back.  Some of it (like at the underarm) could probably be fitted out, and I suspect will be helped with a change in the front bodice size.  Others are just my natural bumps and lumps, and I'd rather not focus too much on those.  Silly back lumps.  :)

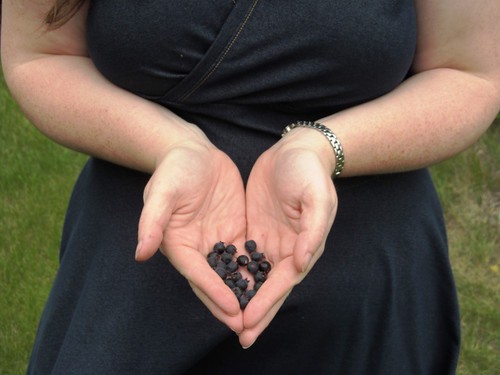
Mmm...saskatoon tiramisu anyone?
Seriously, this dress is probably the most comfortable and flattering dress I've ever made and worn.  While I love Cake Patterns, I don't find that I reach for my Pavlova or Hummingbirds that often.  But this dress?  I finished it just a couple weeks ago, and the only thing that's kept me from wearing it more often is that I'm a slacker when it comes to laundry.  It's comfortable enough for kicking around the house, casual enough for running around and meeting friends for coffee, and pretty enough to wear to a wedding!  (All of which I've done in the last few weeks.)

Now if you'll excuse me, I have some saskatoons to go pick.  Yes, in my Tiramisu!  Now where did I put that ladder...

Monday, July 29, 2013

Finished Project: Hummingbirds!


Hey look, I made a couple of Hummingbirds!  Uh...way back in late June.  Better late than never, eh?  Heh.

I believe I already told you guys I was making this pattern up in this fuglovey fabric here.  And oh how I love it!  Especially the look on my boyfriend's face every time I wear it. 

Details:
Cake's Hummingbird (green version)
Straight size 40
Skirt size 40s
No modifications other than the peplum

Sadly, it's a little bit too large, because I should've cut a smaller size for the back.  You can see some of the extra fabric in the pic above (in my failed attempt to spin the skirt).  See that large fold of fabric?  Oh well, I don't care.

Since my fabric was directional I cut the peplum in two pieces, with a seam along the sides to keep the "up" direction on the front and back (otherwise it'd be upside-down at the back).  The side seam doesn't even show up.

I did have to topstitch every single seam here, because my fabric is vintage 70's polyester and doesn't take to ironing at all.  The plus side is that you could mash this thing into the bottom of your suitcase under a bunch of other crap, and it'll come out crisp and unwrinkled.  The negative side is that it's so. damn. hot. ugh.

And then I sewed another one!  This one is out of a mystery knit sent to me by a friend from her old fabric collection.  It's a lighter-weight, finely-ribbed cotton something-or-other.  I suspect there's a small amount of poly in it because it resists wrinkling, but it's still more breathable.

I modified this version by cutting the back in size 35 and modifying the shoulders of the size 40 front to align with the back.  I also lowered the neckline a bit by judging how much lower I wanted it in my Fuglovely Hummingbird and just cutting it out.  I didn't take into consideration that this fabric is stretchier, and I should've made it a bit higher, but it makes my boyfriend happy!  I might add a mock dicky (is there such thing?  Isn't a dicky already a mock of something?) if it really bothers me.

Love at first twirl!
Since this fabric doesn't fray or roll at all, I embraced my inner lazy sewist and didn't bother hemming the peplum skirt.  Actually, I might still trim the skirt a bit, I think it's a bit too long, looking at these photos.

Heh, despite using a non-directional fabric, I cut the peplum in two pieces again anyways because I managed to eek this top out of less than 1 m of tubed knit fabric.  YAY!

Ignore the weird bump on my butt - it's a rogue belt loop. :)

The only thing that I'm not happy with in this version is the waistline seam.  It poofs out a bit in this fabric, an makes me more self-conscious of my tummy.  Well, my recent weight gain makes me self-concious of my tummy, this just makes me notice it more!  lol  Once I dig this top out of the laundry (it's been a constant in my wardrobe) and feel up to sewing again, I'll probably take in the side seams a bit, since it's still a little loose at the waist, and then try to fuse the seam down so that it lies flat.

You'd think that two great tops would be enough of a reward for the sewalong, but then my house, the Sabrewing House managed to sew the most amount of garments, and we won!!!  Way to go Sabrewing House, and all the other talented sewists in other houses!  It was so much fun to sew with everyone!

If you're still uncertain about this pattern, you should go and check out the sewalong board on flickr.  So many fantastic garments, and even some hybrids of Hummingbird and Tiramisu! 

Saturday, June 15, 2013

Hummingbird Sewalong - Sabrewing House

My Hummingbird pattern just arrived, and it look like I'm in Sabrewing House for the sewalong!  I'm ridiculously pleased that not only am I home for the Hummingbird sewalong this coming week, but my pattern actually made it in time for it.


Now I just need to decide which of these knits I'll use first.

Oh who am I kidding, it's definitely going to be this fugly one:

Tuesday, March 26, 2013

Finished Project: Pavlova Top

Well, that was easier than I thought it would be!  I got everything cut out Sunday evening (after procrastitaping the digital copy all friggen afternoon), spent the day procrastinating while trying to do all the mark-ups, and then sewed the entire thing in the evening.

With the help of this:
Fortitude.

Steph at Cake Patterns was hosting a Pavlova sewalong over on flickr and her website, and it was great motivation to keep going at it.  Here's the details:

Tied loosly in the back.

Pattern: Pavlova wrap top #0169 (can also buy the top and the skirt individually on Craftsy)
Size: I cut size 40, although my measurements were at the bottom of the range. I could've cut a size 35 for a snugger fit, and probably will next time.
Fabric: Some mystery knit that I bought ages ago to make a cardigan. Might be a cotton poly blend?  I have no idea. It's sinfully soft though!
Alterations: None to the size. I did round off the muffin cover so that it'd be more subtle if I wear over a long t-shirt or dress.


Didn't take much, just a plate and a rotary cutter to trim off the excess fabric!

Worn with ties loose as a cardigan.
Sweet mother of pearl, look at these ties! Definitely have to hack these off if I choose to convert it as a cardi.

I'm surprisingly pleased with this top.  I didn't think that it'd work so much for me since I'm not partial to such short tops.  Part of that has to do with the fact that I am most self-conscious of my tummy right below where this top ties.  I'm a little bit concerned that I won't reach for this top just for that reason, but I'll give it a shot for a while.  I have an idea that if I don't wear it as a top, I can convert it to a cardigan, which I'd probably get more use of.

I pretty much just finished all seams by either zigzagging the seam allowance or using a twin needle (and in some cases, both).

And I added a bit of lace as the tag.  I didn't see any point of this beyond decorative, but then I went to put the top on and realized that the neckline is ten billion miles long and having a centre marker is a good thing!

The lapped seam at the neckline makes no sense whatsoever when reading the instructions, and then totally does when you just start doing it.  Trust Steph and just go with it, and remember: it's a lapped seam.

I'm really amazed by the range of motion in this top!  With the muffin cover tucked into the back of my skirt, I can wiggle around and raise my arms and bend over, and everything stays where it is.  Including the girls!

I'm sorry about the BAM FACE.  But look, no gaping!
Overall, I'm pleased with this top!  It was quick to put together (there's only 6 pieces total when cut out, 4 pattern pieces), has some unique construction methods, and suits every body type (check out the flickr group photos if you don't believe me)!  I think the only thing that may hold me back from wearing this as often as it deserves is the length, and as Steph has mentioned, there are ways to lengthen it too.

Are any of you considering making this top?  Which of the above styles do you like best: tied in the front (top and bottom picture), tied loosly in the back (third picture), or loose as a cardigan (sixth picture)?
Related Posts Plugin for WordPress, Blogger...