Yep, that's right, I spent a rare day in my sewing room. I've been itching to get in there for a while now, so you can probably imagine the contented smile on my face right now.
Sadly, only half of the last 5 hours was spent sewing. This morning was spent digging out my sewing room from the epic storm that seemed to blow through. Cripes, how does it wind up such a disaster without any sewing going on?!
Anywho, I MADE PANTIES!!
I've been wanting to make more of these suckers for a while. I'm still wearing two of the pairs I made back in 2010 since they're the most comfortable panties I own and I don't ever want to give them up! Yikes, that's a long time ago. Definitely time to make some new ones!
I'm not going to go into much detail about the construction or tracing the pattern, as they're very similar to how I did the last set and I added some useful links in that post. I did spend some time yesterday reading through Zoe's (of So Zo...) series of blog posts on making panties, and she has a free pattern available if you don't want to try tracing your own. Really helpful stuff!
These were really just a trial run of the pattern I traced this afternoon from a pair of beloved-but-sadly-unwearable La Senza panties. This time I was smart and traced them onto some stiff muslin fabric to create a more durable pattern.
For the trial run, I cut up an old comfy-but-indescribably-unflattering top I originally found at a thrift shop and has been hanging out in my To-Be-Reconstructed Bin for years.
This was the first time I've sewn elastic like this, first stitching the elastic and fabric right sides together, then flipping the elastic under and using a three-stitch zig-zag overtop. Boy do I need practice keeping a straight zig-zagged seam on wiggly elastic!
All in all, I'm pretty pleased with them, other than the horrible job I did on the
elastic. And you can't really see once it's all said and done - at
least, not from the front. I've learned to use a light coloured thread when
using a light coloured elastic - boy does the underside look horrible.
The traced pattern turned out to be really comfortable! I love how odd the leg holes look flat, but they have good bum coverage because of it, yet doesn't dig into my legs in the front. Though one thing I'll need to remember in the future is to tighten up the elastic as it goes over the bum area of the leg holes. The elastic wound up a bit too loose in that area, and tightening it up should snug it up to my bum a bit more.
Things you all obviously need to know. You're welcome.
So yeah, I'd call these a success. Time to start cranking these suckers out, assembly-line style!
Have any of you converted to me-made panties yet? I sort of want to replace all of my current stock with them!
Showing posts with label finished object. Show all posts
Thursday, May 22, 2014
Tuesday, March 4, 2014
Oh Look - A Top Completed in One Day. Who'd a Thunk.
Will do a proper post tomorrow once I get some better pics, but I couldn't resist sharing tonight. SO HAPPY! Why yes, I did manage to get my Tonic Tee done today!
I absolutely adore it. It's the perfect t-shirt! And now I'm going to go try to snuggle with the Neglected Boyfriend. He's come to bug me 3 times in the last hour, so I think he wants attention.
| No make-up, a bit crazy-eyed, but the t-shirt is done. Can I haz a TNT? Why yes I can! |
I absolutely adore it. It's the perfect t-shirt! And now I'm going to go try to snuggle with the Neglected Boyfriend. He's come to bug me 3 times in the last hour, so I think he wants attention.
Sunday, March 2, 2014
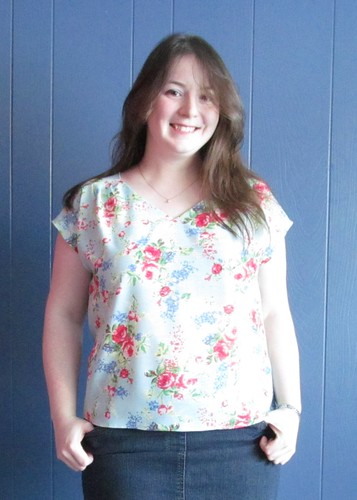
Finished Project (!!!!): Simplicity 2594 Top
![]() |
| I am so sorry about how washed out some of these pics are. My camera is a dick and hates any and all lighting conditions. And me. |
Which took me the whole weekend to finish. *facepalm*
Here's the basics:
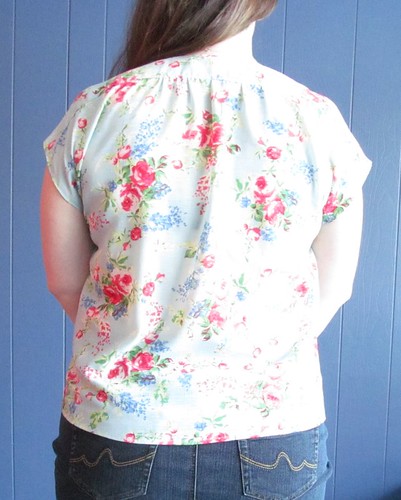
Pattern: Simplicity 2594, view E.
Size: I cut size 16, two sizes smaller than my body measurements. This garment has 7 inches of ease.
Fabric: Lightweight 100% polyester I bought who the heck knows when.
Alterations: NO FBA! So much ease. It appears that I did draft out some of the drape in the back. Thanks Past Heather, I appreciate that!
I made up this pattern a couple of years ago, in view B. I still have that top, and while I do wear it now and then, it's not a go to top because the cowl annoys the living crap outta me. But I like the loose fit of it, so I guess I thought view E would be a good choice.
I like the loose back, although I'm glad I took out some of the upper back fullness. Not sure how bad the fabric-eating-armpits really are (stupid camera and it's hatred of all lighting conditions - even the low diffused light like above), but I don't really care. It's comfortable with a high mobility range.
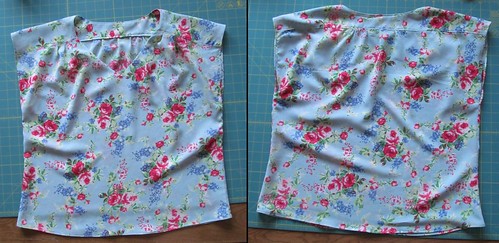
This pattern has some gorgeous details that I didn't notice as much in my black polkadot version. Like these gorgeous pleats at the front shoulder yoke.
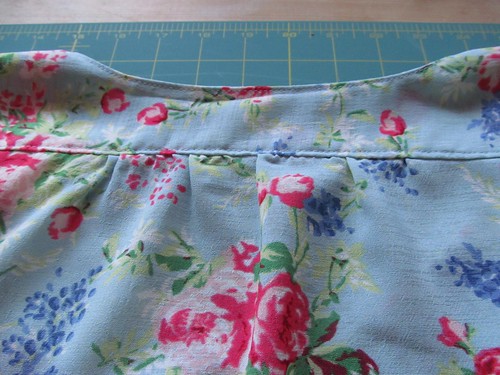
And the back gathers below the yoke. Which I totally should've put more effort into, but oh well.
I topstitched all of the seams, whether the instructions said to or not, because polyester will not hold a press at all. Or not in my experience anyways. The only exception was the neckline. It's faced with a piece of interfaced self-fabric. When I went to topstitch, I realized that I love the look of it without the stitches. Not sure how it's going to hold up long term, but the understitching is holding for now. We'll see how it handles repeated washings.
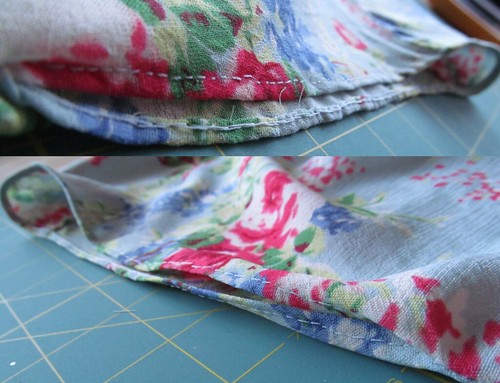
I french-seamed the side seams and did a pseudo-rolled hem at the bottom. For the sleeve openings, I decided to attempt a hand-rolled seam (with visible stitches. The first one, at the top, looks like crap. I decided to run a line of machine stitches along one of the turning lines 1/8" from the edge. Since the fabric is so thin, the stitches pulled too much, creating the horrible crinkling you can see above. The bottom picture was done without the line of machine stitches, and it looks so much better. Plus my handstitching improved with the practice.
I spent a very peaceful couple of hours this morning, lounging on the couch handsewing while the Boyfriend kept refilling my coffee. :)
There's not a lot of shaping to this garment, and I probably should've taken out a bit of width around the waist (yes, even going down two sizes, this was a little too baggy). But I like the looseness, especially since it's offset by the clingy nature of this very light polyester.
And of course, since this was meant to be a layering top, I'll be hiding all of those pretty details under my cardigans. Hehe oops.
Well, I may just wear this top on it's own this summer, because it is awfully pretty! Did I mention that I adore it? So so comfortable (despite the staticy cling), and so so adorable. Seriously, I need to find some really lightweight cotton to make some more. Although I really do want figure out how the lengthen the sleeves without sewing a rectangle to them. Don't like drop sleeves.
Friday, February 28, 2014
Homemade Garter Tutorial
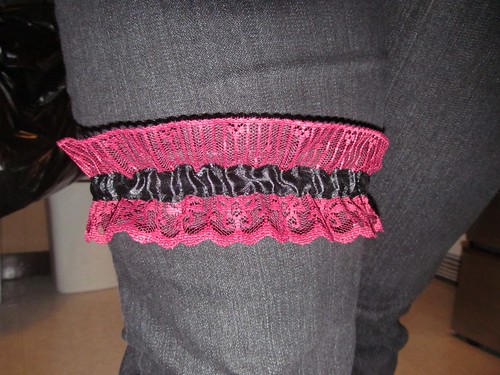
For reasons mentioned here, I had the fun opportunity to sew up a garter! And it was so much easier than I expected. Still, some people were surprised when I said I'd made it myself, so I thought I'd throw together a very quick and dirty tutorial on how to sew one.
Please forgive the powerpoint pictures. IF IT'S GOOD ENOUGH FOR MY M.Sc. THESIS*, IT'S GOOD ENOUGH FOR THIS BLOG. I ain't no fancy photoshopper or photo editor!
Anywho, here's what you need:
- 1/4 inch elastic - length needed to snugly fit around your thigh (where you want the garter) stretched out tight.
- ~3/4 m wide lace - mine was ~2.5 inches wide.
- ~3/4 m ribbon - mine was 5/8 inch wide.
- Matching thread.
![]() |
| Legend for my upcoming awesome Powerpoint figures |
STEP 1: Attaching Elastic to the Lace
![]() |
| Look at that sweet elastic and lace drawing! Stretch that elastic as much as possible as you sew. Don't worry if you have excess lace. |
I found it easiest to control the lace and elastic if I held both ends as it passes through the machine. Make sure to backstitch at the beginning and end to solidify the stitch!
STEP 2: Sewing on the Ribbon
This part is a little tricky. Tack the ribbon to the lace at one end with the elastic sandwiched between the two. I recommend having the lace on top and the ribbon on the bottom. You could have the ribbon on top, but I found it easier to see if the elastic was covered when looking through the lace.
Most normal people would probably pin this. I eyeballed it. What can I say, I'm lazy.
With the elastic and lace part stretched as far as possible, sew along one side of the ribbon through the lace using a straight stitch, catching just outside the elastic if possible. (Don't worry if you sew through the elastic, just make sure it's stretched out.) Sew to the end of the elastic, and backstitch.
Repeat on the other side of the ribbon. The set up for these two rows are fiddly, but it gets easier once you start sewing.
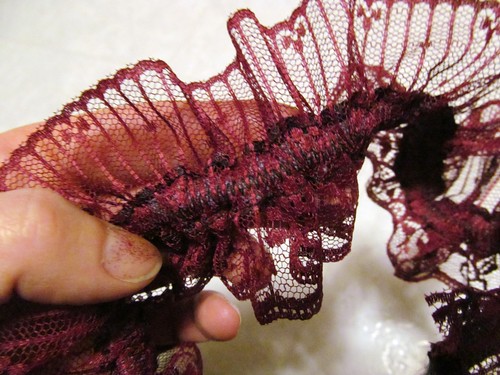
The above photo is the underside of the garter. See how the elastic is zigzag stitched to the lace, and the ribbon is straight stitched to the lace, sandwiching the elastic.
STEP 3: Snip and Seam
This part is easy. Snip off the excess lace and ribbon, where the elastic ends...
...then line up the ends, wrong sides together, and stitch a straight-stitch seam up the side. I backstitched over the elastic portion a few times to give the seam more strength.
Snip your threads, trim your seam (if needed), and you're done! Easy peasy. Wear your gorgeous hot little garter with pride and proudly flaunt that you made it yourself. Brace yourself with demands to make everyone else one.
* I'm serious, I created most of my M.Sc. thesis figures and diagrams in Powerpoint. It's a point of pride for me.
Tuesday, January 28, 2014
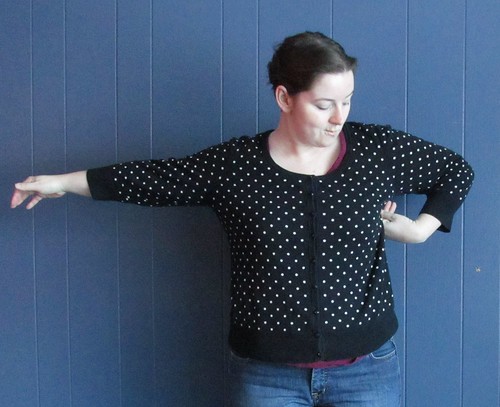
Baggy Too Loose Cardigan to Cute Semi-Fitted Sweater
![]() |
| POLKADOTS!!! |
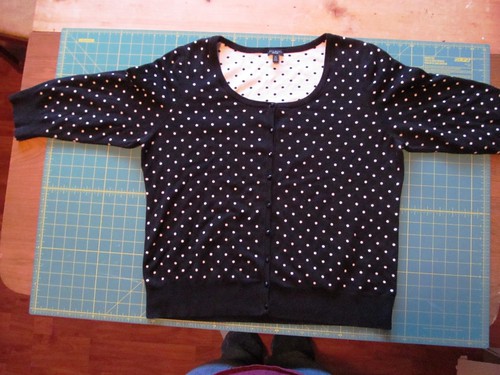
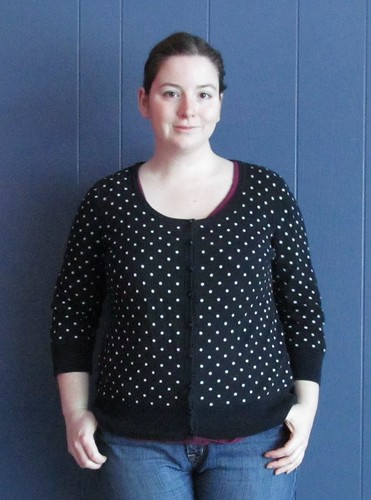
And boy did it not fit. I guess it wasn't too bad, but bad enough that I proceeded to not wear it at all (despite the polkadots). See how thrilled I look? It was too wide across the shoulders, too wide across the body, and the armpits were about 2-3 inches away from mine when I stretched my arms out. And it looked awful unbuttoned. What's a sewist to do?!
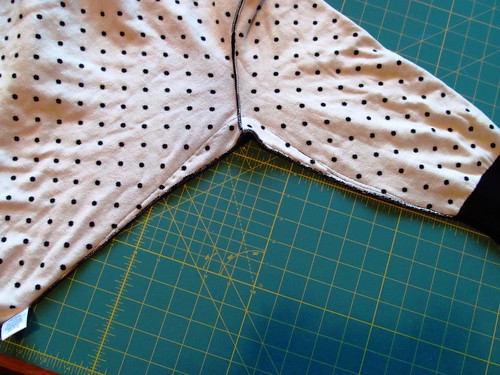
Obviously shove it under the sewing machine and hope for the best. So I did just that, right before leaving for camp again in January*, marking out how much and where I wanted to take it in, and then sewing it up. Well, one side of it, anyways. And then abandoned it in last-minute work preparations.
First thing I did on getting home last week was trim my seam allowance from the one side...
...then taking a page from Lauren method of transfering aterations from one pant leg to the other, I folded the cardigan in half and traced out the seam allowance, then sewed 1/4 inch away from that line. Easy peasy. A bit of trimming and I was done!
Well, other than a bit of quick handsewing to close up the front so that it went from cardigan to sweater. This is the one time I prefer a sweater to a cardigan.
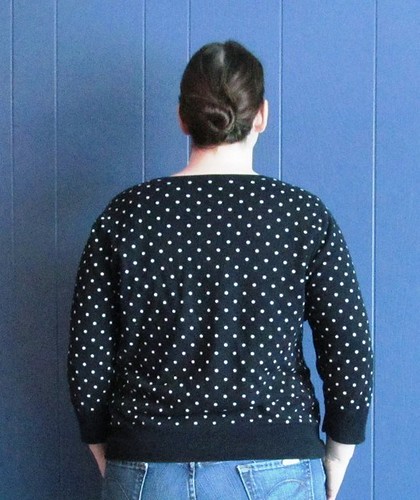
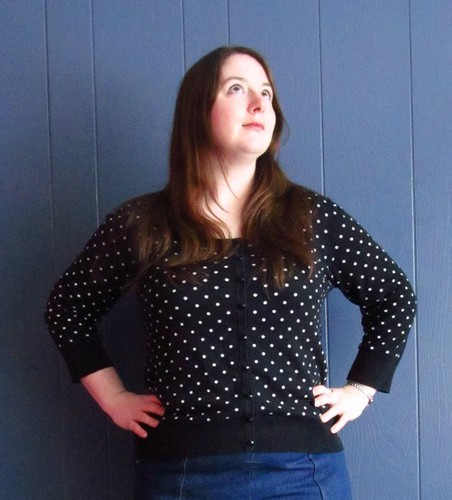
And Voila! A nearly instant (if you ignore the months I dithered over this) sweater that I've barely taken off since fixing! Look! The armpits are actually close to mine! Much better.
Also, remind me to never wear my hair up ever again! YEASH that's not a good look on me. (And no, I'm not fishing for compliments - at least, not on my hair! lol)
* Oh yeah, did I forget to mention that? The silly mine called be back, again. This time as a production geologist in a more essential (and less expendable) position, so here's to hoping that I don't get laid off from them a third time. But if I do, at least I'm an old hat at it? lol
Wednesday, January 22, 2014
Dishies for a Friend
| DISHCLOTH TACOS! |
I certainly didn't envy them the trip.
| Love the textures on these easy to make dishcloths. Great for scrubbing dirty dishes! |
| They kind of turned out a bit...skewed... |
Still, pretty little dishcloths. Pair them with a gift card to Canadian Tire and a babbly letter, and I think that makes for a nice Housewarming gift, don't you agree?
Wednesday, December 18, 2013
Cute Little Hooters
This year, we're spending Christmas at the Boyfriend's Best Friend's Parents place, which will be fun and is so kind of them to invite non-family to their family event. And I thought it would be nice to make them all toques, because they're all outdoorsy people and winter outdoorsy people, and you can never have enough toques.
So while I should've been working on all of these toques, I instead made my coworker's daughter (who I've never met) a toque instead. Because I am the Queen of Procrastination. lol I tried to say no, but the project burrowed it's way into my brain and shoved all other projects out.
I was originally going to make it out of the bright pink yarn you can see hints of in the toque, but it's a bit of a scratchy wool, and it's for a kid...plus wool needs special handling...nope, wasn't going to work. So instead I used some admittedly soft acrylic I happened to have in camp with me, and I'm so glad that I did. Easy care, super soft, and will take a beating. And then added some pink touches, since the girl really loves pink!
As you can see, it's a bit small for an adult's head, but it'll be perfect for the little 8-year-old recipient. The coworker is knit-worthy, considering all of the stuff he's done for me, last minute mind, without complaining. My job would've been a lot harder without his help!
Someday, I'm going to make myself one of these...
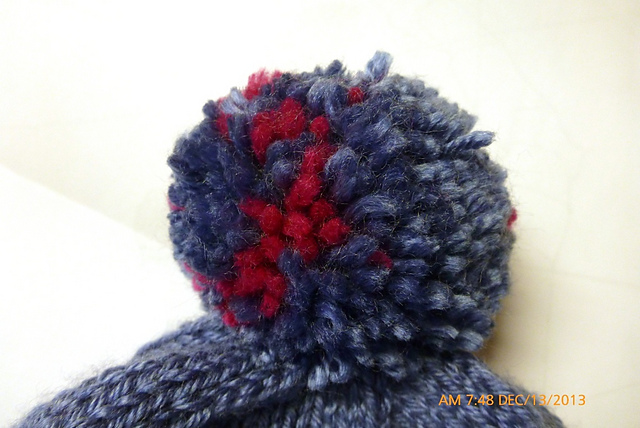
The very best part of this toque is this:
Obviously ALL THE TOQUES will need pompoms now, because I've forgotten just how much fun they are to make!
Monday, September 9, 2013
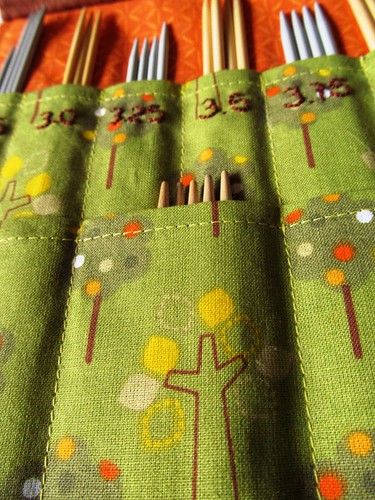
Finished Project: Double Point Knitting Needle Case
It took a couple extra days, but I finally finished my double point knitting needle case! (For those who don't know what those are, they're needles that have sharpened points on both sides of the needle, hense 'double point'.)
The pattern is from a tutorial by Crafty Avocado. She walks you through the instructions clearly with lots of pictures. I did make a few changes though (which I'll detail below), and if I were to make it again, I'd make a few more based on personal preference. Great tutorial though!
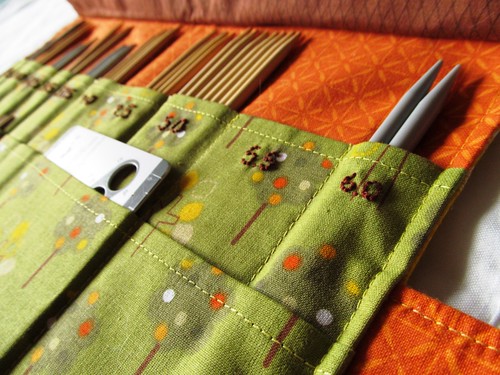
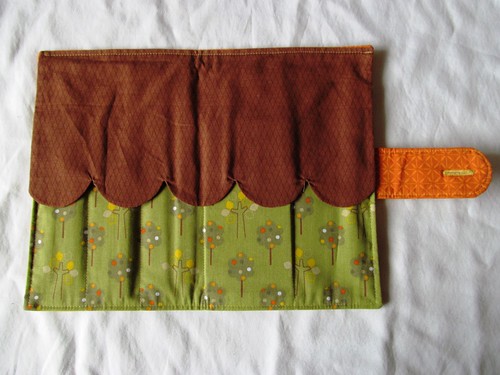
Case opened! The tutorial just had you do the protective flap with a straight edge along the bottom, but I wanted scallops to emulate the little trees in the green fabric below! I also rounded off the buttonhole tab for the same reason.
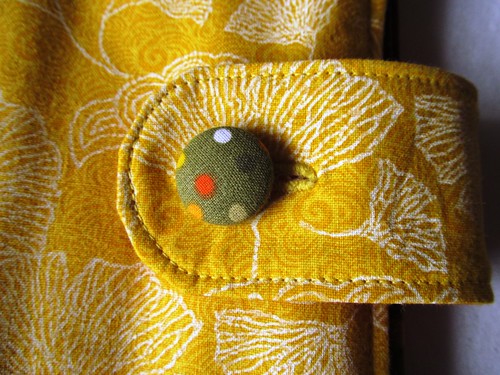
How do you like my self-covered button? I managed to centre one of the trees exactly on the button *cough*on my second try*cough.
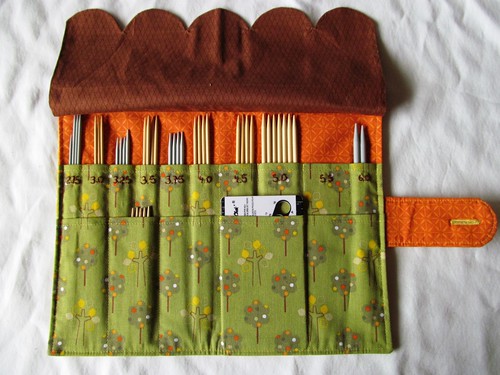
And here's the flap opened, revealing the needles underneath! The flap keeps the needles slipping out of the case when it's closed up, something I neglected to do when I made Fuss that crochet hook case. Oops.
Another change I made was the stitching order. The tutorial had you stitch down all of the upper pocket seams first, then the lower pocket seams, matching up with the upper seams where needed. Instead, I stitched all of the upper pocket seams that didn't line up with the lower pockets, then stitched both at once in one long seam so that they'd line up perfectly. (I hope that makes sense - I'm a little confused trying to explain it.) I did, however, backstitch at the top of the lower pocket for more strength before continuing on.
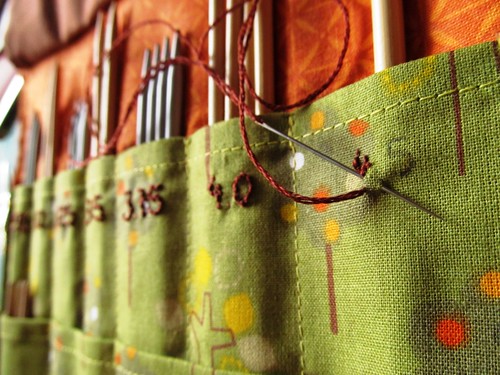
The hand embroidery was...tedius. All I can say is that it seemed like a good idea at the time. If you decided to do something similar, I recommend that younot do it stick a larger knitting needle in the pocket to prevent yourself from catching the lining with the sewing needle. It also makes it easier to stitch with a bit of support behind the fabric.
Now I just need to order a set of 5.5 mm needles to fill that gap! The needles I have here are all the ones I can get in town. :(
Overall, I'm pretty pleased with this case. It was handy to have at the knit night I organized for last night, especially when one of the women asked if I had any DPNs on hand and I could say YES! I think that I'd make more smaller pockets next time though, and maybe a flapped or zippered pocket for adding a few stitch markers (I'm always desperate for them and it's getting annoying finding them in pants pockets, the bottom of my purse, in amongst spare change, under couch cushions...).
I'd originally planned to use the fabric I found in Alaska a few weeks ago, but when I went to find coordinating fabric, I fell in love with the green tree fabric. And then I found the yellow fabric for the outside of the case. The orange and brown just cemented it and I changed directions. Oh well. Maybe I'll use it when I make a case for my circular needles. I might have to design that one myself...
The pattern is from a tutorial by Crafty Avocado. She walks you through the instructions clearly with lots of pictures. I did make a few changes though (which I'll detail below), and if I were to make it again, I'd make a few more based on personal preference. Great tutorial though!
Case opened! The tutorial just had you do the protective flap with a straight edge along the bottom, but I wanted scallops to emulate the little trees in the green fabric below! I also rounded off the buttonhole tab for the same reason.
How do you like my self-covered button? I managed to centre one of the trees exactly on the button *cough*on my second try*cough.
And here's the flap opened, revealing the needles underneath! The flap keeps the needles slipping out of the case when it's closed up, something I neglected to do when I made Fuss that crochet hook case. Oops.
Another change I made was the stitching order. The tutorial had you stitch down all of the upper pocket seams first, then the lower pocket seams, matching up with the upper seams where needed. Instead, I stitched all of the upper pocket seams that didn't line up with the lower pockets, then stitched both at once in one long seam so that they'd line up perfectly. (I hope that makes sense - I'm a little confused trying to explain it.) I did, however, backstitch at the top of the lower pocket for more strength before continuing on.
The hand embroidery was...tedius. All I can say is that it seemed like a good idea at the time. If you decided to do something similar, I recommend that you
Now I just need to order a set of 5.5 mm needles to fill that gap! The needles I have here are all the ones I can get in town. :(
Overall, I'm pretty pleased with this case. It was handy to have at the knit night I organized for last night, especially when one of the women asked if I had any DPNs on hand and I could say YES! I think that I'd make more smaller pockets next time though, and maybe a flapped or zippered pocket for adding a few stitch markers (I'm always desperate for them and it's getting annoying finding them in pants pockets, the bottom of my purse, in amongst spare change, under couch cushions...).
I'd originally planned to use the fabric I found in Alaska a few weeks ago, but when I went to find coordinating fabric, I fell in love with the green tree fabric. And then I found the yellow fabric for the outside of the case. The orange and brown just cemented it and I changed directions. Oh well. Maybe I'll use it when I make a case for my circular needles. I might have to design that one myself...
Saturday, September 7, 2013
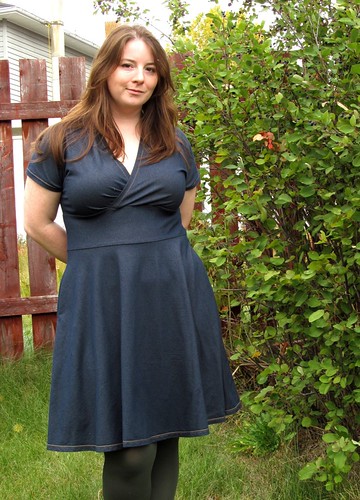
Finished Project: Tiramisu (Finally!)
![]() |
| Posing next to one of our backyard saskatoon berry bushes. |
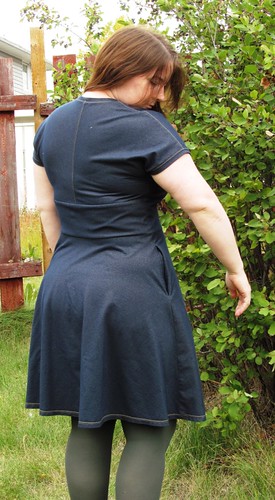
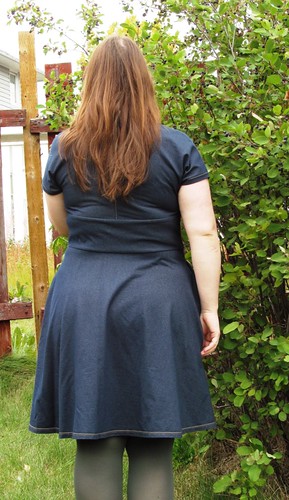
Okay, not really denim, but a denim-like knit Tira. Poor thing has been cut and partially sewn together since January. Why did I wait so long?!
For the people who don't know about this dress (I'm only assuming there's a few of you - although you must be living under a rock!), it's the Tiramisu dress, the first pattern launched by Cake Patterns. Steph at Cake has put out a scad of them, and I've already made up her Pavlova and Hummingbird tops.
![]() |
| Saskatoons to the left of me, chokecherries to the right, here I am stuck in the middle with Tira. |
Pattern: Tiramisu Knit Dress #0144
Size: 35 back bodice, 40C front bodice, waist and hip cut to my size (can't remember what I cut, but my waist and hips measure at 36" and 45" repectively).
Fabric: A denim-like sturdy medium-weight knit bought at our Crappy Local Fabric Shop, a diamond in the rough and the reason I still wander through there now and again. Sadly, I have no idea of the composition because our Crappy Local Fabric Shop doesn't bother to put fibre content on any of their bolts.
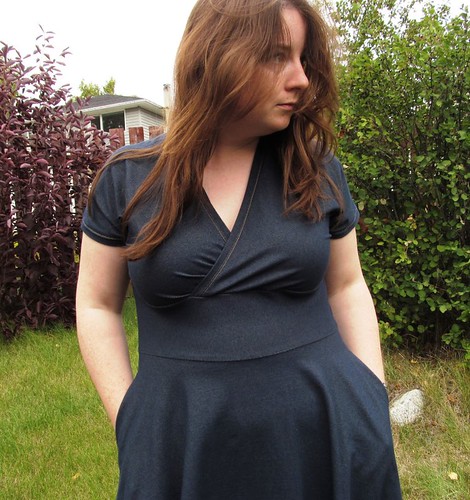
Alterations: Sigh. Because I cut this out so long ago, I don't entirely remember. I do know that my first bodice attempt was way too small, so I recut with a larger size. I also had this almost all sewn together when I picked this up again last month, so other than needing to resew the underbust seam to bring the bodice wraps a bit closer together, I don't remember any other alterations. I do know that next time I make up this pattern, I'll probably try cutting out the front bodice in size 35D, since the shoulder seams pull toward the back and there's some extra fabric above my bust. Well, I'll try a toile of it, anyways. I'm pretty happy with the fit as it is anyways, so we'll see if it improves it at all.
I did make a mistake in the construction though. I understitched the pockets in the back skirt piece, but I completely forgot to on the front skirt piece. Who knew that there were 4 pocket pieces?! This causes the pockets to gape and stick out a little bit on the front skirt, but it really doesn't bother me.
I'm pretty chuffed about all the gold topstitching I did. Because it was denim-looking, I embraced the jean look by sticking topstitching wherever I could! I did a lot on the bodice piece, at the centre back and shoulder seams, around the sleeve hems, at the faux-wrap edges, and a double stitch hem around the skirt. I really wanted to add more, especially around the under-bust and waist seams, but I thought this might be too much, and also make me more self-conscious. That second one strikes me as being stupid, but sometimes you need to let your insecurities win sometimes when it means feeling so comfortable in a dress that makes you look and feel good!
![]() |
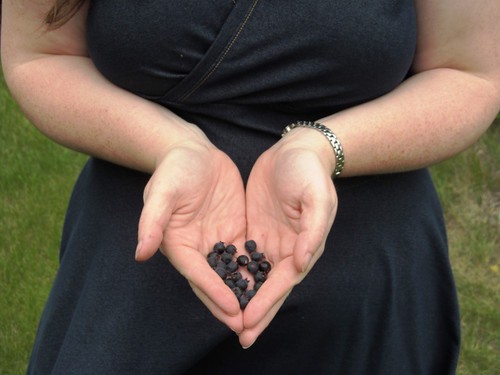
| Need to harvest these berries this weekend! Winter is on it's way, here in Yukon. |
![]() |
| Mmm...saskatoon tiramisu anyone? |
Now if you'll excuse me, I have some saskatoons to go pick. Yes, in my Tiramisu! Now where did I put that ladder...
Subscribe to:
Posts (Atom)