

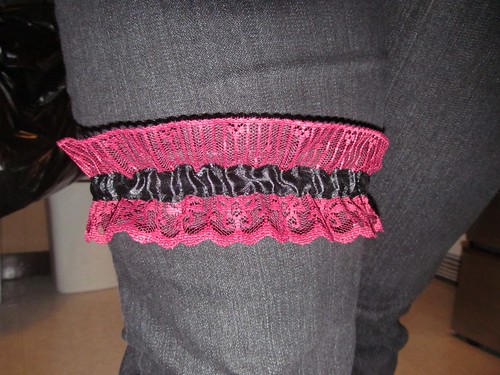
For reasons mentioned here, I had the fun opportunity to sew up a garter! And it was so much easier than I expected. Still, some people were surprised when I said I'd made it myself, so I thought I'd throw together a very quick and dirty tutorial on how to sew one.
Please forgive the powerpoint pictures. IF IT'S GOOD ENOUGH FOR MY M.Sc. THESIS*, IT'S GOOD ENOUGH FOR THIS BLOG. I ain't no fancy photoshopper or photo editor!
Anywho, here's what you need:
- 1/4 inch elastic - length needed to snugly fit around your thigh (where you want the garter) stretched out tight.
- ~3/4 m wide lace - mine was ~2.5 inches wide.
- ~3/4 m ribbon - mine was 5/8 inch wide.
- Matching thread.
 |
| Legend for my upcoming awesome Powerpoint figures |
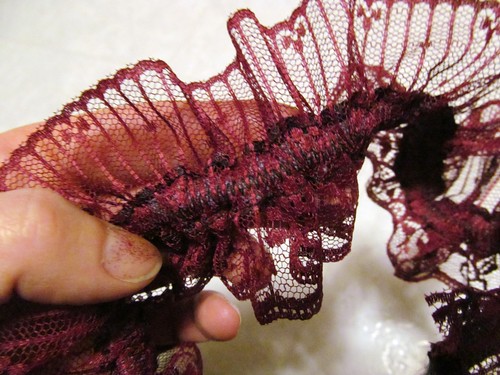
STEP 1: Attaching Elastic to the Lace
 |
| Look at that sweet elastic and lace drawing! Stretch that elastic as much as possible as you sew. Don't worry if you have excess lace. |
I found it easiest to control the lace and elastic if I held both ends as it passes through the machine. Make sure to backstitch at the beginning and end to solidify the stitch!
STEP 2: Sewing on the Ribbon

Most normal people would probably pin this. I eyeballed it. What can I say, I'm lazy.
With the elastic and lace part stretched as far as possible, sew along one side of the ribbon through the lace using a straight stitch, catching just outside the elastic if possible. (Don't worry if you sew through the elastic, just make sure it's stretched out.) Sew to the end of the elastic, and backstitch.
Repeat on the other side of the ribbon. The set up for these two rows are fiddly, but it gets easier once you start sewing.
STEP 3: Snip and Seam


Snip your threads, trim your seam (if needed), and you're done! Easy peasy. Wear your gorgeous hot little garter with pride and proudly flaunt that you made it yourself. Brace yourself with demands to make everyone else one.

* I'm serious, I created most of my M.Sc. thesis figures and diagrams in Powerpoint. It's a point of pride for me.
No comments:
Post a Comment