 It's done!! And I love approximately 90% of it. More on that later. I managed to get the lining sewn in, the hem stitched together, and the back of the buttonholes finished last night, mostly because of my goal to finish up this jacket for Friday Night Sew-In. All I had to do this morning was sew on the buttons and take a bunch of pictures. I met a friend for coffee this afternoon, and she complimented my jacket without me saying a word about it! \o/ More importantly, I love wearing it, so I call this a success.
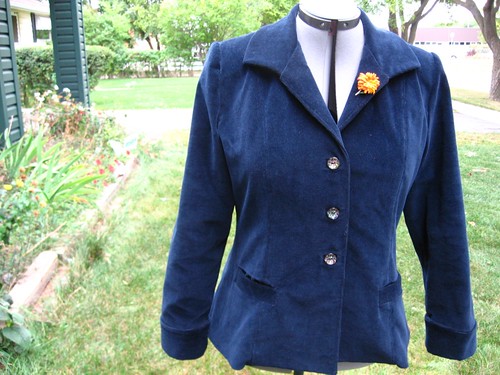
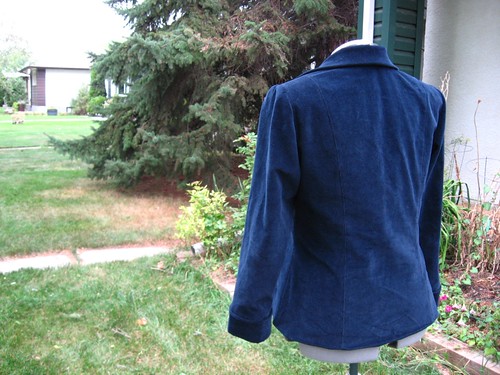 Mabe and I went out to the front lawn and took a load of pictures. One cyclist nearly ran into a parked car because he was staring at us and not paying attention. I'll bet he was jealous of my pretty new fall jacket!
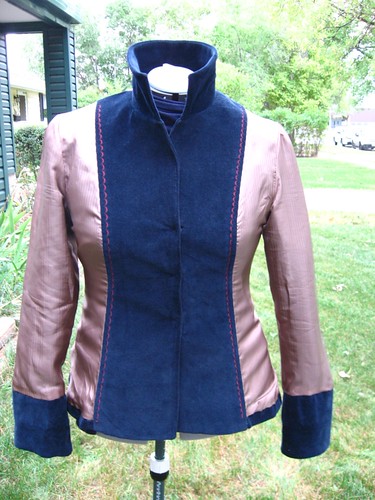 The lining mostly behaved, and the only real problem is that I forgot to tack it to the shell before stitching the opening where I flipped the jacket right-side-out. Ooops. It's holding together pretty good so far, so I may leave it. If it gives me trouble, I'll tack it along some seam lines from the outside.
 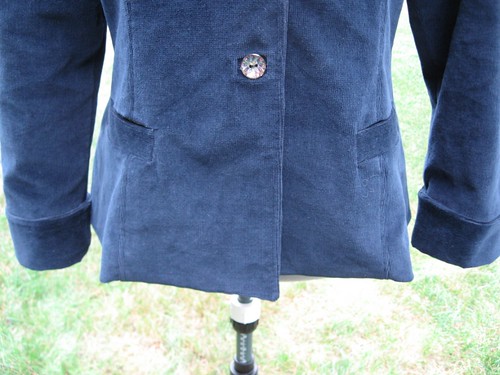 The thing I'm most disappointed about is the hem. It's the reason I don't 110% love the results. I completely forgot to stabilized the hem, and because the length-wise direction is the direction of stretch, it's a very flimsy hem that's apt to stretch. You can see how it kinks right where the body of the jacket joins the faced front. The stiffness and heft of the facing is just too much for the lighter hem. It bothers me, to the point where I'm considering re-doing the hem. It'll be a giant pain in the rear, but I'll be happier with it. I might live with it for a bit, but look at what's happening in the back anyways:
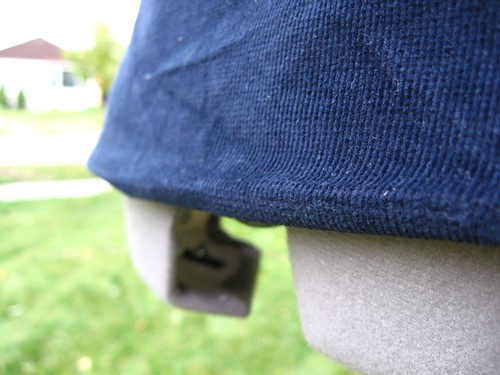 The hem is dropping. You can see the pressed edge, and where it's drooping a bit. :( I originally ran a line of topstitching along the hem, but really didn't like the look and tore them out. So I'll probably use some hem fuser to help hold this hem up. Maybe that would be enough to stiffen the hem, too. Any suggestions?
Speaking of the hem, here's a note for those baffled by the hem instructions:
I had some trouble figuring out what the instructions meant for attaching the lining to the jacket along the hem. They way they explained it and showed in the instructions, it looked like the lining would line up with the bottom of the jacket, but then the next figure showed the shell fabric folded inside. I finally figured out that you're supposed to shift the lining fabric down to meet the shell fabric and stitch. However, this only works if you remember to chop 1 inch off of the bottom of the lining pieces, and only stitch to the circle mark where the lining attaches to the facing. The instructions mention the former, but only in passing, and I nearly forgot to do it myself. Also, I had to do some fancy hand-stitching where the facing meets the hem after I flipped everything right-side-out, because I forgot to stop stitching at the circle, and had to cut the lining out. Also, make sure you listen to the instructions when it suggests hand-basting about 1 1/2 inches from the bottom of the shell. This will be your folding line for the hem, and it's so much easier to do the hem with the markings.
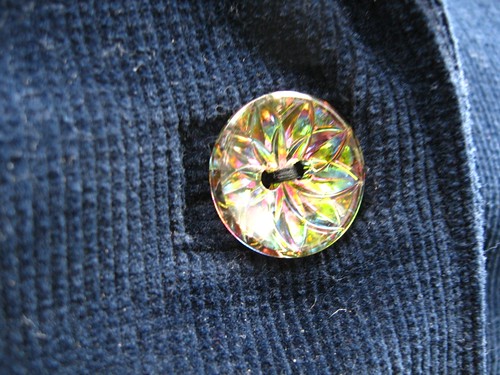 I really liked the bound buttonholes, and my pretty crystal-bowl buttons!
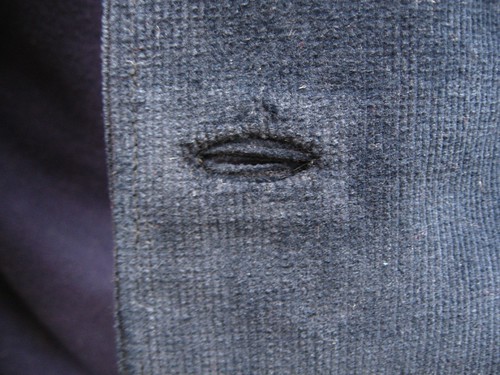 Here's the back of the buttonholes. I followed one of the methods in RD-CGtS, which included cutting a slit the same length of the buttonhole, then gently tucking in the raw edges and hand-stitching the edges down. It was really simple.
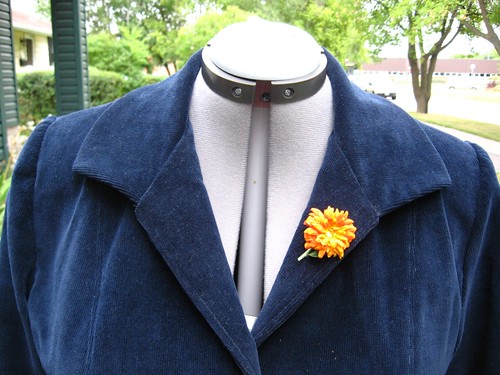 Still love the collar! Obviously I need to pin fresh flowers to the lapel all the time. It's going to be hard to steal pretty flowers from peoples gardens once winter comes, though. :(
It's a fun jacket, and I loved wearing it already. It's pretty warm too! I was worried about the liner fabric, but it seems to hold body heat in well and keeps the wind from blowing straight through it. I need to line more things.
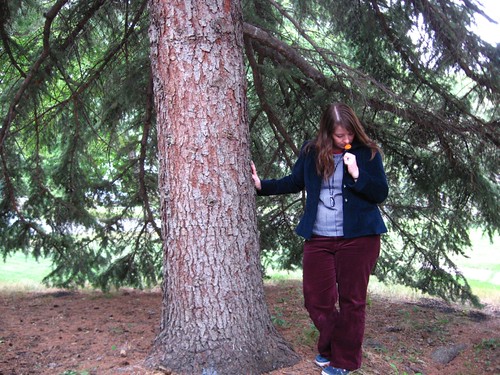
Anywho, me an my self-timered camera had some fun outside after we abandoned poor Mabe on the front lawn. No, I didn't leave her naked, I gave her my cardigan so she wouldn't be sitting out there in only my spare red bra. Here's a bunch of fun shots.




Your jacket looks nice and I love the idea of a biker almost crashing as he gawks away- hahaha
ReplyDeleteThis turend out fantastically! Great job on those bound buttonholes!! :]
ReplyDeleteI love that colour blue that you used for the jacket. To prevent that droop in the hem... you might try hand sewing it with some invisible stitches.
ReplyDeleteLove the jacket! Love the buttons! I even love what it looks like inside out! But if that's the way you had it on when the cyclist went by I can see why he was staring :)
ReplyDeleteWhat a great job on your jacket! I took a tailoring class in college YEARS ago. I really admire what you are able to do. And fun pictures! ;-)
ReplyDeleteI love the buttons & am super impressed by your jacket making skills! I would love to be able to make something that complicated. Great FNSI finish!!
ReplyDeleteYour jacket turned out GREAT!
ReplyDeleteI made a jacket once where I had to undo the lining to add interfacing to the hem. It was a pain but I was much happier with it after it was done.
It looks perfect to me, and what a great fit. Now I want to run in my room and start working on my blue cord jacket again. Super job!
ReplyDeleteTurned out great! A corduroy jacket is so timeless.
ReplyDeleteIt turned out so nice! And you're making me glad I already have a corduroy jacket in the FESA list, because otherwise I'd have to add one now.
ReplyDeleteI think you can be 100% pleased with this one. The lining finish is superb and the little details like bound buttonholes and pockets clinch the deal.
ReplyDeleteI popped over from your link the pattern giveaway at mollysews and I really like your jacket. well done! and the lining is lovely, even if it did give you fits! :) The whole thing looks great.
ReplyDeleteNice posting. These tips are really tremendous to sale our home. I think it would be effective for all.Thank you for sharing with us. keep it up.
ReplyDeleteCorduroy Jackets