Showing posts with label pants. Show all posts

Monday, January 27, 2014

Pants: V2.2 - Nearly There!

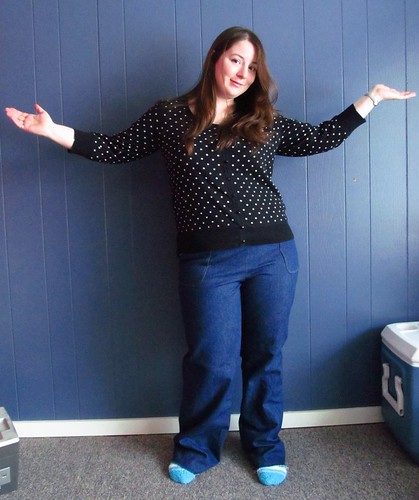
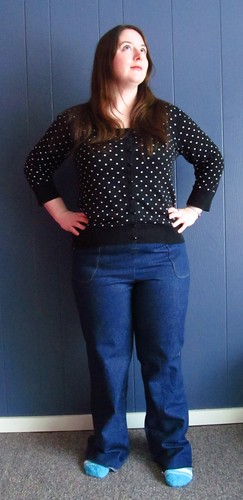
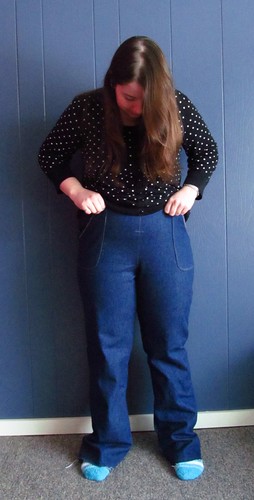
Alright, I'm not going to babble much a lot apparently.  Or at least, I'll try not to.  I think I've gone about as far as I'm going to with these pants for now.  I am so sick of looking at my butt in photos.  There's no waistband attached yet, but I was just trying to get the pattern into useable shape.  My next step is to trim down seam allowances, rip these apart and trace off the pattern, then resew them.

But not today.  Oh goodness, not today.

NOTE: I did a bunch more alterations on the left leg (on right side above) to narrow up the pants from WHY SO DAMN WIDE to wearable.  Instead of trying to duplicate this on the other leg, I'm just going to deal with it when I recut these, and try to remember which leg to trace off for the pattern.

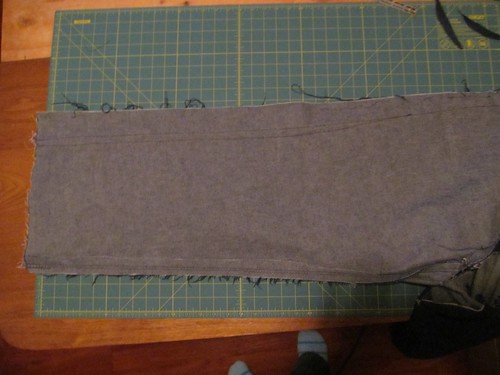
Sorry for the crummy photo - the inner-most seamlines are the real ones.
Considering that I took off a total of 3 inches of width (which, might I remind you, is doubled, so actually 6 inches of width cripes), it shouldn't be hard to figure that one out.  But this is me, so...

Snipped off bit of fabric shows you just how much I lowered and scooped out the crotch seam. Don't know if it made any amount of different, other than adding more greys to my hair.  WHATEVER CROTCH CURVE I'LL DEAL WITH YOU MORE LATER.
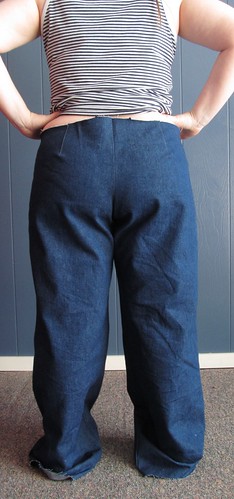
I spent all day yesterday, futzing with the blasted crotch curve.  SO TIRED OF LOOKING AT WRINKLY BUMS OMG.  I gave up.

Here's my bum. Be glad this is the only one I'm posting.  You're welcome.
It fits about the same as my RTW - which isn't great, but I'm tired of bums that aren't my boyfriend's.  I suspect half the problem here is that I've *ahem* put on a bit of weight since last April, and they're a bit...tight.  I'm going to add about 1/8th inch to the seam allowance when I resew these, just to take them from obscenely tight to (hopefully) snug.  And I think I need to slap some patch pockets on those cheeks, because wow that's a lot of denimed bum.

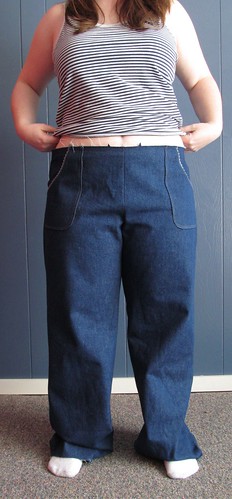
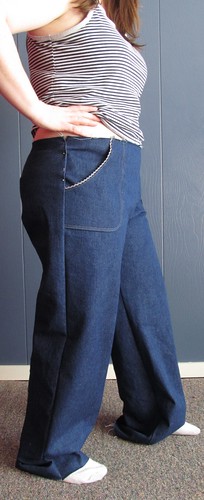
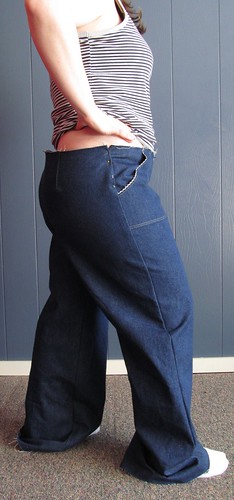
Front is looking wrinkly, but this mostly because there's no waist band and oh dear god are they tight across the hips.  I like them tight though.  So obviously I'll need to hike them up with a good waistband.  That little wite line in the second photo shows where I want the bottom of the 2.25 inch waistband to go.  Thereabouts, anyways.  And yeah wow, need to take out that side seam at the hips a bit.

Anyways, I've babbled way too much about these.  Here is where they stand.  Will do more tweaks when I resew this.  Tomorrow though, I'm going to tell you about that sweater I'm wearing!

Friday, July 26, 2013

I Changed a Zip and I Liked it (kinda)

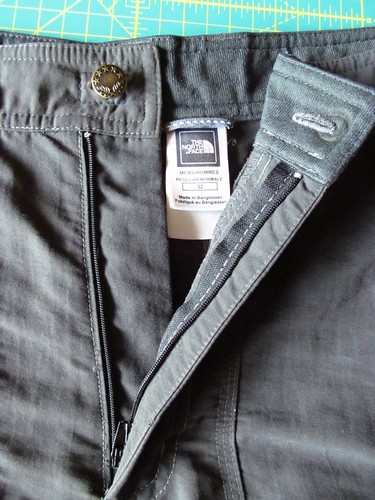
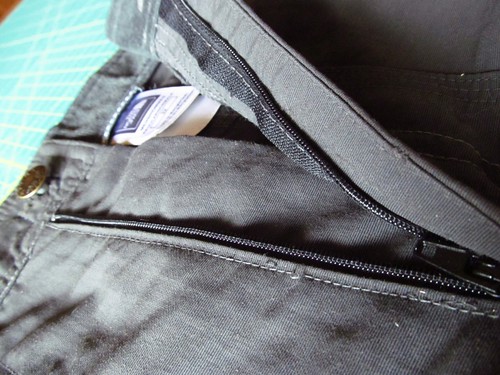
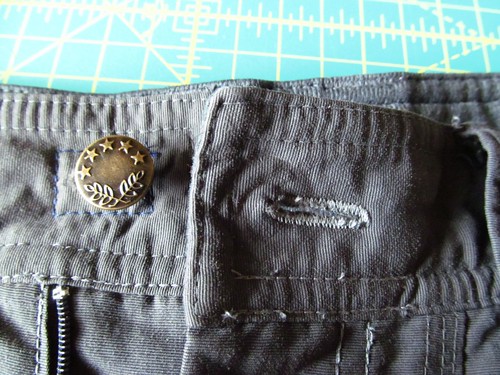
I must really like my boyfriend, because he mentioned a couple days ago that the snap and zipper were broken on his good pair of hiking pants, and I voluntarily said I'd fix them.  Not only that, but I did it all last night!  The last guy who asked me to fix his shorts had to wait nearly a year for me to sew on a button.


I'm particularly proud of myself because I've never even inserted a front fly zip before!  Thank you Google and Threads, I couldn't have done it without you!  It's not the best job in the world, and I'll probably go back and whip-stitch the edge of that zipper down, but it lays flat on him and he's happy about it since he got his good hiking pants back.

I also replaced the snaps with a tab button and buttonhole.  I had to redo both of those twice before I was happy with it (I crushed the first tab button and misalligned the buttonhole), and it's pretty ugly.  Definitely should've used grey thread to stitch down the twill tape on the back for reinforcement, but again, he doesn't care.  Plus this was before I realized the zipper was broken and finally stopped being lazy and switched thread.

So yay, sewing!  Even if it is alterations.  Except now he's going to be on my case to patch repair that other pair of pants he gave me months ago...

*~*~*~*~*

I feel like I need to keep apologizing for my absence here lately, but I'm going to stop doing that.  I'm a casual blogger, not a professional, and I'm going to give myself some slack.  Unfortunately, I've had a really crappy month, which has involved getting laid off from that job that I loved (stupid low metal prices) and my Grandma suddenly passing away and needing to spend a ton in flights to get home and support my Mom in final arrangements (it was, to be fair, a pretty loud, fun, and musical funeral - as my Grandma requested.  The fiddlers playing her into the ground was a great touch).  I'm not looking for sympathy and I'd rather people just not focus on it - I'm trying to stay mentally positive, but I'm either going to be just as sporatic or you'll suddenly be flooded with all sorts of posts on my distraction crafting this month.  Either way, I refuse to make myself feel any worse than I have been lately, and I hope you lot will cut yourself some slack too when you're having a rough time of it. 

*raises beer, cheers you all to slacking*

Wednesday, April 3, 2013

Pants: V2.1 - Getting Better!

First of all, thank you so much to those of you who gave me fitting advice on my last post (including Lena who emailed me some advice and Suzy who sent me awkward fitting pictures)!  I was seriously floundering, and you all prooved how talented, skilled, and generous this community is.  THANK YOU!

I haven't quite followed all of their smart advice yet, but I wanted to show my progress before I disappear for 2 weeks for my next work rotation.

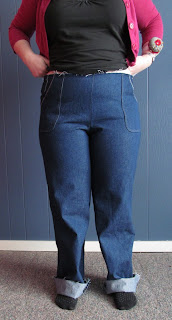
All I've done is drastically taken in the outer side seams - up to 2 inches in places.  I still need to take in the inner seam, but that'll have to wait until my next time out.  I will also, at some point, be lowering the front a bit (by hacking a bit off the top this time, but I'll alter my pattern for that later).  The raw seam allowance is sitting about as high as I want the waistband to be.  But they're already starting to look like wearable pants!

I just noticed how low the left side is. I think it's just drooped from running back and forth to the camera because it was fine earlier.
Well, from the front anyways.  The back needs a lot of work still, particularly lowering the back crotch seam.  I've also added two more darts to the back to reduce gaping.  Got some butt nipples going on there, but I'll fix that later.


There's still lots of fabric around the knees, but I think taking in the inner seam will help with that.  I also suspect I'll have to take it in a bit more from the outer side seam, but I want to resolve the back crotch issues before I do that, just to see what it messes with when I do.  Pants are complicated and messy.

Everything is just basted together, except one inside seam and the pockets.  Once all of my alterations are made, I'll mark up the right seamlines and trim down the seam allowance, rip it apart, alter my pattern, then sew it all together properly (and hope it goes together properly again).

Sadly, I now have to leave these be while I go back to work tomorrow.  :(  I wish I had a couple more days to work on these, but it's better to leave it alone and not try to rush the alterations. 

I guess.

You guys have a good and productive time sewing!  See you in a couple weeks.  :)

Tuesday, April 2, 2013

Pants: V2.0 - BLEGH


Sigh.

Okay, let's focus on the good points.  I spent some time playing with those patch pockets.  On my next pair, I'll definitely make them wider since the pattern includes a one-size-fits-all piece that just moves further and further from the centre seam, but I don't think it's too bad here.

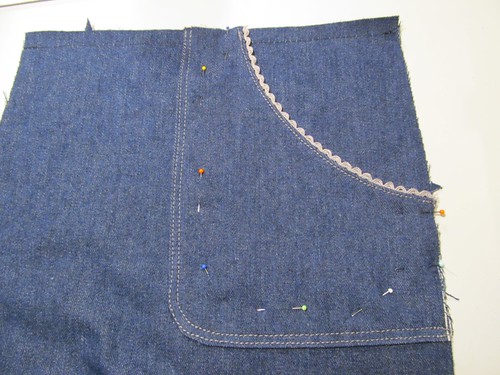
I lined the pockets in some quilting cotton you may recognize from here and here, and trimmed them in some lace I found at a new-to-me Awesome Dollar Store in town.  Which, incidentally, has a better stocked sewing section than our only local (crappy) fabric shop.  OH RIGHT POSITIVITY.  I CAN DO THAT.


I'm pretty proud of the topstitching here!

In regards to the pants themselves, it's not too bad, just obscenely big.  As I mentioned before, I graded up a size 16 pattern to size 20, which should've fit according to my measurements.  In fact, this size "fits" slightly smaller than me, but I figured it was close enough and I only wanted 2 inches ease in the hips instead of the built in 3 inches.  I've made these before, and they certainly didn't turn out this huge.

Although to be fair, I'm pretty sure I should've cut a size 18 instead of 16 back then.

Anyways, I'm just going to toss up all of the fitting photos I just took.  Then I'm going to go dig through all of my pants fitting books and see what they suggest.  The only thing I know for sure is that I definitely need to add two more darts to the back.  Any suggestions by you folk would be mucho appreciated.


ETA: I guess I should add some context here.  This is Simplicity 2367, and I definitely don't want a wide legged trouser.  I'd like it more fitted, closer to what it looks like when I literally pinch out 3-4 inches of fabric from the side seams.  Believe it or not, but these leg pieces are 2-3 inches narrower than my previously considered Simplicity 2562 pattern.  As in, each leg piece is 2-3 inches narrower. So glad I didn't go with that one.  I'm not sure if the leg width will be best resolved by just taking in the sides or if I should take in the inside seam too.  Or just for the back pieces?  I'm really not sure.

Like I said, any advice would be appreciated.  HELP ME PLEASE!!!

Sunday, March 31, 2013

Pants Project: Pattern Tracing Adventure


You guys have heard me whine on and on about my fear of pants.  WELL NO MORE!  I am doing this.

I was planning on making Simplicity 2562 Amazing Fit because I’ve heard good things about it, and it’s been on my radar since Patti made a pair ages ago.  But once I started to trace it out, I realized that really wide-legged trousers are just not something I’d get any use out of in my wardrobe.  So I dug around a bit in my pattern stash, and came across Simplicity 2367.   I originally made these in a size 16 back in 2010 for the PR WardrobeContest.  They were my very first completed pair of pants.  And they were a disaster.  Still, I think most of it had to do with the thin stretchy cotton poplin I’d used, along with a desperate need for crotch length lengthening.
 
Despite how bad the first pair turned out, I really did like the details and style of the pants, and even knew back then that my failure wasn’t the fault of the pattern.  So I pulled it out and started to play with it.

The first problem I encountered was that pattern tracing is something I’ve only recently embraced, and back then I cut a size 16.  Based on my measurements, I’d need a size 20. *facepalm*  Luckily (or so I thought at first), the pattern also includes separate pieces for the shorts included in the set.  I thought ‘hey that’s great!  I’ll just trace the shorts pattern, then use the original pants to extend the legs’; simple!  Too simple.

Pants pattern over shorts, inside seam lined up. Just a little bit different.
Turns out that the shorts pattern is designed to be much looser in order to attach bands at the bottom and create a bloomer effect.  Adorable in shorts, but too much fabric for the look I want in pants.  Back to the drawing board.  Or in this case, back to the original size 16 pattern.
All of you out there who have ever graded up a pattern are probably laughing at me, since it’s actually pretty easy to do.  I knew I needed to go up 2 sizes, and luckily the pattern itself goes up to size 22.  This made it really simple, since I just slid the pattern around on my tracing plastic the amounts needed based on the drawing lines on the shorts pattern (they were useful after all!) and traced.  Easy peasy. 

Also easy was retracing the contoured waistband.  I was concerned at first since these curve differently depending on the size.  Again though, I was lucky because the pattern includes another waistband piece for the skirt also included in the set that has different markings, but the same contour.  :D  Seriously, I couldn’t have found a more convenient pattern to grade up. Thanks for that, Simplicity!

Simplicity 2367 (my chosen pattern) over the Amazing Fit pattern, back centre seams aligned. Hmm.
And here's my favourite pair of non-stretch jeans (also my only pair, because most women clothing stores suck) lined up over the Amazing Fit crotch line - perfect!
Now, back in 2010, I identified one of the problems with my pants was the crotch curve.  Actually, all of the lovely people at Pattern Review identified the problem was with the crotch curve (thanks ladies!).  I wasn’t sure how to handle this, until I spied the Amazing Fit pattern pieces, still draped on my ironing board.  I put them under my tracing plastic, wiggled it around a bit until it lined up relatively well, and then retraced the crotch curve.  There wasn’t much difference in the back, although the curve was a bit higher (we’ll see how that goes – at least it can be removed if needed), but boy was the back curve different!  It makes sense.  If you (dare to) look at the back of my first pair, the fabric pulls tight under the butt and causes major wrinkles; the area obviously needs more length along the crotch curve.  After tracing the new crotch curves, I just graded them over to meet up with the original pants leg line approximately 6 inches or so below the crotch. 

I haven’t tried cutting these out yet, never mind sewing them, but I thought I’d share my progress here so far.  Last week, I promised you more posts, so here’s one of them!  :D
Anywho, wish me luck on these.  I’m tentatively hopeful (so much so that I’m going directly to my planned fabric), but more luck is always good!

Happy Sewing!
Friday, December 30, 2011

OMG I'm Trying Pants (Again)

I know I've been really quiet as of late, both on my blog and on others. Between work being insane and the holidays, I haven't really been up to much on the sewing side of life.

But I'm dedicating tonight to sewing, and I can't tell you how excited I am about this! So of course I had to share.

I'm working on...wait for it...a pair of pants! My first pair since this disaster. No, it's not the trouser pattern I've been sitting on forever to make (mostly because it's the wrong size and also sort of complicated), but a simpler straight-legged version from New Look 6082.

I know I know, you're all saying "But Heather, last time you learned that the crotch-curve sucks on New Look patterns, especially if you have a huge butt", but whatever, I'm trying it out anyways. It's Stacie's fault for making her lovely clovers, and since I am obviously jealous of her straight-leg pants and want a pair of my own to fit into my knee-high boots (and don't actually own the clover pattern), I'm trying these.

Don't worry, I'm making (hopefully wearable) muslins, and have my copy of Pants for Real People sitting beside me as I snip and cut.

This is one of the first coordinate pattern sets where I actually love almost everything on it. I adore that cardigan jacket (the short version, the long looks too much like a lab coat to me), and am tickled that it's a woven! Might have to (for once) make multiple garments from this one.

Do any of you actually make multiple different garments from a coordinate pattern set?

And in lieu of anything productive to share besides some rambling, here's my slowly growing cross-stitch project. (Some photo editing since I suck at taking pictures, and then suck at editing. But the colours look more true this way, even if it is blinding.)

Tuesday, January 11, 2011

Book: Pants for Real People

Look what arrived in the mail for me today! Thank you, Step-Sis and Boyfriend for the Chapters gift cards!

I've pretty much wanted this book since the disaster that was my first pair of pants.

This book is pretty amazing. It spells out all the alterations you could possibly need in an easy to understand manner, with tonnes of clear and helpful drawings.

They even go through multiple pants fittings on non-"standard" body types. What I really like is that they teach you to alter commercial patterns, rather than drafting your own. While drafting is well and good, there are so many great patterns already out there that would be lovely to sew, if you could do the correct alterations. This book teaches you that.

The authors have included so many useful tips and tricks throughout the book, and it's written from a knowledgeable but humorous angle.

Haha, whoops. Looks like I found one of the many errors I made when altering my pants. Silly side seams.

They even have a chapter on Pants for Men, in which they not only show you how to alter the initial pattern, but also on altering ready-to-wear pants. And yes, they have a chapter on that for women as well!

Just looking over this book for a couple hours this morning has proven that this is going to be a very useful book when I'm ready to tackle pants again. Without even using the advice in this book yet, I'd recommend it to anyone, beginner or otherwise, who needs to alter pants patterns. Which is probably everyone, in one way or another!

It'll definitely been a great addition to my sewing library, and go well with my copy of Fit for Real People. My wonderful Grandma sent me that one after laughing at me over the phone as I ranted about my fitting woes. Isn't she great!

Now all I need is a copy of Jackets for Real People, and I'll be set!

Happy sewing (and fitting) all!
Related Posts Plugin for WordPress, Blogger...