
Quilting.
I swore, swore that I was never going to quilt again after making my Mom's scrabble quilt a year and a half ago. Then I won that cute quilt top kit, and all of a sudden, I'm hooked!
 I started it when I was at my Mom's and itching to do something creative, figuring I'd get a few triangle squares put together. But Lo! I got them ALL made up. And then I got all of the horizontal strips sewn together. Haven't gotten much further on it since returning to the city, but I'm itching to do more.
I think I've caught some sort of quilters rash. Is there a cream to help with this?
Anyways, I was pretty proud of myself for figuring out how to make the triangle squares. I didn't have access to either the internet or my Quilting Grandmother, but a little thought went a long way, and I wound up using the internet approved method after all!
 I simply marked a diagonal line from corner to corner on the light blue fabric with a
  Then I simply stitched 1/4 inch away from this line on both sides of the mark. I don't have any of those fancy quilters tools, so I just used the edge of my zig-zag foot. (Apt, using a zig zag foot for my Zig-Zag Quilt - maybe I should incorporate some zig-zag stitches to it as well!)
 Then all you need to do is cut along the line, and voila! Two completed triangle squares!
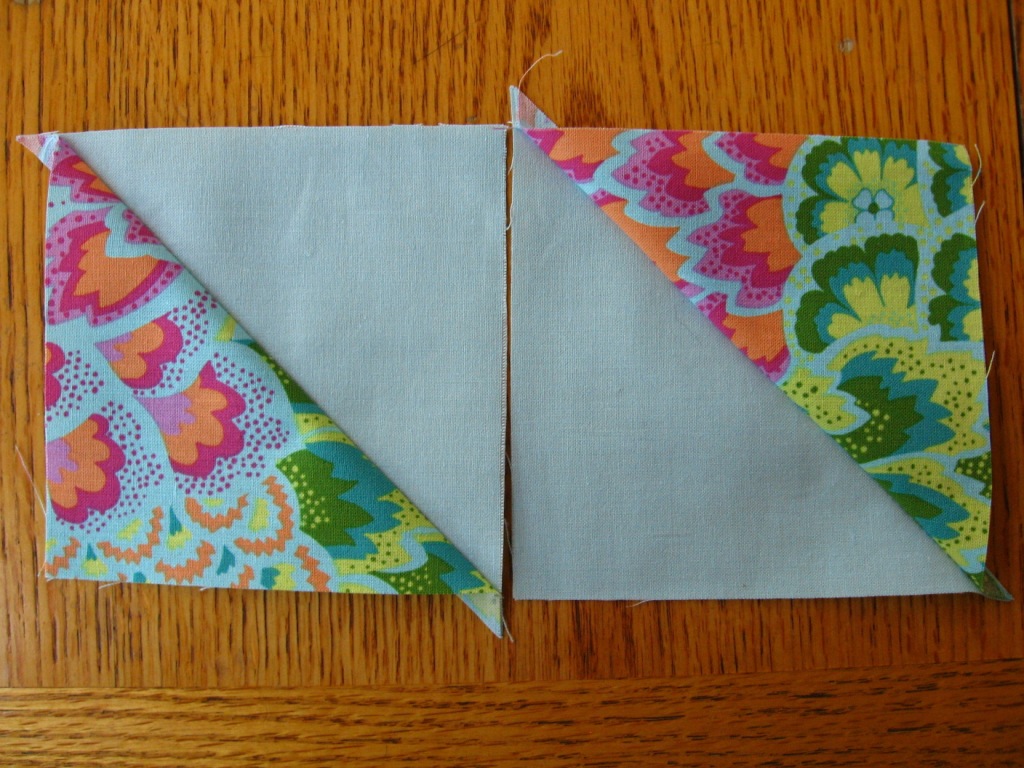
 Just make sure that you put right sides together, NOT wrong sides. Whoops!
Once I got the triangle squares together, I had a great time playing with different designs. Here's a few of the ones I tried, as shown in some quick figures I made in Powerpoint. (BTW, it was ridiculously easy to make these in the program, once you get your square design made. Keep that in mind!)
Option 1: Keeping all like fabrics together in a zig-zag. I liked the idea of it because I love all the fabrics in the kit, and this was a great way to show them off. But I wasn't a huge fan of it in practice, since some of the more directional prints looked off.

Option 2: I mixed up the fabrics in this version, which I liked much better. Actually, this design was a bit of a whoops. I was trying to make the bigger, 3 square deep zig-zags, but messed up the sides. While it was a neat effect, the centre peaks looked too much like arrows, and I wasn't a fan of the affect.

Option 3: What I was trying to do in option 2. I seriously considered this one, because I felt that the larger zig-zags really showcased the fabric well. But in the end, I simply liked the final option best.

Option 4 (and obviously my choice): I really did like the small zig-zags from option 1, but with the mixed up pattern. But instead of zig-zagging across the shorter width of the quilt, I decided to make them go across the long edge of the quilt. It worked out really well with 4 zig-zag rows.
 3 of the horizonal rows are missing, being stitched up and draped over a chair. But you can see the affect.
As it turns out, this is exactly how Nikol made her version of the quilt. Hehehe, whoops! Oh well, we'll have twin quilts!
At least now I know where I was exposed to quilter's rash. I like the zig zags a lot. I can't wait to see it done.
ReplyDeleteYay! I was SPEEDING through reader and this made me come to a screeching halt! I recognize that!
ReplyDeleteYay! My crazy plan to get people hooked on quilting is working!! Bwaahaha! Very nice job - Can't wait to see the finished piece which should be in about an hour or so..... right??? :0)
ReplyDeleteNikol, the quilting rash is apparently very contagious! Sadly, I've put it aside for now, until my local fabric store has a sale on cotton quilt fill stuff. That stuff is expensive! But I can't wait to get back to it. :)
ReplyDelete